GRAIN FREE "BEAUTY WAFFLE" RECIPE || FOOD+LIFESTYLE PHOTOGRAPHER NICOLE LEE || GLUTEN FREE RECIPE


gluten free waffle recipe

Hi friends,  

How we doing out there? It’s been pretty go! go! go! this summer. We are so close to moving back into our home. Officially we move back in this Friday July 14th. We are feeling slightly bittersweet about it all. The “storms” have calmed down, and the “series of unfortunate events” have been put to rest. Mold gone, plumbing fixed throughout the house, tree that was causing leaky roof, gone ( my apologies mother nature) roof fixed…let me think.. Walls fixed.. Now the house is safe. Amen. Ha. Ryan and I have been cleaning like mad, painting, so the house will be move in ready. There are a few odds + ends I’ll still be sharing on Insta stories ( so stay tuned!) Nothing but clear skies ahead for us with our home. Excited to get back into the kitchen ( well my own kitchen and test some new recipes!)

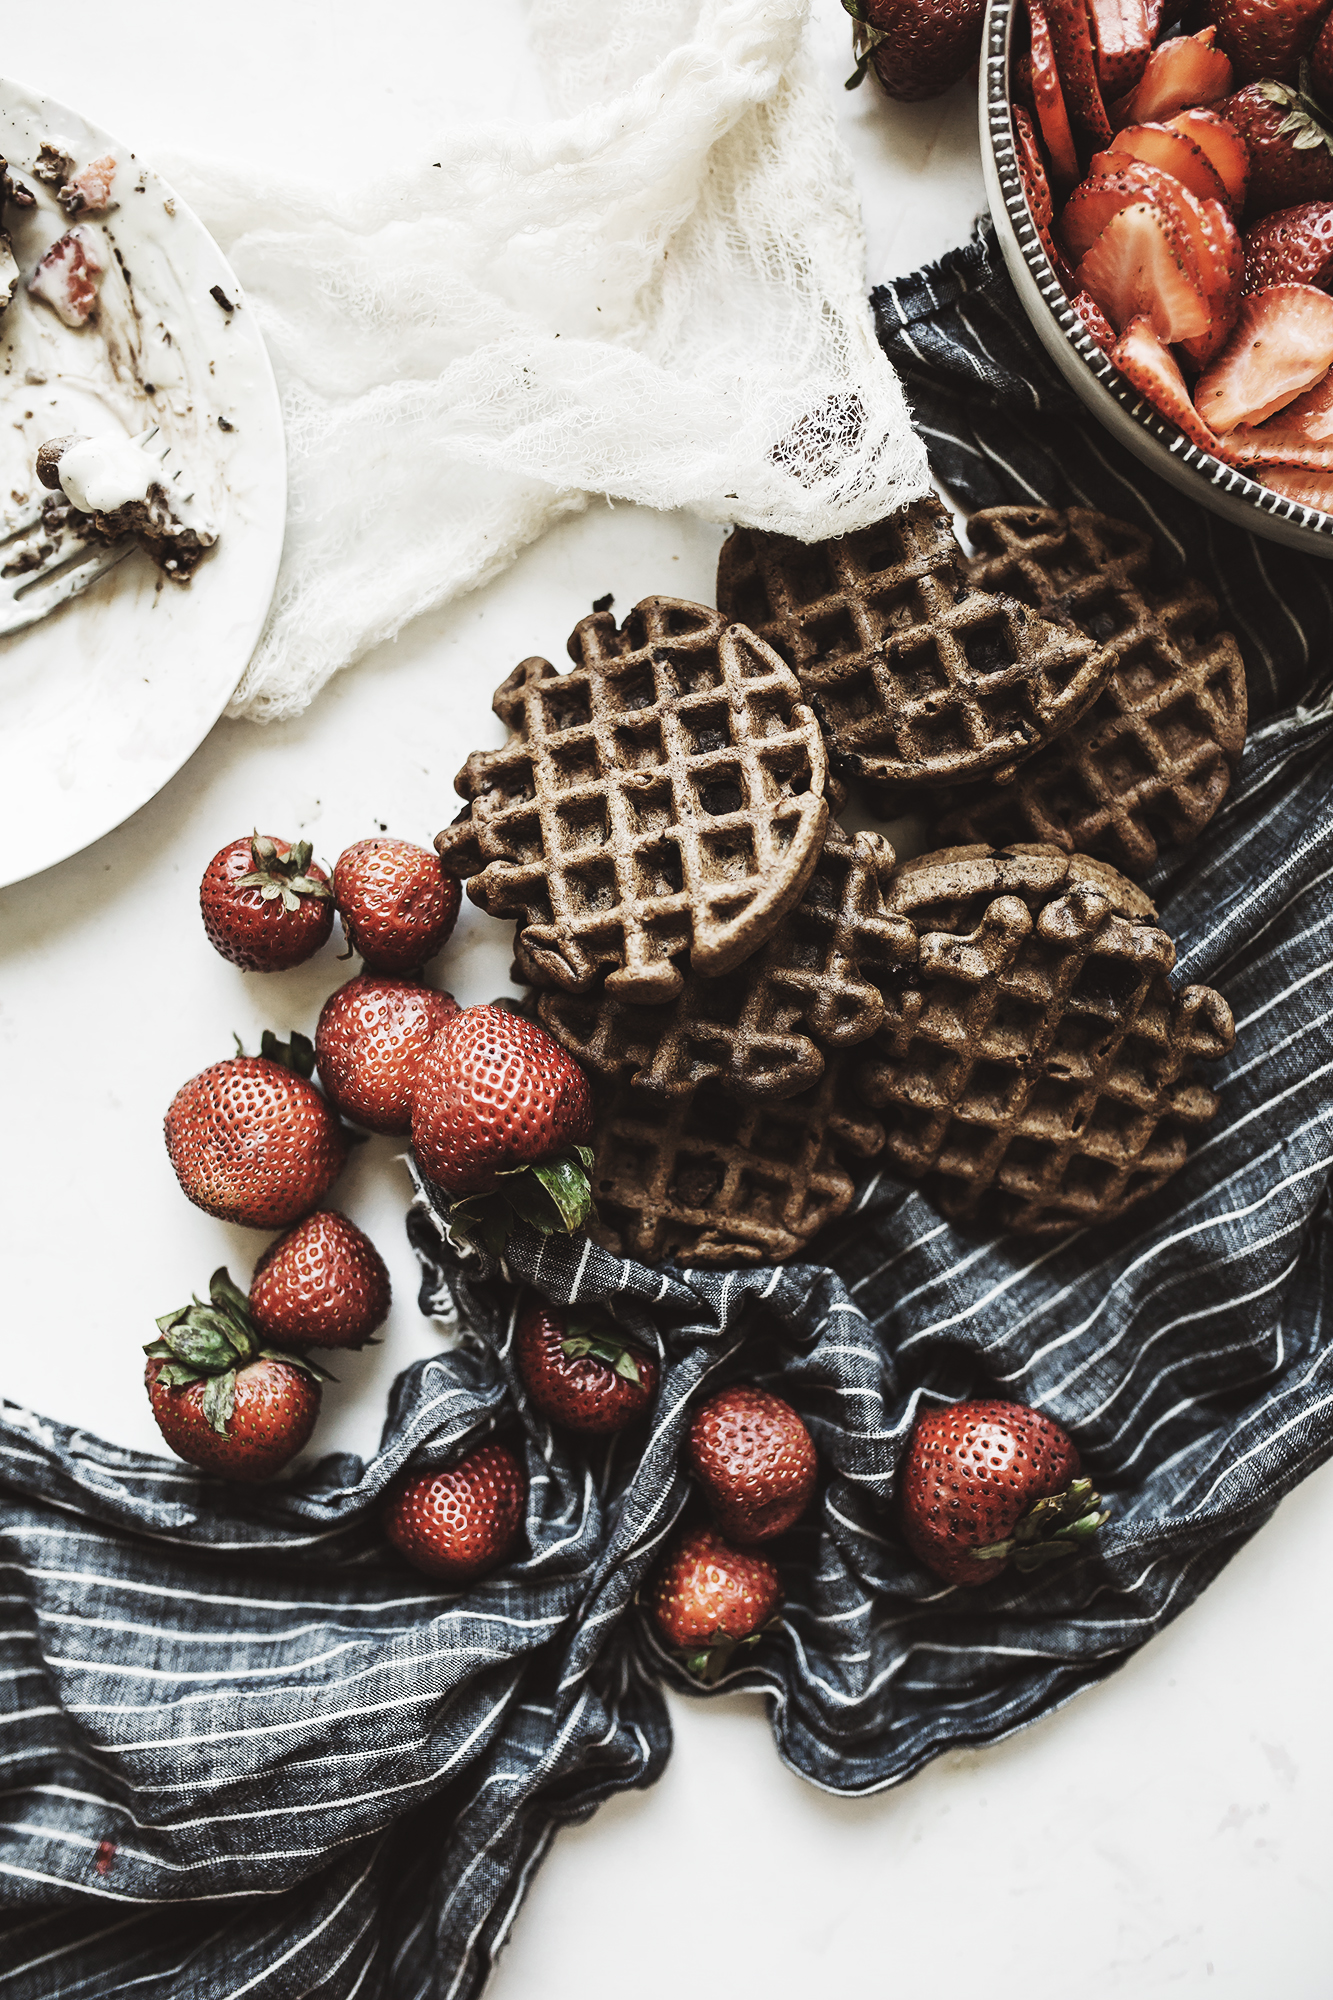
To celebrate our move in, I've been cooking up some waffles. I have been recipe testing like mad these past few weeks with this grain free chocolate beauty waffle concoction. It sure has been giving me a run for my money! “Beauty waffle”? These waffles are filled with all sorts of good stuff, we’ve got, raw cocoa(rich in magnesium), dark chocolate, xylitol sweetener ( no sugar spike + crash), egg yolks (amazing for skin!), Maca ( libido boosting), and flaxseed meal (aids digestion). All mixed together you have heaven, oh and don’t forget the whipped topping! If you are into things tasting good, and knowing the ingredients going into the food you make are full of added bonus give these waffles a try.

-Happy cooking!

Nicole 


waffle ingredients

gf chocolate waffle recipe

Recipe :
Grain Free Chocolate Chip beauty waffles

Ingredients:

Wet ingredients:
3 pasture raised egg yolks plus+ 1 full egg
2 tablespoons filtered water as needed or almond milk
1 tspn vanilla extract or unsweetened vanilla powder

Dry Ingredients:
½ cup cassava flour
¼ cup unbleached almond meal
1 tablespoon High quality Extra Virgin Olive Oil
1 tablespoon MCT oil ( I love bulletproof brand)
1 teaspoon organic cinnamon
½ tspn baking soda
1 tspn baking powder (aluminum free)
1 tablespoon organic raw cocoa (if desired)
2 tablespoons organic ground flaxseed meal ( trader joe’s brand is awesome)
1 tablespoon raw Maca powder ( moon juice brand is my favorite)
1 bag of stevia sweetened chocolate chips or 1 dark chocolate bar (roughly chopped)
1 tablespoon of swerve ( sugar alternative)
1 tablespoon of xylitol

Tools needed: large mixing bowl, measuring cups, wooden spoon, small or large waffle iron, plate or cooling rack.

Directions:
TIP: It’s always helpful to measure your ingredients ahead ( I don’t always do this, but it helps to at least have them all out)

In a small bowl Separate the egg yolks from eggs. Add in the one whole egg. Set aside. Grab your large mixing bowl and add in all the wet ingredients. Lightly whisk the mixture for about 30 seconds. Add in your dry ingredients (except the chocolate chips), starting with the sugars, then add in all the rest doesn’t matter the order. Mix it all up with your wooden spoon. If it looks dry, add in 1 tspn at a time of almond milk ( or water). Add in your chips. ( to your desire, I like a lot!)
Plug in your waffle iron, use the directions on your machine( believe me they are all different)
Start making waffles! Poor a bit of waffle mix into the maker, when the little light goes off you know they are done, but sometimes they may need an extra min. This is where your own judgment comes in. You can also poke them in the middle, and if they bounce back they are done. Note: you can make a few “tester” one and set a timer. This is always helpful.
Place on plate or cooling rack with a piece of paper towel or parchment paper over the top to keep warm.
Chop fresh berries for topping
Enjoy! Add your favorite whipped cream, maple syrup, or nut butter with bacon.

“Whipped topping”:
(Makes 11 oz )

Ingredients :
3 pasture raised egg yolks
2 cans full fat organic coconut cream (refrigerated overnight)
2 tablespoons xylitol
1 teaspoon of organic vanilla extract or unsweetened vanilla powder
1 organic whole vanilla bean
1 -tablespoons of moon juice loose probiotics ( another form of loose probiotics should work)
Vitamix high powered blender

Directions:
1.Place the blender top in the freezer for about 15-20 min. Or until cold enough there is a layer of fog around the blender top.
2.In a bowl open and separate coconut milk fat from the water. (This should be natural as you have put it in the refrigerator). Disregard the water and use for another project!
3. Slice open your vanilla bean, in half with a sharp knife, scrape out the beans and place with your coconut fat.
4. When your blender top is good and cold, take all the ingredients and place in the blender. On the cold setting blend your heart out ( about 15-35 seconds). Check the consistency and if it’s thick ( not too thick) transfer to airtight container and back in the fridge while you make your waffles. (You can also use this cream to have for a late night treat with berries or other goodies. )


Gluten free chocolate waffle recipe

grain free waffle recipe

SAY HELLO! 


Source: www.heydear.co/blog

LETTING GO || PART 2 || FACING YOUR FEARS|| PHOTOGRAPHER NICOLE LEE


“Letting go”, it sounds easy right? I cling tightly to shields, put on armor; masks even, to protect myself, fearful to let too many people get close. Why would I do that? Well, it’s too scary to let people in.

For some odd 25 years I’ve been doing this, granted I’m only 29. I’ve lived a lot of lives, and seen a lot of things. This past weekend I had a session with my therapists and they said this, you have the survival gene, most people wouldn’t have survived what you went through as a child and young adult. The tools you used, the methods you fought with, worked and got you here. But now its time to choose to put the armor down, and stop taking everyone one out. The battle is over. Take a step back and look around where you are, you aren’t there anymore in the chaos, you are here present day in 2017. So I let that sink right in. Deep. That’s it? That’s how you let go? I think it is.                                                                                                                                                      

Over the past few weeks I’d been asking myself, how do I let go? I want to so desperately to really do it. Let go, be my best self, always. I mean that is what I am striving for. I was having a hard time connecting my brain to the actions. I was doing the actions, but my brain couldn’t make sense of it all. See, I want to have the weight lifted off my shoulders, and breathe easy. I want to stop waiting for the floor to sink out from under me. Hearing my therapist say what they did in the session, I had a light bulb moment. It’s this time where I aloud myself permission to finally surrender the flag, and start living life. In that moment, right there.

Now what? Is it as easy as saying yes I get it and erasing everything that happened in the 25 years of my life? Maybe…. See, once you know the core of your crap, where it came from, what it is, what tools you use (good or bad). You can finally start saying (to yourself) stop it. I don’t need to use that tool, it isn’t necessary, and I’m safe. What I’m talking about is, those moments where you find yourself in an anxiety-ridden tizzy, instead of running in circles around it, you face it, check it out, and you explore it. When you face it, you will know what to do with it. Sounds “kooky”, but it works.

The way I look at it is this, I have two choices, I can use the armor to fend off the Calvary, take the sward and finish them all off. – Or I can retrain myself, learn new tools, stop, and be the person who I already know how to be, kind, loving, caring. Option one works, but will be the harder road. With option two, although it seems scary as hell to put down the armor, it feels freeing to let the walls down and walk a new unknown path.

Thanks for listening friends, below are some IPHONE Self Portraits I took, and editing on my phone using the vscocam app. 

Cheers,  - Nicole 


LEARNING TO LET GO || PERSONAL | ANXIETY | FACING FEARS, PHOTOGRAPHER NICOLE LEE


Hello Friends, 

Its been awhile. 

Over the past few months I hit a low. My Anxiety hit an all time high. I justified my anxiety because of the unpredictable events, house having mold, (or falling apart as Ryan would say) having to be flexible about the whole thing, being defeated by my children’s school, and the social behaviors they were dealing with, (Actually, still are dealing with) and then Work…

How did I juggle it? I dropped all the balls. There was no certainty in my little world, everything was swirling around me and I stood and watched while all the clouds came rolling in. I didn’t know which way was out, which way let the floods came in, or even how to be safe. Or keep everyone else safe.


0348 BW FLORALS 4.jpg


So I froze. And then froze some more. Instead of coming up with sensible solutions, I internalized everything, and outwardly put on a persona that was FINE by society standards. My goal was just to get through the day to day. To practice being easy going about the whole thing until I really believed it. But there were a few times I was like, when is the next crap thing going to happen? 

 When the clouds finally subsided, I thought I got this. I have been dealing with anxiety since age 6 and honestly I’ve been through much harder crap. Certainty is what I really longed for. In an uncertain situation I made matters worse, then I remembered my therapists saying, you will never have certainty. The world can’t give you that. REALLY?? At first I thought NO. HELL NO. My heart said, there has to be another way. The only way to get certainty is to make your own. Why not channel my inner survival mode instincts? Use them for good, not to fuel my anxiety. Maybe this is the best idea I’ve had in a long time…. Its time to get back on the horse stop looking left or right and plow straight ahead. 

Letting go “game plan”. The plan includes the things I am in control of; ME+ MY actions…

1.  Let go. - Life is unpredictable. Letting go isn’t easy, but when you do it feels so freeing.

2.  Truly be easy going. (No matter what) - As “cheesy” as it sounds, it’s an opportunity to learn when unexpected life events happen. Showing your kids you can stay calm when shit hits the fan is a true gift. Best part, they become easy going people too.                                                        

3.  Health (mental and physical) - Talking to therapist is always a good idea.  Exercising has done wonders for my mental health, subsides anxiety, and makes you feel SEXY!                                

4. Parenting - Committing to teaching my children to socially interact, defeat bullies, to make the world a better place, and WIN AT LIFE.                                                                                          

5. Home- Being Patient. Doing what we can in our time with our house AND BEING OKAY WITH THAT.                                                                                                                                          

6. Anxiety - FACE IT. DON’T RUN FROM IT. GET BACK ON THE HORSE. AND STAY ON, EVEN WHEN YOU HIT THE BUMPS.  ( AND, Damn those hurt!)

Thanks for listening folks; I’m excited to be back in the swing of things. And for this new uncertain chapter called LIFE. Leave a comment below, would love to hear from you!! 

Cheers,

Nicole


MOLD, And Moving forward || ARIZONA LIFESTYLE PHOTOGRAPHER NICOLE LEE || PERSONAL POST


Dear Friends, 

My apologies for my slight disappearance these last few months friends. I have found myself (and family) knee deep in black mold. First we found it in our bedroom bathroom, behind the toilet and inside the wall. So Ryan then removed it. Then we suspected it in the kitchen, so he demoed that too. Which he found more mold in the walls of the cabinets and sink. The island and storage next to the fridge is what is currently intact.

While this was being taken care of my very kind Aunt and Uncle let us stay with them. Since I am highly allergic, it’s not smart for me to be in the environment when removal is happening. In fact we ended up finding it because I had become a cesspool of sickness for months, and even though hidden behind walls I was still reacting from it. Finally once the mold was removed and air was clean again (about a week) we went back home.

A few days after returning home, we had some heavy rains here. I was doing some work on my computer and heard some noises. I investigated finding a leak in the dinning room ceiling. I noticed a water bubble in the wall and I just started nervously laughing, someone is “punking me”. Where is ASHTON? I know he will pop up here soon….

So we called the insurance again, it took about a week for them to come out. The adjuster came and inspected the leak. He Chatted with Ryan about how there is nothing he or the insurance could do; unfortunately this was just normal home wear and tear. But he suggested, because of the leak you should pull out the drywall and make sure there is no mold growth under there. That evening, I took the kids to dinner and Ryan ripped out the wall.

Guess what? We found the source… a large I mean, large amount of black mold right there in the ceiling. That night we stayed in a hotel. Now we needed to sort out how to make sure it was gone for good! This owning a home is serious business folks.


Plan of action (to defeat MOLD!):  

-Make sure we get the mold out, Clean (spray down with mold control, the area, and check the rest of the house for hidden spots)

-Get it dry, Tarp it off, put dehumidifier in the space, Keep the air cool

-Figure out how to function in house without kitchen

-Sort out health, do more research, breathe, breathe again

-Make sure to listen to my therapist; she said looks like another opportunity to practice being “easy going” listen to this advice

-Stay Calm

-Call contractors

-Call roofing companies

-Call tree removal services

- Breathe again

-Plan a home remodel

-Be excited about new kitchen, bedroom bathroom, dinning room, painting the house, (cutting down a tree that is causing your house to fall apart)

-Don’t feel guilty about cutting down a tree that is making your house fall apart

-Embrace Change

- Act like you are camping

- Cook outside, Cook food on induction burners, use crockpot, and get creative

- Wash dishes in the bathroom (no judgments please!)

- Get kids to pitch in

- Use survival instincts

- Push through until its finished

- Be easy going with the timeline of projects (contractors are busy)

- Remember this can be fun!

-Embrace the uncertainty

In some odd way I am glad we found it. Even though my house is currently a construction zone, and it’s not nearly “perfect”. I can actually say I’m okay with it.

 Life didn’t give me lemons, but I’d say more like some blank canvas to start creating on. This is an opportunity instead of loss. It’s just a house, its just “stuff”.

Mold will not be the death of me. Challenge accepted.  

- Cheers Friends, Nicole

P.S. As we progress with the house I will slowly add updates, thanks for listening friends!

QUICK AND EASY VEGAN SNACK RECIPE // BLUEBERRIES + ALMOND MILK // FOOD PHOTOGRAPHER NICOLE LEE


Dear Friends, 

For today's recipe I bring you "easy peasy" as my 7 year old would say. Simple frozen blueberries and almond milk. This is made for one, but you may double, or triple or even add in extra's to make it your own. Then simply enjoy! 

What you will need :

1 bag of frozen organic blueberries

1 bowl, spoon and hungry belly

1/2 cup (or more to your liking) Fresh Almond Milk 

Note : if you aren't vegan I would sub for 2% with a splash of raw cream, or even RAW MILK 

Then pour blueberries in a bowl, pour milk over blueberries and watch the magic happen. The milk freezes over the blueberries and now you "almost" have ice cream.

Cheers and enjoy!

 -Nicole 


Strawberry-Basil and Coconut Popsicle Recipe// Arizona food Photographer Nicole Lee


Hi! Lets start there. I wanted to take a moment and reintroduce myself. I’m Nicole. I am a photographer, home cook, Mother, jack  Jill of all trades kind of girl. Last year, I started pursuing photography full time, I had no idea “what” "where" or "how" I was going to get there. Becoming a Photographer that is. Looking back I was quite the hot mess, sometimes I still feel that way ha. But Over the last 6 months I have found some clarity in it all.

When you first start you have a hundred people chiming in your ear, which I am thankful for. They say words like branding, Marketing, Direction, Specialize, Who are you? What are you, how are you going to be successful? What do you charge? Can you do a headstand, then 100 jumping jacks, and snap a shot of me doing one to?

Then you have doe eyed me, blank faced and speechless…queue the crickets please…

I had no idea how to answer any of those questions. I just thought, well I have a camera, I like to take photographs, I like food, and I like people. It is that simple. (But it wasn’t) So many other creatives make it look so simple, truth is I wasted too much time focusing on how to ‘make it' I missed all the key steps to getting there. I just got in the way of myself! I’m sure you have been there.

Then Last April, I ended up taking the most amazing trip out to Seattle and attended the Survival Guide Workshop, by John Keatly. It saved me. I am not kidding around here folks.

He taught us how to market, do business, charge people properly, become a real sustaining brand, and he taught me how to take a risk, to start putting my feet on those stepping-stones. We also had killer food, and pop quizzes. It’s not your average workshop. Plus, I walked away connecting to some supportive friends, some game changers who being the new girl, and they didn’t stomp all over me, they embraced the underdog.

For the last year, I have been able to put myself out there, gain some confidence, say I’m the girl for you, (or not). I’m getting clear on who I am which; in fact you do need to know if you are a creative. What am I willing to say no and yes to, as well as be humble enough to do the odd jobs while I get my feet off the ground.

So where am I going with all this? Well I am saying, If you are struggling creative, don’t give up, figure out what you need to get better at and find someone, anyone, or you tube how to get from here to there. Second, I’m just so freaking excited that all the little steps are coming together.

Now go make some popsicles!!


Strawberry Coconut Popsicle Recipe


Makes 12 Popsicle molds

Ingredients:

4 cans full fat coconut milk (chilled in refrigerator)

2 lbs strawberries (fresh or frozen)

3 eggs

1-tablespoon vanilla paste

1 bunch fresh basil

2- 3 cups raw sugar

1 tsp. fresh squeezed lemon juice

2 trays of Popsicle Molds


Directions:


Clean and Cut the ends of the strawberries, set aside. Measure out the sugar, the vanilla. Open the cans of coconut milk and separate the fat. Measure the fat out to 2 cups. Set aside the coconut water from the cans. Prep the basil, cut off stems and gently chop up.

Put a large pot or Dutch oven over medium heat on the stove, place a small tsp. of olive oil, and cook the strawberries, sugar, and lemon juice together. You will want to stir frequently, until all the water comes out of the strawberries. (About 5-10 min) Add in the basil and vanilla paste. Cook for another 5 min.

You know it will be finished when the strawberries aren’t as tart, with a strainer take out the strawberry mixture from the pot, place in a blender and blend until smooth.

Set aside the left over liquid from the mixture.

Put the coconut milk into the pot, add in the strawberries, cook until everything is smooth and no lumps are shown.

Take the strawberry coconut mixture off the heat, stir in the 3 eggs, taste to see if needs more sugar, or strawberry, or even more coconut. You want a smooth creamy strawberry flavor to come through.

Once finished, add your mixture to your molds. Freeze for 6-12 hours depending on your freezer, and enjoy!!


Fancy Prosecco Cointreau Ice Cubes, Recipe


When I think of Champaign, Prosecco or Rose` I can't help but want to channel my inner Lady GoLightly. Aka Audrey Hepburn from Breakfast at Tiffany’s. Call it cliché’ call it typical, I don’t mind. Back in the day I used to watch that movie so many times. If I can be really honest, probably every other day! Fantasizing about how amazing her life would be to just have for a day. Live in New York City, wear fabulous clothes, be an actress.  You know what I mean right?

The thing is when I grew up I finally figured out what she did in the “Powder Room” with those men each evening. I’ll let your imagination run away on that one. Some how the charm of her glamorous lifestyle, of chic clothing, fancy parties and her tiny apartment seemed to take my breath away. (Although, Currently speaking it doesn’t look like it was all that fabulous after all.)

This shoot wasn’t fully inspired by Audrey, but after staring at my screen editing I couldn’t help but think of the movie. Of her, Of the Scenes of fancy parties with great music, and of Course Paul Darling. (Insert British accent from his mistress) How can we forget him?

I am sure she would have been smart enough to make fancy ice cubs for her drinks as well, or maybe she couldn’t afford an extra bottle of Prosecco to make them? Either way, I have a wonderfully easy way to spice up your Prosecco, or to keep your glass chilled. And while your making them, maybe channel your inner Audrey, you know she is in there! 


Prosecco Ice Cubes, with Fresh Blueberries and Cointreau, Recipe

Ingredients and Materials:

-2 rubber ice cube trays, (I find these are the easiest to use, the ice cubes pop out really easy)

-1 bottle of Prosecco (Lamarco is a great one!)

- 1 bottle of Cointreau, orange liquor

-1 bunch of fresh BlackBerries, or any that is in season

- A tea towel to wrap the Bottle of Prosecco with when opening

Directions:

First make sure to chill your Prosecco in the fridge for at least an hour, to speed up the process you can throw it in the freezer. Just don’t forget it, I have totally done that before and ended up with ice of course.

Take the tea towel and wrap it around the chilled Prosecco, pull the top off straight up away from your face. Go slow! Unless you are a pro and use a saber. Grab your ice trays; fill them with the Prosecco leaving room for the Cointreau and berries. Then add in a splash (about ½ tablespoon) of Cointreau in each ice cub spot, and fill to top. If desired add in berries to each cube.  Freeze for a good 6-12 hours. (Depending on your Freezer. This also works if you choose to leave the berries out.

When serving the Prosecco, add in one or two ice cubes to your glass and enjoy!


Cheers Friends! 

-Nicole