CHICKEN + LEEK SOUP WITH WHITE BEANS | RECIPE | BY NICOLE LEE

Hello internet world,

It's been a hot minute and I feel like I am finally coming up for air after being under the surface for so long. Oddly, my schedule and life has never been more "busy”. I’m learning to accept these things, because my kids are only getting bigger and their lives more full, so I guess that means mine is too. 

We Are just coming off a very mild case of Covid 19, we quarantined and have been making the most of the five of us packed into our little home for isolation once again. Each time I get some sort of sickness, I crave soups, and broth. Sometimes I even sip on them from morning until dinner, within a few days they've done their magic and I start to feel better. Another one of my go- to sickness tricks is licorice tea mixed with chamomile, and lots and lots of baths with tons of oils. 

This Leek soup is one of those great base soups, you simply can play around with it any way you desire. If you omit the beans, you can also add potatoes, or pasta, or meatballs instead of the chicken. Just be sure if you add any starches to cook on the side, and only add to your individual bowls, not the entire batch of soup. If you do you may end up with a big pot of mushy soup, or less broth as the starch will soak it all up. If you want to make this vegetarian or vegan, simply don't add the chicken, and use veggie broth instead. You could even add in a mushroom for a hearty flavor.  There are no limits here. Let me know if you make. :) I hope this soup fills your belly and warms your soul. 

Below is the recipe..

Happy cooking. enjoy. 

Nicole x

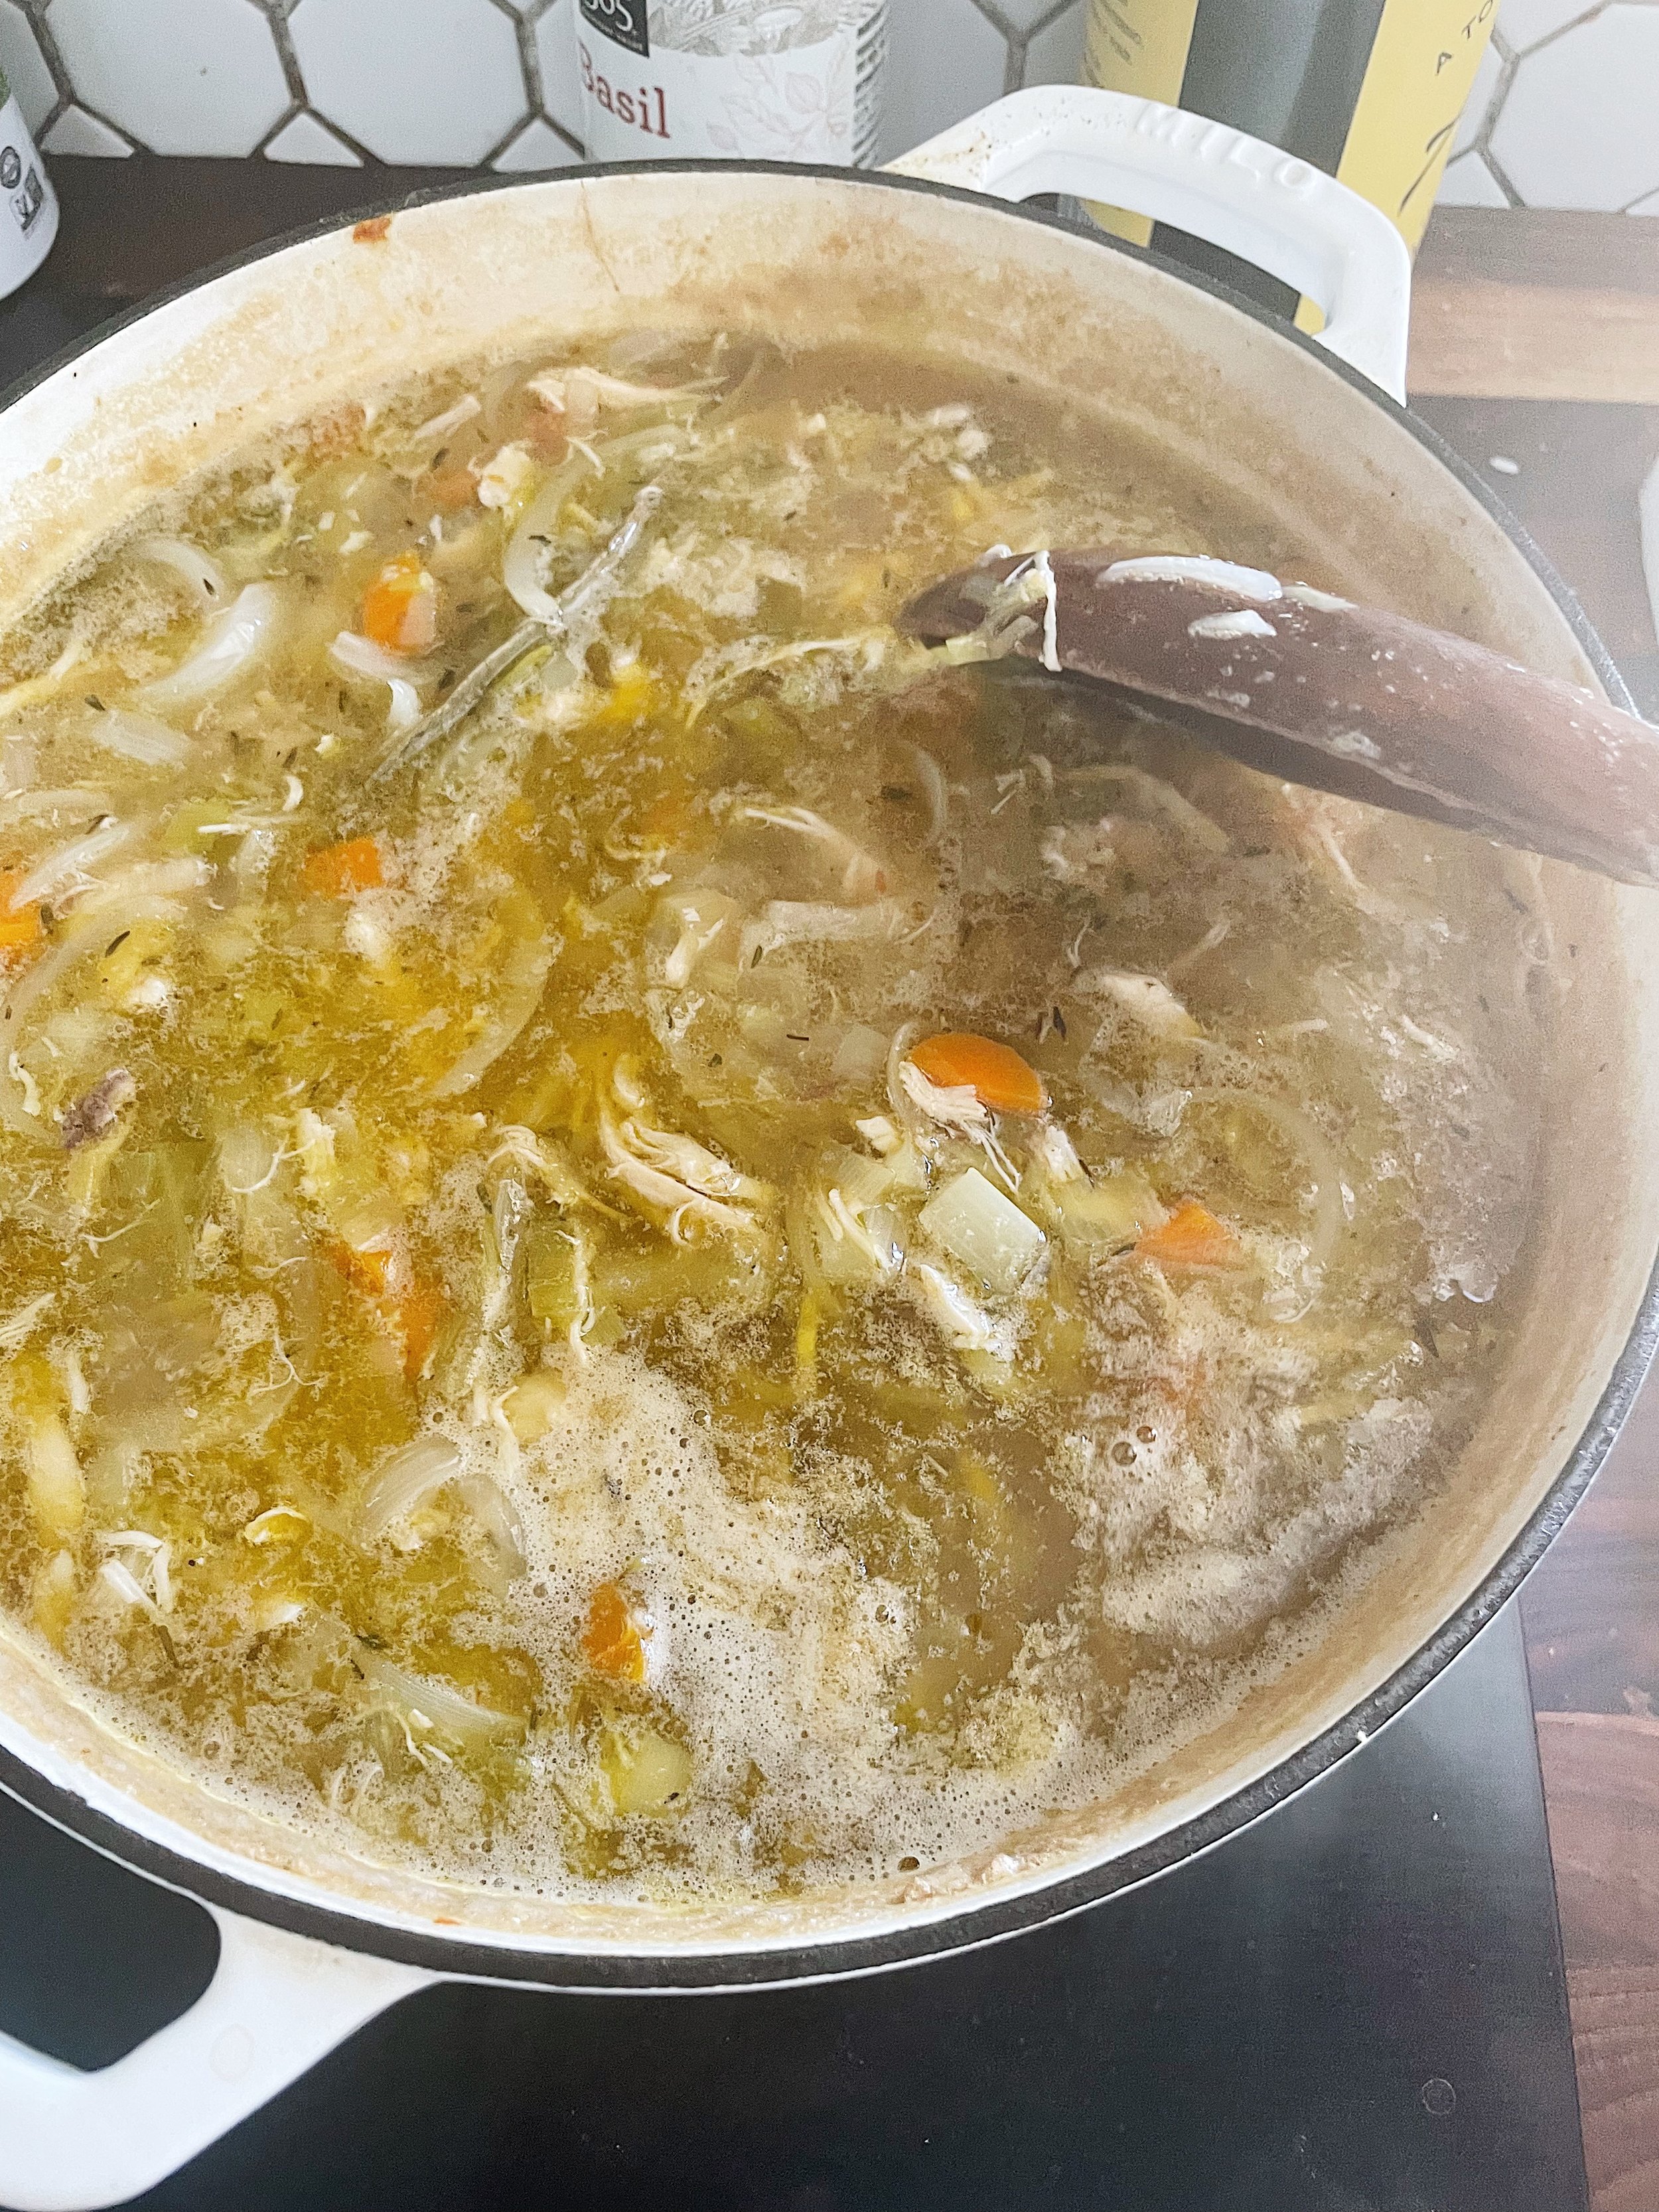
"Chicken, leek, and white bean soup"

Makes 1 Batch of Soup. serves 6-8

TIP : READ this recipe through before cooking
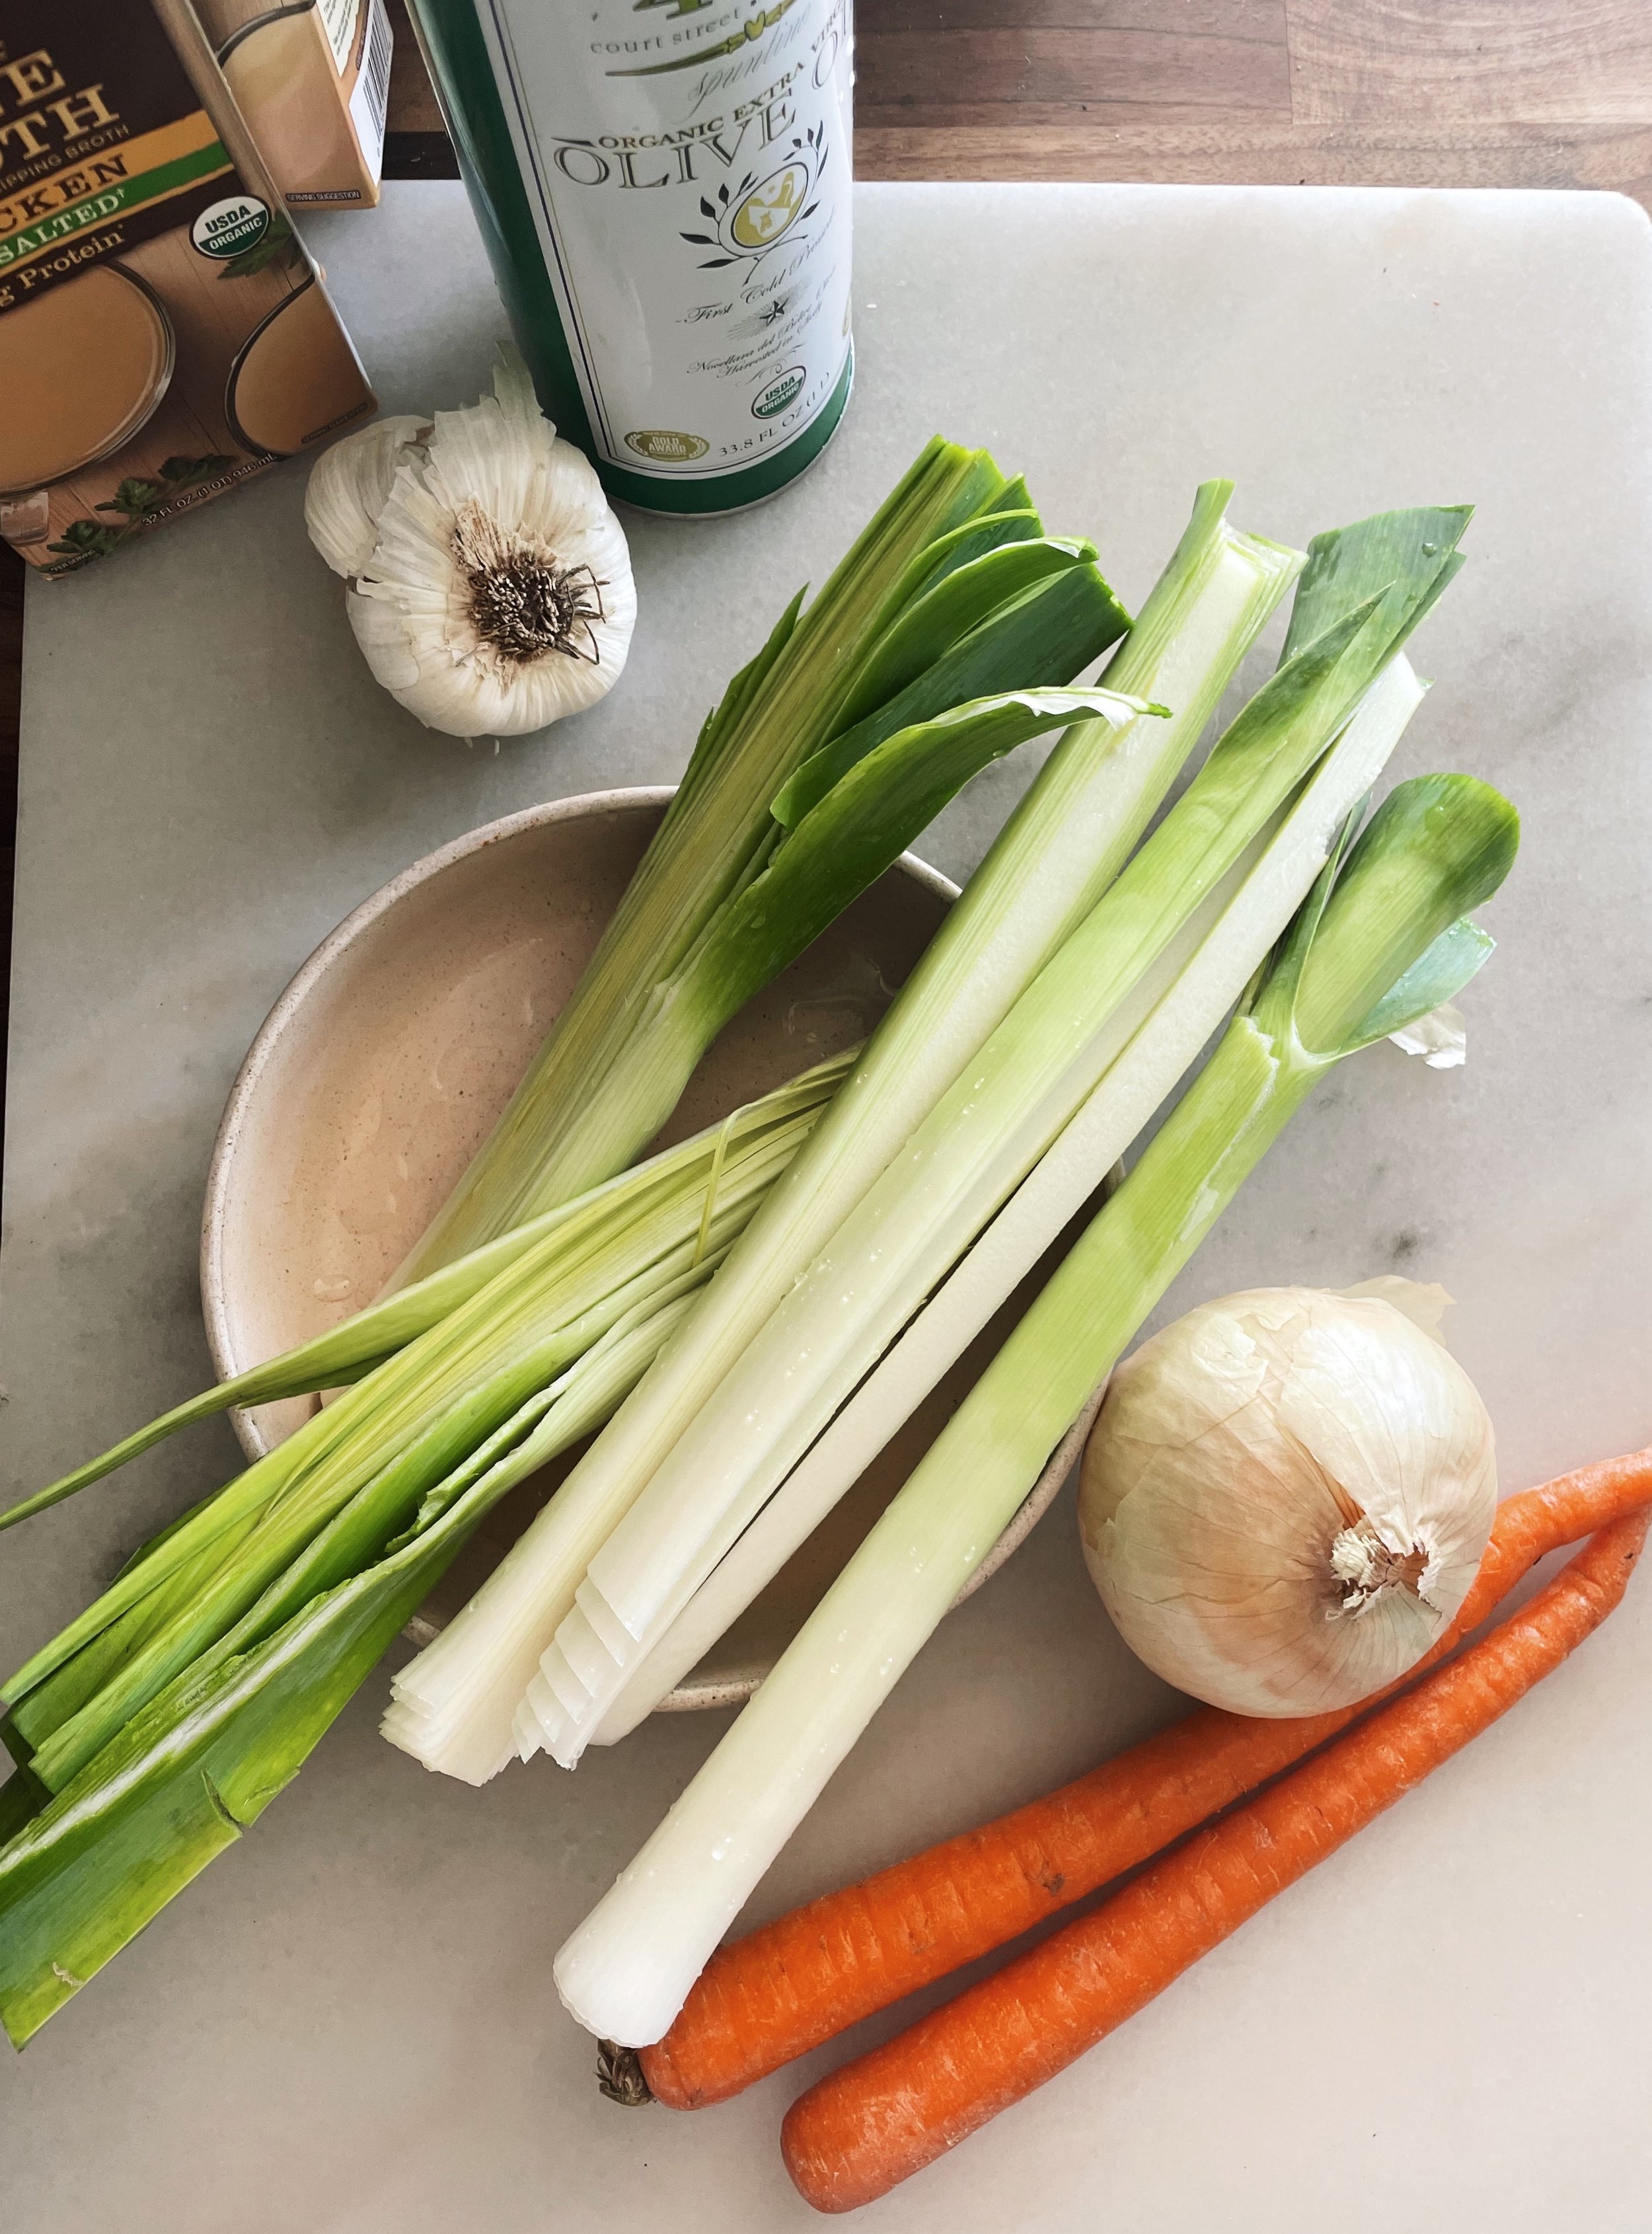
Ingredients:

  • 2 medium onions julienned
  • About 2 lbs or two large leeks cleaned, roughly chopped, stems and all
  • 2 celery roughly chopped
  • 2 carrots roughly chopped
  • 3 cloves garlic left whole, peeled
  • ½ thumb fresh ground ginger
  • 2 chicken breast skin off chopped into about ¼ cubed chunks
  • 2 cups dry white wine
  • 2 (16 oz )boxes of chicken stock, bone broth or even homemade chicken stock
  • 1 tin of your fav white beans rinsed ( I like cannellini or great northern beans)
  • EVOO as needed
  • few pats of Grass-fed salted butter as needed
  • salt and pepper to taste
  • crushed red pepper as needed
  • 1 dried bay leaf
  • 1 bunch parsley, for serving ( chop as much as desired and sprinkle in at the end or in your own bowl)

Directions:

  1. Put a large dutch oven, or heavy bottom stock pot on medium high heat. Add some EVOO + a good pat of butter, when it sizzles add the garlic cloves, Sautè until fragrant, then the veg, season with salt and pepper. Cook until the veg is clear and soft. TASTE, TASTE and TASTE. (this is to tell if you need to add more salt and pepper) I like to add a good pinch of crushed red pepper at this point , and the ginger, if I want it more spicy, omit if you don't want spicy.
  2. Add in the chicken, a splash of white wine, cook until the chicken is a bit golden. Turn up your heat to high, toss in your beans, the rest of the wine, chicken stock and bring to a soft boil. Add bay leaf, and lower the heat, put a lid on slightly askew and let simmer for 45min to an hour. I usually clean up my very messy kitchen from all the cooking. Enjoy as is, add a bit more salt and pepper as needed. Serve with fresh chopped parsley, crusty bread, and a salad.

Let me know if you make this, look forward to hearing from you. x


FOR THE PRINTABLE RECIPE CLICK BELOW:

FOR THE PRINTABLE VERSION OF THIS RECIPE CLICK THE LINK PRINTABLE RECIPE

SAVERY TOMATO GALETTE RECIPE | GLUTEN + DAIRY FREE | BY NICOLE LEE


Hi Friends,

This summer I’ve been obsessed with experimenting with baking in the kitchen. I’ve also been cooking my way through several cookbooks and having a blast doing it. Not to say there hasn’t been some mishaps but we won’t go into those today. 

Xo

Nicole


galette recipe gluten free tomato

SAVORY TOMATO GALETTE RECIPE | INSPIRED BY RECIPE IN BON APPETIT MAG

HOT TIPS: PIE DOUGH can be made up to 2 hours to 2 days ahead of this recipe. Make Recipe when you have some time, it's great for SUNDAY AFTERNOONS,OR WEEKENDS. If you're pressed for time buy pre-made pie dough. Because we aren’t all bakers and there is nothing wrong with buying PRE-MADE DOUGH.

PIE TART DOUGH INGREDIENTS:

2 cups gluten free brown rice flour
¼ cup potato starch
¼ cup tapioca starch
2 Tbsp coconut sugar
1 tsp kosher salt
1 cup vegan cashew butter (cold cut into cubes)
4 Tbsp unsweetened cold almond milk

PIE DOUGH ADAPTED FROM ARAN GOYOAGA

FILLING INGREDIENTS:

2lbs heirloom tomatoes sliced ¼” thick
3 garlic cloves, thinly sliced
1 bunch of fresh thyme
1 large egg beaten
Good quality extra virgin olive oil
5 oz mixture of finely grated hard cheese combo (Pecorino Romano, manchego, and sharp grass fed cheddar such as dubliner) or any hard cheese that sounds good!
½ lemon zest / 1 squeeze of fresh lemon juice
1 tsp salt
Bunch of fresh basil

OTHER INGREDIENTS: Parchment Paper Non-stick spray 1 large sheet pan

DIRECTIONS FOR PIE TART DOUGH: NOTE: PIE DOUGH MUST BE MADE 1 HOUR AHEAD

  1. Place your cold cashew butter into the freezer for a min while you measure out all of your dry ingredients.

  2. In a large bowl place your dry ingredients. In a seperate cup add a few ice cubes to the unsweetened almond milk to keep it cold.

  3. With your hands gently mix the cashew butter and dry ingredients together until grainy. Add your almond milk and mix together until dough forms. Gently knead together ensuring not to over work. If it feels wet, add 1 tsp of gf flour to the mix, if feels dry add 1 tbsp of more of cold milk.

  4. When the dough forms, pop some plastic wrap over it and refrigerate for min of 1 hour. NO Cheating here!

GALETTE DIRECTIONS:

  1. Preheat oven to 400 degrees f. In a bowl, place your salt and pick off about 1 tsp thyme. With your fingers take your 1 tsp salt and combine with thyme to make a paste. Then add garlic and mix with figures more. Add in your tomatoes and toss together. Let sit for 5 min, while the tomatoes release some liquid.
  2. Drain the tomatoes with strainer, and lay flat onto paper towel.
  3. Grab your dough, unwrap.
  4. Get a large sheet pan and spray with nonstick spray.
  5. Measure out parchment paper to fit your sheet pan, place on COUNTER (not on pan). Lightly dust with flour. Place another sheet of parchment paper over the dough and GENTLY roll out into a round shape. If it falls apart (stay calm) and gently sprinkle water or almond milk over the dough until it combines. It should be easy to roll out, but still be gentle.IT DOESN’T HAVE TO BE PERFECT. WONKY IS OKAY, THAT'S why they call it a galette!!
  6. When it looks even in shape place your finely grated cheese in the middle leaving 1 ½ inch of dough border.
  7. Add your tomatoes and garlic mixture over cheese. Bring the edges of the dough over the filling using your parchment paper to guide it over. NOTE: SINCE this is GLUTEN FREE you have to be EXTRA GENTLE, pretend you are handling a newborn baby!
  8. Crack your egg, and whisk with fork in bowl, blend in 1 tsp flaky salt. With a brush wash it over the edges of the dough (not tomatoes). Then POP in FREEZER for 5-10 min. (Basically depending on how patient you are!) After it’s done, take a bunch of fresh thyme and place in the middle of galette or on the edge of the baking sheet.
  9. Bake on bottom rack for 55-60 minutes until golden. Rotating 1 time.
  10. When finished, enjoy with a drizzle of olive oil, fresh basil and grated lemon zest!

ENJOY and HAPPY baking ANY QUESTIONS feel free to send me a message!


galette recipe

summer tomato recipes

gluten free savory galette recipe

STRAWBERRY RHUBARB CRUMBLE RECIPE || GLUTEN FREE + VEGAN | BY NICOLE LEE


Hi Friends,

When Rhubarb comes into season, I find myself terrified of it. I know dramatic right? I have this push pull relationship with it, I want to try it but I don’t... is it a fruit or a vegetable? Not sure if it’s the long stalks that resemble celery? Wait, it’s poisonous?

Lately, I have been trying to FACE the scary things in life and the kitchen. One of the most pressing fears I’ve been avoiding like the plague, is cooking with ingredients I’m unfamiliar with. The ingredients look scary or hard to work with, I tell myself that I can’t do it, and freeze up. That mentality has me stuck, and I don't want to be stuck anymore. HENCE facing The RHUBARB FEAR. It’s weird as it sounds that cooking could be fear based, but sometimes that’s how things comes up. These days I find I learn most about myself through cooking, can you relate?

Part of the journey in facing the scary thing, is to Acknowledge the FEAR - “RHUBARB scares the shit out of me!” Recognize, checking in with yourself and asking, is it a thought or Story I’m telling myself? What’s the truth here? My Truth, ‘I felt that If I fucked up cooking with rhubarb on the first try I would be a failure”. After sitting with those questions, I realized I told myself a STORY. WHAT a STORY I told myself indeed, and why do I need to put that pressure on myself?

NEW MONTRA, GIRL you’ve got this, COOK the damn thing and GET ON WITH IT.! You may fuck it up, but WHO cares it’s no big DEAL. Here is the thing, the best part of cooking is the failure, trying new things, it’s not about PERFECTION but the journey in getting to the destination (or final dish in this case) I realized that sometimes scary things aren't as scary as you thought they were. It’s that simple.

What are the stories you’re telling yourself right now about cooking? Or about life? Keep going friends. x

Now let's COOK!

X

Nicole


Tips for cooking with RHUBARB;**

-When picking your Rhubarb, don't skimp. Make the extra trip to the farmers market, they have the good stuff. Look for deep tones in the stalks, deep red + pink. If they are pale they were picked too soon, they won’t be rich in taste.

-DON'T eat the LEAVES, they are poisonous. Clean the stalks and discard the leaves.


STRAWBERRY RHUBARB CRUMBLE RECIPE

INGREDIENTS:

For the filling;

  • 2 cups chopped rhubarb, cleaned and leafs discarded
  • 2lbs cleaned and chopped strawberries
  • 1 tablespoon lemon juice
  • ¼ cup organic coconut sugar
  • 1 tsp organic vanilla extract
  • 1/4 teaspoon ground nutmeg ( add one ½ tsp if like spicy)
  • 1/4 tsp ground cinnamon
  • 1/4 tsp ground ginger
  • pinch of pink salt

* For the topping;

  • 3 cups gf rolled oats
  • 1 stick of vegan cashew butter COLD (I use MiyoKo’s brand)
  • 1/4 cup coconut sugar
  • 1 tsp vanilla
  • 1/4th tsp ground cinnamon
  • ¼ ground ginger
  • 1/4 tsp ground nutmeg
  • 1/4 cup gf flour

TOOLS YOU WILL NEED: Non stick spray, a 9x9 or 9x8 baking dish, bowls for mixing the topping.

DIRECTIONS;

  1. Chop your strawberries and rhubarb set aside. Measure out all your ingredients and set aside. Pre- heat the oven to 350 degrees. In a medium dutch oven or saucepan put over medium heat, then cook your rhubarb with ¼ cup sugar. Until they are tender, turn your stove off and add in your chopped strawberries, lemon juice, pinch of pink salt, spices and vanilla. Give it a good stir. Set aside.
  2. Prep a baking dish with non stick spray, (9x9 or 9x8 works great). Make sure its deep. Set aside.
  3. In a large mixing bowl add all your topping ingredients EXCEPT the VEGAN BUTTER. Give a light mix with a spatula.
  4. With your hands break up the cold butter into your topping ingredients bowl. It doesn't have to be perfect, and you're looking for a small chunk type texture. Do this until all the butter is mixed in.
  5. Pour your filling into the baking pan. Then sprinkle your topping on top until it's coated evenly.
  6. Bake in the oven for 20-35 min at 350 degrees. Let cool on a cooling rack for 15-20 min and then serve with vanilla ice cream, whipped cream, yogurt or creme fresh!


DIY GHEE RECIPE || BY NICOLE LEE


So what is GHEE you ask? Essentially, Ghee is clarified butter. During the cooking process the milk proteins separate from the butter leaving you with ghee. This stuff is liquid gold, it’s used for cooking veggies, baking, and of course adding to your bulletproof coffee. Packed with Vitamins, Ghee is really a superfood! It’s also the simplest thing to make at home.


DIY GHEE RECIPE

DIY GHEE RECIPE

NOTE: It’s really important to use high quality grass fed butter, this is key to getting the recipe just right. Also, if you are allergic to dairy stay away from GHEE. There are trace amounts of milk solids in it and may cause a reaction. If you are reintroducing dairy into your diet, this is a great food to start with. My only advice would be to go slow and small tiny amounts, over weeks or even months. But we can get into that another time!

Ingredients:

1 pound grass-fed butter (at room temp)

Tools:

Wide mouthed sauce pot
Metal strainer
Cheese Cloth
Metal spoon
Wooden Spoon
Jars with lids for storing

Directions:

Heat your pot on low heat. Add the butter. Let the milk solids bubble to the surface. Skim the bubbles until there is just a layer of protein at the bottom of the pot. It will brown slightly, watch it carefully so you do not burn it. When the solids are fully separated turn off the heat. Put the cheesecloth over the metal strainer, then strain your melted butter through the strainer into your jars. If it looks cloudy strain again. Then put the lid on and store in the fridge. It will become solid and creamy. If you don’t wish to have it creamy keep it on the counter and in about 24 hours it should turn from oil into a thicker consistency.

Happy Cooking friends x Nicole


DIY GHEE RECIPE

This recipe was adapted from the BULLETPROOF DIET COOKBOOK


VANILLA DAIRY FREE ICE CREAM RECIPE || TOPPED WITH FIGS AND RAW HONEY || NICOLE LEE FOOD PHOTOGRAPHER


VANILLA FIG ICE CREAM small 2.jpg


Confession,I have a deep love affair with making Ice Cream. Anybody with me?? There is something romantic in the cooking process, therapeutic even. Melting the sugar and vanilla into the coconut milk, watching it do a beautiful dance together, going from two forms into one. When I’m cooking I find myself grounded, in the most natural way. This thing takes over, becoming present in the moment, I’d like to call it Being.

There are times I’d find myself rushing the cooking process. Whatever dish I’d be attempting to cook, didn’t turn out good at ALL. The flavors were off, something was BURNED! What I noticed is BEING is the KEY to becoming a great COOK. If you’re busy doing other things, or your mind is wrapped in endless thoughts during the cooking process, Or you RUSH through it. You bet it will translate into the food. You can taste your anger, and wandering mind, and definitely the burn toast.  I started noticing there was more to cooking than only doing the motions, you have to FEEL it.

Think of cooking like an intimate dance, or making love. Take it slow, feel each ingredient, smell it, and move with the process, MOVE WITH THE FOOD. Turn off all distractions. Focus on cooking ONE thing and nothing else.You don’t want to rush the process, EMBRACE it. Embrace the mess ups to, because we don’t always get it right the first time. When that comes up brush it off, and KEEP GOING.  

Let’s go make some creamy Vanilla Ice cream!

-Nicole xox


DAIRY FREE ICE CREAM RECIPE, Topped with honey and fresh figs.

INGREDIENTS:**

4 cans full Fat organic coconut milk
2 whole pasture eggs PLUS **5 egg yolks **
4 tablespoons MCT Oil 1/2 cup raw sugar or SWERVE ( alternative sugar)
1-tablespoon vanilla paste or Vanilla extract works great
1-2 whole Vanilla Beans

TOOLS: 1 pot (dutch oven), whisk and an ice cream maker)

NOTE: PREP your cans of coconut in the refrigerator upside down overnight! Before you make the next day!

DIRECTIONS:

1.SEE ABOVE NOTE

2.Slice your vanilla beans in half, and with your knife blade scrape out the paste, put in small dish. Set aside. Next, open the cans of coconut milk and separate the fat and liquid. (You can save the liquid for another project, such as coconut water.) Put your pot on the stovetop and set on low heat. Add in the coconut milk, sugar, vanilla paste and beans to the pot. Whisk together until you see chunks of coconut dissolve. Cool liquid to room temperature, and set aside.

TIP: It’s key you keep your liquid warm and DO NOT boil. ( If it boils, take off heat and pop in the freezer for 20 min)

3.In another bowl, whisk together the whole eggs and yolks until light and fluffy. Add into the coconut mixture. Gently whisk again. Then place the bowl in the freezer for about an hour.

4.Once the mixture is cooled put it into the ice cream maker and follow your machines directions. About mid way through of churning add in your chocolate chips, or fresh chopped chocolate pieces berries or whatever you desire. If you keep this vanilla, serve with figs, and raw honey on top. Store in ice cream containers, or a loaf pan lined with parchment paper. The ice cream should make about 2 quarts.


Chocolate- Brownie- Cookies- Gluten Free-


About 8 months ago I got really sick. Ever since I have been on a journey to get back to my normal self.

It all started with some flowers. I was really into buying flowers for my house and this particular week lavender was in season so I thought oh, lets buy something different. When I got home, I put them in a mason jar and placed them on my living room coffee table.

A few mornings later, I entered the living room and started coughing and could barely breath, kind of like a massive asthma attack, (which I don’t have) I thought this was super strange so I then looked around the room, finally discovered that my lavender was covered in MOLD! What? !  I kind of panicked because I am actually allergic. (Not just a little, A LOT.)  I quickly got rid of the lavender.

A few weeks passed and I become super ill.

First I thought it was the flu, then allergies. But as the weeks went on I got worse. I was the only one in our house that was ill as well, so at times I felt a little crazy. I thought back to the flowers and thought what If it was the mold? Maybe I inhaled some of the spores? My husband and I did some research on symptoms of toxic mold exposure, to name a few: mental confusion, sinus infections, flu like symptoms, lung infections, blurred vision, migraines, headaches, hair loss and in extreme cases death, (which were found in people exposed for years.) I ended up with most of the symptoms because I am allergic to mold. The rest of my family just had minimal to none. Which is also common.  First thought was maybe it was just the lavender, that’s why I was just sick. Second was its not worth the risk of our whole family,

Lets just test the house for mold to be safe.

Sure enough it came up positive. We looked around the house, we opened the vents and there was mold everywhere! What? Our whole family was breathing in this? Everyday!

After finding it we literally packed up our things and fled like Zombies were attacking, No joke.

There were the five of us crammed in a hotel. Within days of leaving we started to feel better. Who knew?

We inquired with an environmental allergist here in Charleston. (I seriously owe him my life.) During the evaluation they ask you questions about your symptoms, and after listing most of them he told me: without testing you it sounds like you have been exposed to toxic mold, and you may feel alone, or crazy but you are not. We see a majority of people with toxic mold exposure. You are not alone and we have a plan for you to get better. I can promise you that.

I was beyond relieved that there was an answer to the last few months of madness.

The short version is he got me on a plan for detoxing and recovery. He gave us things for the kids too but he said to keep an eye on them if they are better after leaving the house then they should keep healing quickly and be okay. My predicament was slightly different, he said because of my health history this mold exposure was like the straw that broke the camels back. Your body stopped fighting and healing itself. The amazing thing was it was an answer. Along with a road to travel down to actually get better.

Part of the plan is I have to be on a “special” (not the good kind) diet because of the mold and candida (yeast) that I am allergic to. They basically feed off each other, and my body went on a feeding frenzy. The purpose of the diet was to starve the Candida/ fungus overgrowth, which then leads to die off and creates normal levels in your body. The best way to describe the diet is it’s a low sugar version of Paleo. No grains, no dairy, no vinegars, no beans, no foods containing any time of fungus. These foods actually feed the Candida and make it grow, so if you eliminate them then the candida dies off. (This alone wont “cure” the candida, like I said this was just one part of the treatment plan.) 

Basically my culinary palate has been starving for months. All I want is to eat a piece of bread, with cured meat and cheese on it, or better a big fat piece of melting pizza!

Looking back to a few months ago I have made leaps and bounds, I no longer feel like a sick person trying to get well.  My family is well and safe and things are starting to feel less like we were running from Zombies, to feeling like “well now we know how to survive when Zombies attack”.

Over the past few months I have come up with some creative ways to make my really boring food exciting.  I love bon appetite’ mag and stumbled upon an awesome Gluten Free Chocolate cookie recipe. The main ingredients are coca powder and gluten free powdered sugar (Which you can substitute or add less if you desire to do so). The cookies are so simple to make your 6 year old child could do it!

So stop listening to me ramble about my life and get up and make some awesome mouth watering cookies. You will not regret it!

Thanks for stopping by, look forward to hearing from you friends!

Recipe below 

-Best

Nicole 


Recipe :


Ingredients

SERVINGS: MAKES 2 DOZEN

  • 3 cups gluten-free powdered sugar
  • ¾ cup unsweetened cocoa powder
  • 1 teaspoon kosher salt
  • 2 large egg whites
  • 1 large egg
  • 4 oz. bittersweet chocolate, chopped
  • 3 tablespoons cacao nibs


Instructions

  • Place racks in lower and upper thirds of oven; preheat to 350°. Whisk powdered sugar, cocoa powder, and salt in a large bowl, then whisk in egg whites and egg; fold in chocolate and cacao nibs. Spoon batter by the tablespoonful onto 2 parchment-lined baking sheets, spacing 2” apart.

  • Bake, rotating sheets once, until cookies are puffed, cracked, and set just around the edges, 14–16 minutes.

  • Transfer baking sheets to wire racks and let cookies cool on pan (they’ll firm up).

ENJOY!! 


More information on health and recipes check these guys out! 

Bon Appetit Magazine Recipe :  http://www.bonappetit.com/

Center for occupational and environmental medicine : http://www.coem.com/