GLUTEN FREE CHOCOLATE CHIP COOKIE RECIPE || FOOD PHOTOGRAPHER NICOLE LEE


CHOCOLATE CHIP COOKIE RECIPE 1small.jpg

Who doesn’t love CHOCOLATE? I’ve got the perfect cookie for you, with a low glycemic index you won’t feel a crash. And still get to ENJOY your CHOCOLATE! Recipe below!

Tell me what YOU THINK, Or tag me in your BAKING ADVENTURES!

CHEERS + LOVE,

Nicole


GLUTEN FREE CHOCOLATE CHIP COOKIE RECIPE

INGREDIENTS:

  • 1 cup vegan butter, or mix of avocado + Olive oil
  • 3/4 cup maple syrup
  • 2/3 cup swerve alternate sugar
  • 2 pasture eggs
  • 2 1/4 cups @bobsredmill GF all purpose baking flour
  • 1 teaspoon baking soda
  • 1 teaspoon sea salt
  • 1 bag 85 % chocolate chips
  • 1 tablespoon vanilla

DIRECTIONS: In large bowl pour all liquid ingredients, mix. Then add one egg at time. Mix again, Set aside.

In a separate bowl measure out dry ingredients, then add to wet ingredients. Add in chocolate chips. Mix together, if dough seems wet, add 1 tablespoon of flour mix and repeat.

Store in fridge for 1 hour to up to 24 hours. Then Bake. At 350 degrees for 15 min, let cool and enjoy!


CHOCOALTE CHIP COOKIE RECIPE 5small.jpg

GF CHOCOLATE CHIP COOKIE RECIPE 6small.jpg

GF CHOCOLATE CHIP COOKIE RECIPE 4small.jpg


SAY HELLO! (fill out form below!)


GRAIN FREE "BEAUTY WAFFLE" RECIPE || FOOD+LIFESTYLE PHOTOGRAPHER NICOLE LEE || GLUTEN FREE RECIPE


gluten free waffle recipe

Hi friends,  

How we doing out there? It’s been pretty go! go! go! this summer. We are so close to moving back into our home. Officially we move back in this Friday July 14th. We are feeling slightly bittersweet about it all. The “storms” have calmed down, and the “series of unfortunate events” have been put to rest. Mold gone, plumbing fixed throughout the house, tree that was causing leaky roof, gone ( my apologies mother nature) roof fixed…let me think.. Walls fixed.. Now the house is safe. Amen. Ha. Ryan and I have been cleaning like mad, painting, so the house will be move in ready. There are a few odds + ends I’ll still be sharing on Insta stories ( so stay tuned!) Nothing but clear skies ahead for us with our home. Excited to get back into the kitchen ( well my own kitchen and test some new recipes!)

To celebrate our move in, I've been cooking up some waffles. I have been recipe testing like mad these past few weeks with this grain free chocolate beauty waffle concoction. It sure has been giving me a run for my money! “Beauty waffle”? These waffles are filled with all sorts of good stuff, we’ve got, raw cocoa(rich in magnesium), dark chocolate, xylitol sweetener ( no sugar spike + crash), egg yolks (amazing for skin!), Maca ( libido boosting), and flaxseed meal (aids digestion). All mixed together you have heaven, oh and don’t forget the whipped topping! If you are into things tasting good, and knowing the ingredients going into the food you make are full of added bonus give these waffles a try.

-Happy cooking!

Nicole 


waffle ingredients

gf chocolate waffle recipe

Recipe :
Grain Free Chocolate Chip beauty waffles

Ingredients:

Wet ingredients:
3 pasture raised egg yolks plus+ 1 full egg
2 tablespoons filtered water as needed or almond milk
1 tspn vanilla extract or unsweetened vanilla powder

Dry Ingredients:
½ cup cassava flour
¼ cup unbleached almond meal
1 tablespoon High quality Extra Virgin Olive Oil
1 tablespoon MCT oil ( I love bulletproof brand)
1 teaspoon organic cinnamon
½ tspn baking soda
1 tspn baking powder (aluminum free)
1 tablespoon organic raw cocoa (if desired)
2 tablespoons organic ground flaxseed meal ( trader joe’s brand is awesome)
1 tablespoon raw Maca powder ( moon juice brand is my favorite)
1 bag of stevia sweetened chocolate chips or 1 dark chocolate bar (roughly chopped)
1 tablespoon of swerve ( sugar alternative)
1 tablespoon of xylitol

Tools needed: large mixing bowl, measuring cups, wooden spoon, small or large waffle iron, plate or cooling rack.

Directions:
TIP: It’s always helpful to measure your ingredients ahead ( I don’t always do this, but it helps to at least have them all out)

In a small bowl Separate the egg yolks from eggs. Add in the one whole egg. Set aside. Grab your large mixing bowl and add in all the wet ingredients. Lightly whisk the mixture for about 30 seconds. Add in your dry ingredients (except the chocolate chips), starting with the sugars, then add in all the rest doesn’t matter the order. Mix it all up with your wooden spoon. If it looks dry, add in 1 tspn at a time of almond milk ( or water). Add in your chips. ( to your desire, I like a lot!)
Plug in your waffle iron, use the directions on your machine( believe me they are all different)
Start making waffles! Poor a bit of waffle mix into the maker, when the little light goes off you know they are done, but sometimes they may need an extra min. This is where your own judgment comes in. You can also poke them in the middle, and if they bounce back they are done. Note: you can make a few “tester” one and set a timer. This is always helpful.
Place on plate or cooling rack with a piece of paper towel or parchment paper over the top to keep warm.
Chop fresh berries for topping
Enjoy! Add your favorite whipped cream, maple syrup, or nut butter with bacon.

“Whipped topping”:
(Makes 11 oz )

Ingredients :
3 pasture raised egg yolks
2 cans full fat organic coconut cream (refrigerated overnight)
2 tablespoons xylitol
1 teaspoon of organic vanilla extract or unsweetened vanilla powder
1 organic whole vanilla bean
1 -tablespoons of moon juice loose probiotics ( another form of loose probiotics should work)
Vitamix high powered blender

Directions:
1.Place the blender top in the freezer for about 15-20 min. Or until cold enough there is a layer of fog around the blender top.
2.In a bowl open and separate coconut milk fat from the water. (This should be natural as you have put it in the refrigerator). Disregard the water and use for another project!
3. Slice open your vanilla bean, in half with a sharp knife, scrape out the beans and place with your coconut fat.
4. When your blender top is good and cold, take all the ingredients and place in the blender. On the cold setting blend your heart out ( about 15-35 seconds). Check the consistency and if it’s thick ( not too thick) transfer to airtight container and back in the fridge while you make your waffles. (You can also use this cream to have for a late night treat with berries or other goodies. )


Gluten free chocolate waffle recipe

grain free waffle recipe

SAY HELLO! 


Source: www.heydear.co/blog

easy granola and vegan whipped cream recipe


Lets chat about business. I want to be real for a min as well; it’s not as easy as everyone says it is. Its one big game, even if you are prepared for the test.  Business is a bitch.

Sometimes I find myself having a clear direction and path, along with creative ideas energy, then I get in the way of myself.

I get insecure, I want approval, and I have a hard time jumping into my ideas because of the things that happened in the past. (Which I am working on not doing.) Do you know what I mean? By getting in the way of yourself? 


For the last 2 weeks I have been on what I like to call a creative high. Upward spirals, downward spirals, and so many “great” ideas my head may burst into a thousand tiny pieces. I want to get them all done, right now, at this moment, I cant seem to get the pen to paper fast enough, I’m brilliant. And then not….

So I say farewell to insecurity, and would like to say I’m diving off the board, into the deep end. Sink or swim, Join me on this ride?


Vegan Whipped Cream

Ingredients:

2 Cans full fat organic coconut (chilled in refrigerator the night before)

About ½ cup of organic confectioners sugar

1 teaspoon vanilla paste

An electric mixer, or kitchen aid with a whisk attachment and metal bowl

Directions:

Fill your metal bowl with ice, dump out after about a minute. Open your coconut milk, the fat and liquid should be separated, at this point dump the liquid in a jar and save for later. (you could make coconut water or use for a sauce) Take the coconut fat and place in the bowl, then add in the vanilla paste,  and the powdered sugar. Turn your machine on low for about 1 min then speed it up for about 2-3 min. You want to get a lot of air in there to get it nice and fluffy.

Once you see the consistence change into airy and light , you have your vegan whipped cream. (Taste it to see if it needs more sugar. )

Gluten free Granola:

Ingredients :

¾ cup avocado oil

6 cups old fashioned gluten free rolled oats

1/3 cup honey or coconut sugar

1 tablespoon light brown sugar

1 teaspoon vanilla paste

1 tablespoon cinnamon

1 cup chopped roasted almonds

1 pinch of salt

Directions:

Preheat the oven to 325 degrees. Line a large baking dish or cookie sheet with parchment paper.

In a mixing bowl, whisk together; oil, honey, brown sugar, vanilla paste and salt. Once this has mixed add in the oats, nuts, and cinnamon, stir all together until combined.

Then place evenly spread the mixture onto your lined baking sheet. Bake for 25-35 min or until golden brown. When finished, cool for about an hour, then break apart into chunks.  This can be stored up to 2 weeks (if it lasts that long!)

Cheers Friends - Nicole 


Gluten Free Chocolate Peanut Butter Ice Cream Sandwiches


How to make an ice cream sandwich Part 2

Recipe:

Gluten / Dairy Free Chocolate Peanut Butter cookies

Ingredients:

2 Vegan Baking butter sticks

2 Cups brown sugar

2 Room temp. Eggs

1 ¾ cups Gluten Free Flour

2/3-cup Raw Cocoa Powder

2 teaspoons Baking Soda

5 Ounces Finely Chopped Good quality Dark Chocolate bars

1 cup Peanut Butter

1 teaspoon of vanilla

Directions:

In a large bowl, or kitchen aid mixer, cream the butter, brown sugar, vanilla and eggs. You will know when it is done because the mixture will be fluffy and airy.

Next add in baking soda, gluten free flour, and cocoa powder until combine. Add in your peanut butter and chopped chocolate.

Cover the dough with airtight seal, such as plastic wrap or a container. Let sit in fridge for 1 hour or up to the next day.

Preheat the oven to 350 degrees F. Line a cookie sheet with Parchment paper. Place about one tablespoon of dough onto the baking sheet.

Bake for 10-12 min, turning your cookie sheet halfway through bake time.


To make the Ice Cream Sandwich:

½ pint or pint of vanilla bean ice cream(make your own, or choose your favorite store bought)

6-12 gluten free chocolate peanut butter cookies

Spoons

Ice cream scoop

Take your cooled cookies facing down, spread ice cream layer on each side. Then smash together. Cover with plastic wrap and store in freezer. Repeat until all the cookies are gone!


Hipster Affogato Recipe : Coffee with Ice Cream, Nicole Lee


Some may say my obsession with Coffee is only because I am a millennial. Or I’m a hipster. All we do is sit in coffee shops and waste away our days. Now I think people have our generation all wrong, we appreciate things, where they came from, how they are made, how they taste so on. We want to slow down and take in life and not let it pass us by. 

I would also politely disagree that my obsession with coffee began when I was a young girl. My Italian Heritage didn’t spare me that, growing up around the kitchen table coffee was served morning noon and night. Fresh espresso, served straight up, with desserts to follow. Usually my mother would give my sister and I a cup filled with milk and a splash of coffee in it. I was probably 7. I thought it was the coolest thing ever. As I got older my passion for coffee grew stronger, I feel deeply in love with coffee, the way the beans were roasted, the process of making a French press, how some blends tasted different than others. I learned how Folgers coffee is in fact different than fresh roasted beans! If you cant tell I am sorry for your palate.  Naturally I spent most of my teens, into adulthood working at coffee shops.  (I am pure dork for sure).

As of late I have been on the hunt for a new local coffee spot here in Arizona, Starbucks has me thoroughly disappointed because although I understand what Howard Shultz is doing for his business I feel that’s it is becoming more like McDonalds. He is killing me.

Recently I found, Cartel Coffee Lab, which is of course filled with hipsters and even I feel out of place when I first stepped in. It wasn’t until I got some guts and asked the girl taking my order how to make my shots of espresso not taste so acid? She told me how to order my drink, gave me some knowledge, (which was great, my drink was perfect. I was hooked! Now, I spend my days contemplating driving a half hour each way to get my fix? Worth, it? Yes. I promise. Anyway I am really off on a tangent, you have probably skipped over to the photos by now. (I don’t blame you; I’m joking if you can’t tell.)

When I am not out enjoying a coffee, I have been making a lot of coffee at home. French press of course, (note to self: I need to invest in a pour over).  Occasionally I will add in some of my vanilla bean ice cream to change things up, it’s so good.

Some refer to this as an Affogato (“Drowned”) the Italian term.

You take a scoop of vanilla ice cream or gelato and place it in the cup, and pour a shot of hot espresso over it (espresso not expresso!).  If you don’t have espresso you can just use a French press. I thought I would share a simple recipe and some images I took to inspire you to make your own Affogto at home! It will change your world.


To make a simple Affogato:

Ingredients:

-French Press coffee maker; pour over coffee maker, or Stovetop Espresso maker works great. If you are privileged enough and have a fancy set up that works well too.

-Fresh ground coffee beans, Espresso blend, or your favorite brew. (The stronger the better in my opinion)

- Vanilla ice Cream (dairy free, or regular works either or)

- Boiled water

-Espresso cups (these are smaller than regular coffee cups because of the portions) you wont be making a huge cup of coffee here, think portion control at its finest)

Directions:

-French Press: You would take 2 tablespoons of ground coffee beans and place in the bottom of your press, once the water is boiled pour on top of the grounds fill with water to the fill line. Set the lid on top without pressing it down. Set timer for 4 min, once it goes off, push down your press and its done.

-Stovetop Espresso Maker – this is a two-part contraption depending on your model. Take it apart; fill the bottom half with water. Then there should be a little basket fill that with ground espresso beans, leave a little room because you will be screwing it back together. Then place on the stovetop and put the maker on high heat, once it starts boiling and whistling the coffee is done.

(Also see your user manual it will give you proper instructions)

Then get your ice cream fill the espresso cup with a scoop of ice cream, pour over the hot espresso and serve immediately!

Enjoy!   

-Cheers, - N


Works sited :

An Affogato (Italian, "drowned") is a coffee-based dessert. It usually takes the form of a scoop of vanilla gelato or ice cream topped with a shot of hot espresso

Starbucks : 

Folgers

Cartel Coffee

Espresso maker 

Pour Over

French press


Handmade Wooden Spoons, for the kitchen - Nicole Lee Phoenix Food Photographer


This winter I was commissioned to take on photographing and styling a small business who specializes in handmade Wood spoons, cutting boards and all sorts of other goodies! They are simply awesome. They are still in the process of setting up their shop but they go by a little name called Bo Woods! 

Below are my favorites from the project. Happy Thursday Friends! 

Cheers!  -N


handmade wood spoons


Fancy Prosecco Cointreau Ice Cubes, Recipe


When I think of Champaign, Prosecco or Rose` I can't help but want to channel my inner Lady GoLightly. Aka Audrey Hepburn from Breakfast at Tiffany’s. Call it cliché’ call it typical, I don’t mind. Back in the day I used to watch that movie so many times. If I can be really honest, probably every other day! Fantasizing about how amazing her life would be to just have for a day. Live in New York City, wear fabulous clothes, be an actress.  You know what I mean right?

The thing is when I grew up I finally figured out what she did in the “Powder Room” with those men each evening. I’ll let your imagination run away on that one. Some how the charm of her glamorous lifestyle, of chic clothing, fancy parties and her tiny apartment seemed to take my breath away. (Although, Currently speaking it doesn’t look like it was all that fabulous after all.)

This shoot wasn’t fully inspired by Audrey, but after staring at my screen editing I couldn’t help but think of the movie. Of her, Of the Scenes of fancy parties with great music, and of Course Paul Darling. (Insert British accent from his mistress) How can we forget him?

I am sure she would have been smart enough to make fancy ice cubs for her drinks as well, or maybe she couldn’t afford an extra bottle of Prosecco to make them? Either way, I have a wonderfully easy way to spice up your Prosecco, or to keep your glass chilled. And while your making them, maybe channel your inner Audrey, you know she is in there! 


Prosecco Ice Cubes, with Fresh Blueberries and Cointreau, Recipe

Ingredients and Materials:

-2 rubber ice cube trays, (I find these are the easiest to use, the ice cubes pop out really easy)

-1 bottle of Prosecco (Lamarco is a great one!)

- 1 bottle of Cointreau, orange liquor

-1 bunch of fresh BlackBerries, or any that is in season

- A tea towel to wrap the Bottle of Prosecco with when opening

Directions:

First make sure to chill your Prosecco in the fridge for at least an hour, to speed up the process you can throw it in the freezer. Just don’t forget it, I have totally done that before and ended up with ice of course.

Take the tea towel and wrap it around the chilled Prosecco, pull the top off straight up away from your face. Go slow! Unless you are a pro and use a saber. Grab your ice trays; fill them with the Prosecco leaving room for the Cointreau and berries. Then add in a splash (about ½ tablespoon) of Cointreau in each ice cub spot, and fill to top. If desired add in berries to each cube.  Freeze for a good 6-12 hours. (Depending on your Freezer. This also works if you choose to leave the berries out.

When serving the Prosecco, add in one or two ice cubes to your glass and enjoy!


Cheers Friends! 

-Nicole 


Jacob's Applesauce Recipe


Who doesn’t love applesauce? You can eat it plain, spread it over vanilla ice cream, and add it to yogurt. Add it to baked recipes. The list is endless. My 6 year old came home from school so excited to share he had learned how to make applesauce in his first grade class. He then of course wanted to teach me how to make it right away, so we did.

I would say cooking with my children is something we always have done. Its something I wanted to include them in, and make them feel apart of things. When they were crawling they would be banging on pots and pans in the kitchen while I danced around and cooked. As they got older we started giving them real jobs, stirring a sauce or making the scrambled eggs. Sometimes Jacob (my 6 year old) comes up with his own recipes, for example, peanut butter with honey on rice cakes, or the not so popular, mustard peanut butter sandwiches.

So this applesauce recipe seemed like the perfect thing to add to our recipe book, and do something well just fun together!

Cheers Friends, Happy Cooking!


-Nicole


Jacob’s Applesauce

Ingredients:

4lbs apples cored and sliced (about 10 apples)

A mixture of red, yellow and green

½ cup sugar

½ teaspoon cinnamon

1 tablespoon lemon Juice

1-cup water

1-tablespoon vanilla paste (preference only)

Directions:

In large Dutch oven, bring the cup of water to a simmer, add in the apples, sugar, cinnamon, lemon juice and vanilla. Give it a good mix with a large wooden spoon. Let this simmer until the apples are good and mushy, about 12-20 min. If needs more water add in about a half cup at a time.

Once the apples are good and cooked, remove from heat and blend in a blender or food processer and pulse until combined. The consistency you are looking for is slightly smooth, slightly chunky.

Then transfer mixture to bowls and let completely cool (about 1-2 hours)

When cooled you can store in a container / Mason jar for up to two weeks.

(If it lasts that long!) 


Ultimate Banana Bread Recipe; America’s test Kitchen 100 recipe cookbook

Have you heard of Cooks illustrated or America’s test kitchen? First if not you should! And I am a huge fan, so when they contacted me and sent me their new cookbook I thought how cool! I screamed with excitement, maybe multiple times over ha. The thing is I just love their approach, concepts and core values. They say “repetition and good practice are keys to success in the kitchen” as well as “A good cook will learn from his her mistakes and make a better dish next time”. Hello that is huge! I mean if you can take on those mantras it will change the way you approach cooking, or photography, or really any skill you may be learning. It helps us keep pressing through and even laugh at ourselves.

The other thing about their new cookbook 100 recipes is that it is a compilation of essential basic and staple recipes. In my opinion it’s those simple recipes that are the key to cooking, and becoming a cook. Once you learn these skills you can truly become and expert and then break the rules, and come up with your own recipes. They are the foundation and building blocks to the kitchen. Now the only thing I would say for someone who has food allergies such as myself, many of the recipes are adaptable. But you will have to put some work in to get it just right if you have never done that type of thing before.

Usually during the fall I make pumpkin bread, this year I wanted to switch it up and chose the banana bread recipe from America’s test kitchen 100 recipes cookbook. I am going to be a stickler, with baking itself you really need to follow word for word the recipe. Down to each minute detail to get it right. Unfortunately, I had to change the butter out for olive oil, as well as the flour for gluten free flour. But when I switched out those to things and followed their recipe through and through it really worked! I would say their method was spot on and would totally recommend anyone just learning to give it a go. The banana bread was moist and yummy and lasted 24 hours in my house because everyone loved it so much.

Now for the recipe, this is from the 100 recipes cookbook; I did not come up with this on my own, as well as in the margins I will give you substitutions.

Also A big thank you to America’s Test kitchen for sending me their lovely book and giving cooks around the country the confidence to venture into the culinary world! 


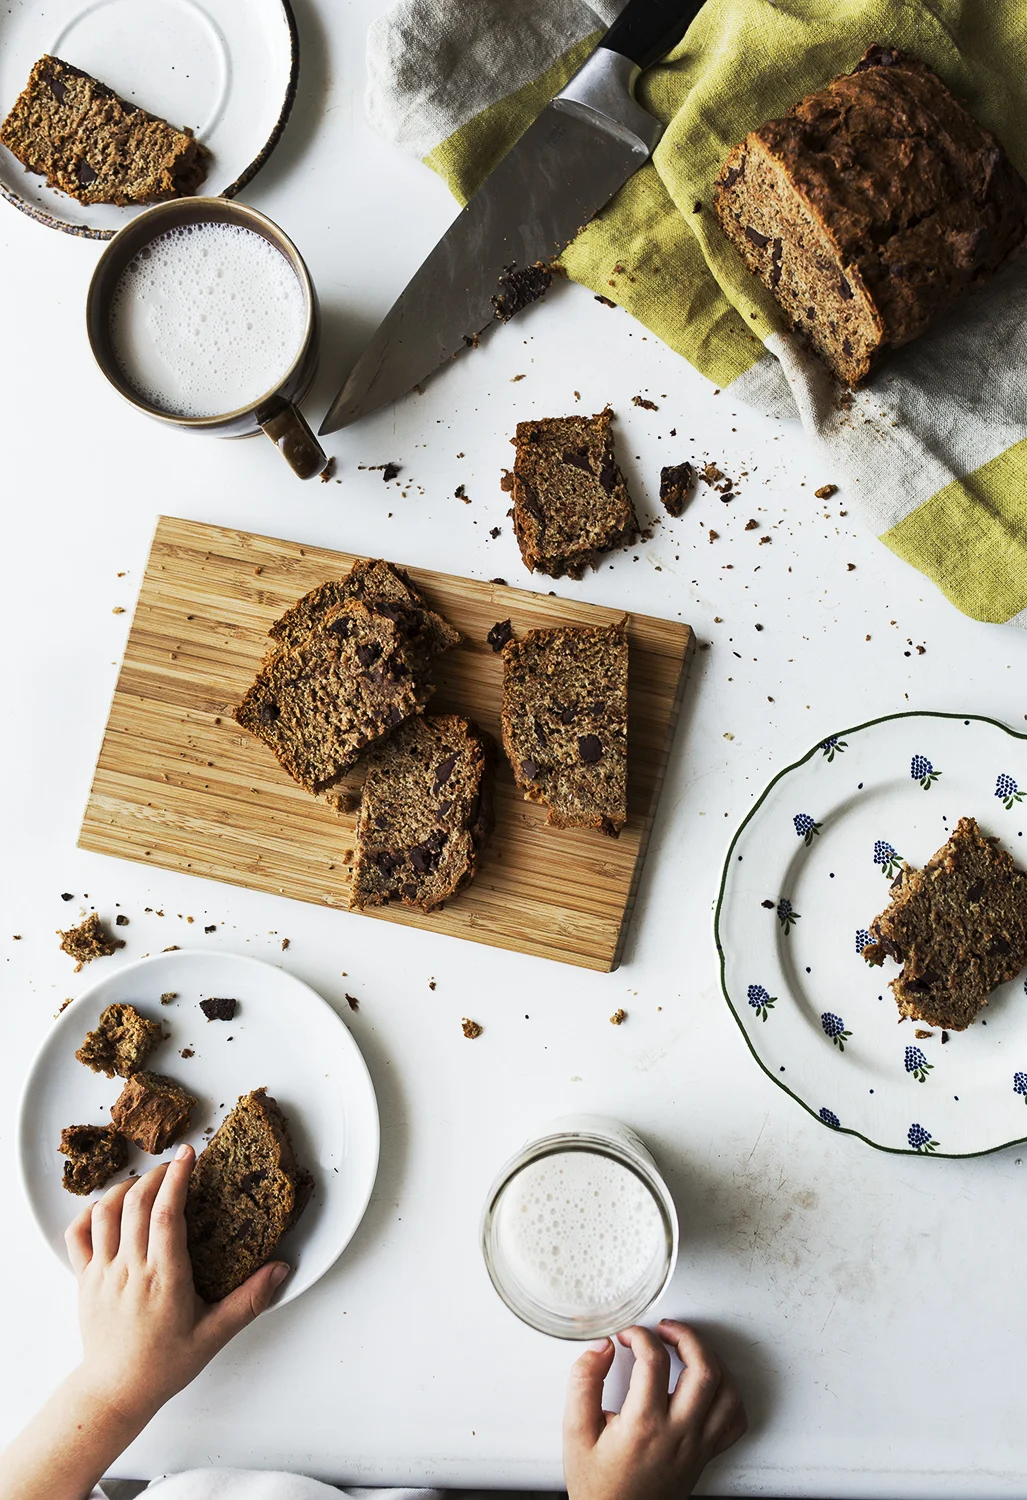
Ultimate Banana bread

Makes 1 loaf

Note: Be sure to use very ripe, heavily speckled (or even black) bananas for this recipe. The texture is best when the loaf is eaten fresh, but once cooled completely, it can be covered tightly with plastic wrap and stored for up to three days.

Ingredients:

1 ¼ cups (8 ¾ ounces) all-purpose flour (or one to one gluten free mix)

1-teaspoon baking soda

½ teaspoon salt

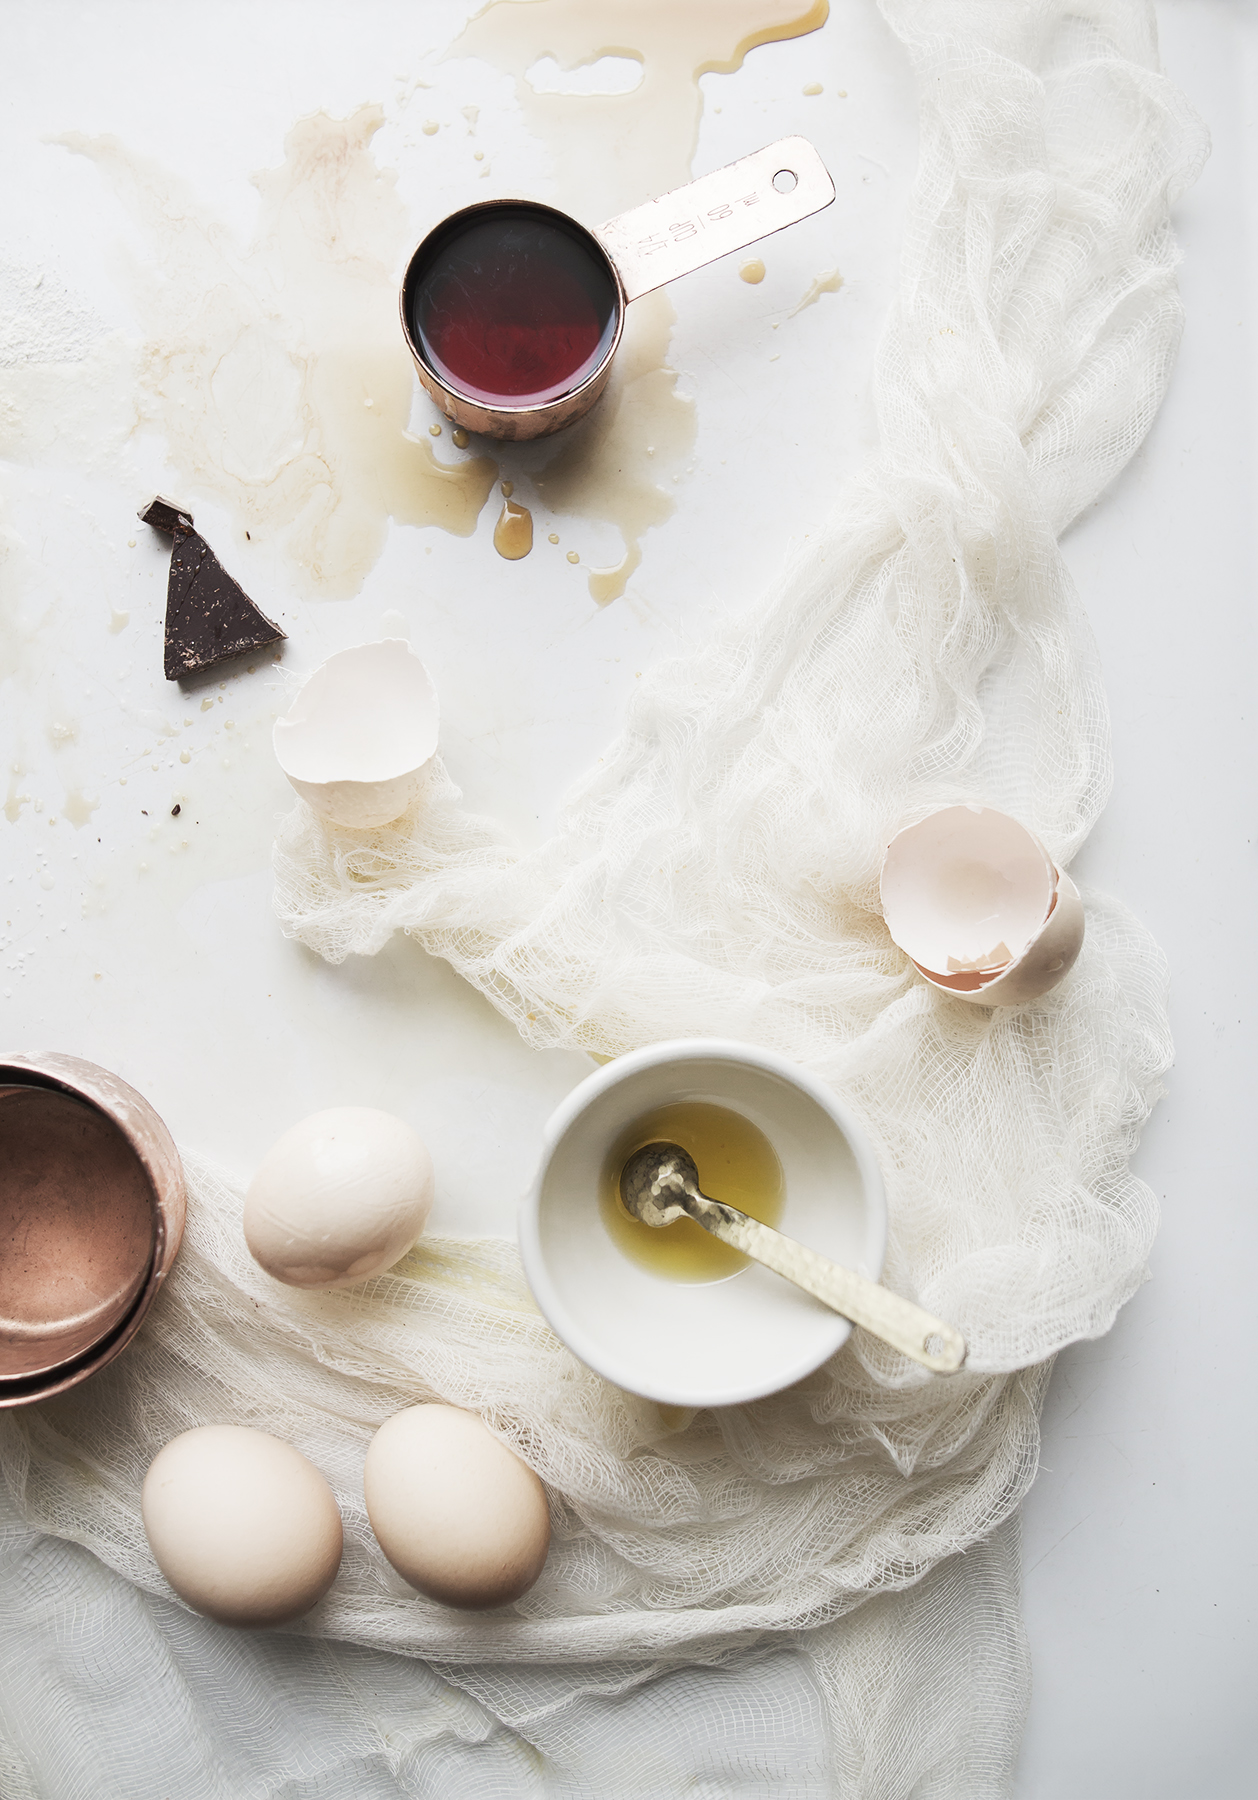
6 very ripe bananas (2 ¼ pounds), peeled

8 tablespoons unsalted butter, melted and cooled (or olive oil if allergic)
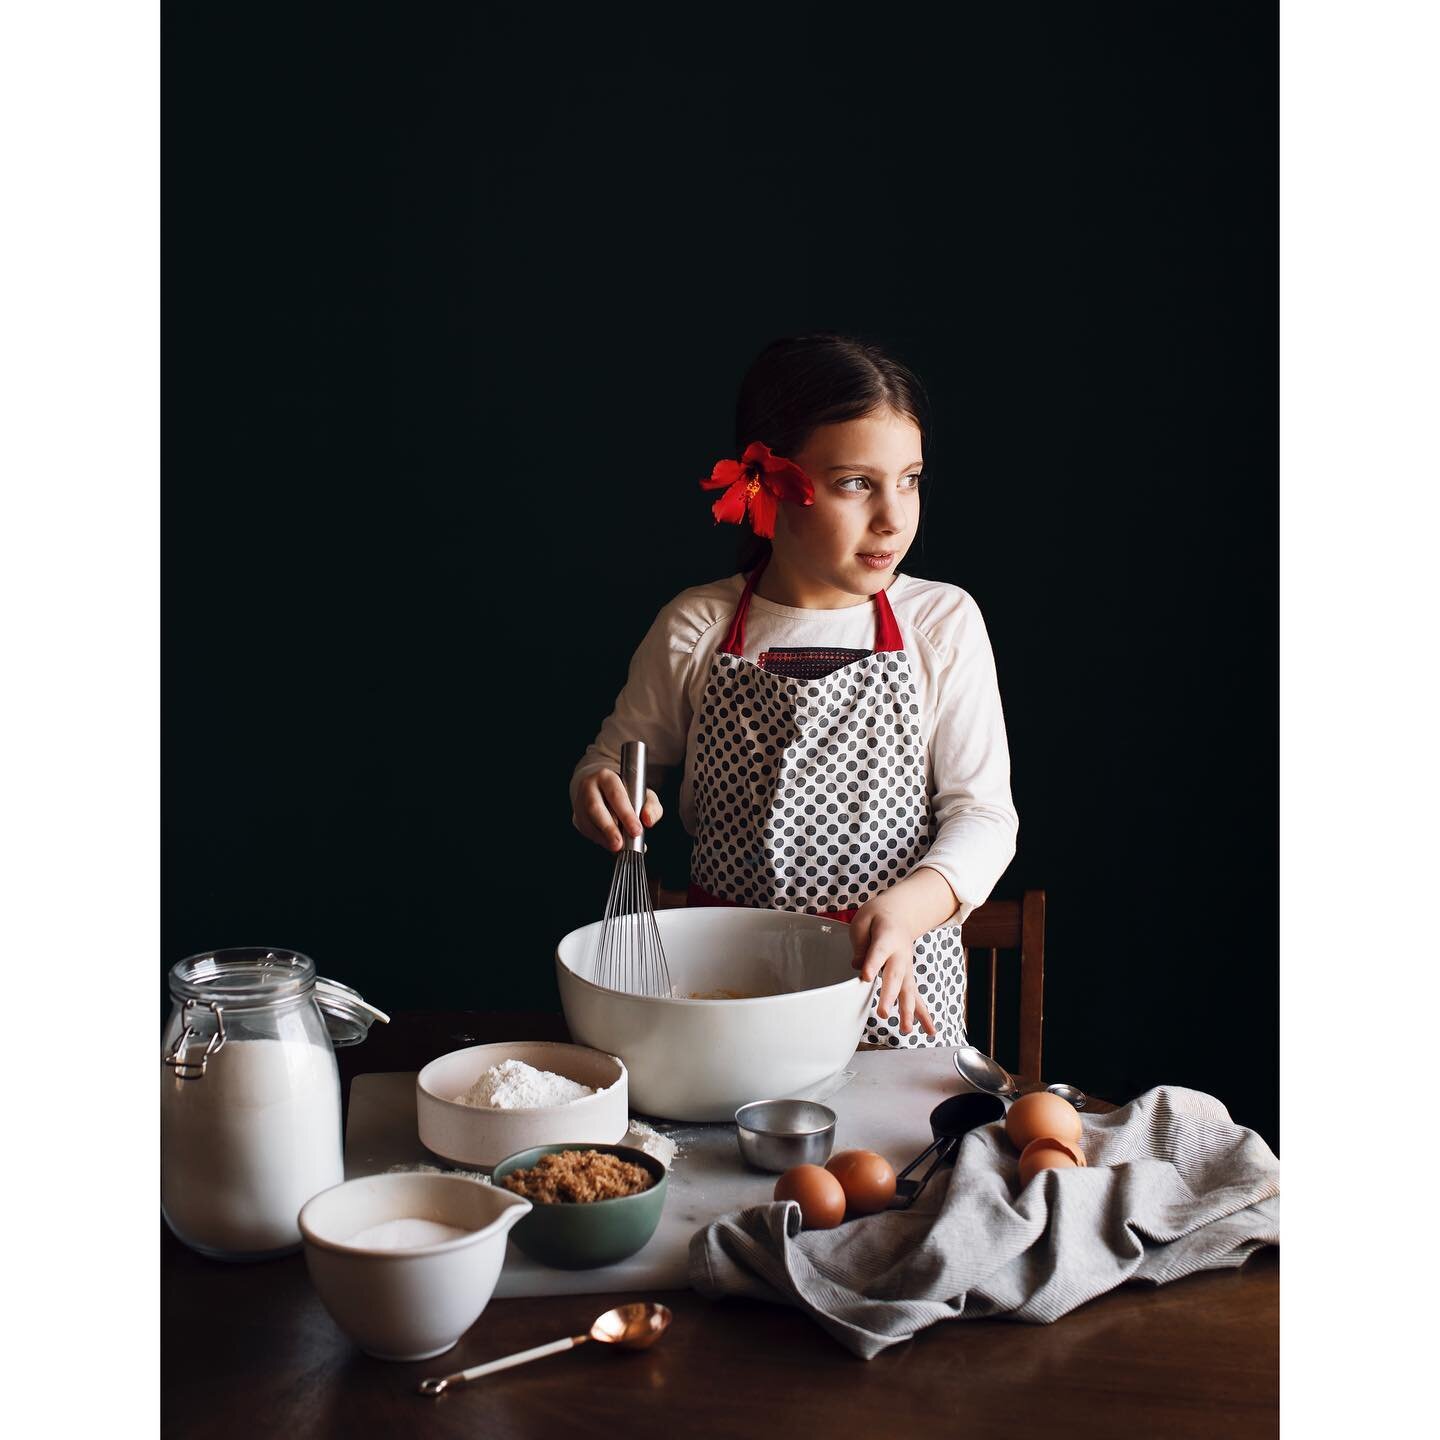
2 large eggs

¾ cup packed (5 ¼ ounces) light brown sugar

2 teaspoons granulated sugar

½ cup walnuts, chocolate chips chopped (optional)


Directions:

1.Adjust oven rack to middle position and heat oven to 350 degrees. Spray 8 ½ by 4-½ inch loaf pan with vegetable oil spray. Whisk flour, baking soda, and salt together in a large bowl.

2.Place 5 bananas in separate bowl, cover and microwave until bananas are soft and have released liquid, about 5 minutes. Transfer bananas to fine- mesh strainer over medium bowl and allow to drain, stirring occasionally, for 15 min (you should have ½ to ¾ cup liquid).

3. Transfer to medium saucepan and cook over medium – high heat until reduced to ¼ cup, about 5 minutes. Return drained bananas to bowl. Remove pan from heat, stir reduced liquid into bananas, and mash with potato masher until mostly smooth. Whisk in melted butter, eggs, brown sugar and vanilla.

4. Pour banana mixture into dry ingredients and stir until just combined, with some strokes of flour remaining. Gently fold walnuts, if using. Scrape batter into prepared pan. Shingle banana slices on top of the loaf in 2 rows, leaving 1 ½ inch –wide space down center to ensure even rise, Sprinkle granulated sugar evenly over loaf.

5. Bake until toothpick inserted in the center of loaf comes out clean, 55 minutes to 1-¼ hours, rotating pan halfway through baking. Let loaf cool in pan for 10 minutes, then turn out onto wire rack and let cool for 1 hour before serving


Sources and notes: 

This is or was not a sponsored post. All recipes were written and developed by Americas test kitchen, they are not property of Nicole Lee or Hey Dear. All rights Reserved. 

America's Test Kitchen : https://www.americastestkitchen.com

100 recipes cookbook : http://americastestkitchen.buysub.com/homepage/100-recipes-the-absolute-best-way-to-make-the-true-essentials.html