APPLE SPICE CAKE WITH SCOTCH WHISKY + WHIPPED CREAM RECIPE | GLUTEN FREE RECIPES | PHOENIX FOOD PHOTOGRAPHER


The sun is beaming through the curtain window onto my keyboard this afternoon. Currently, sipping on a doppio blonde espresso from starbucks, because my love affair with them is still flourishing. I’m trying to conjure up some profound words about this apple spice cake I made. But for whatever reason I feel stuck, yet a thousand thoughts seem to fill my mind. In my best attempt to quiet the thoughts, I pound my fingers on the keyboard and keep going.

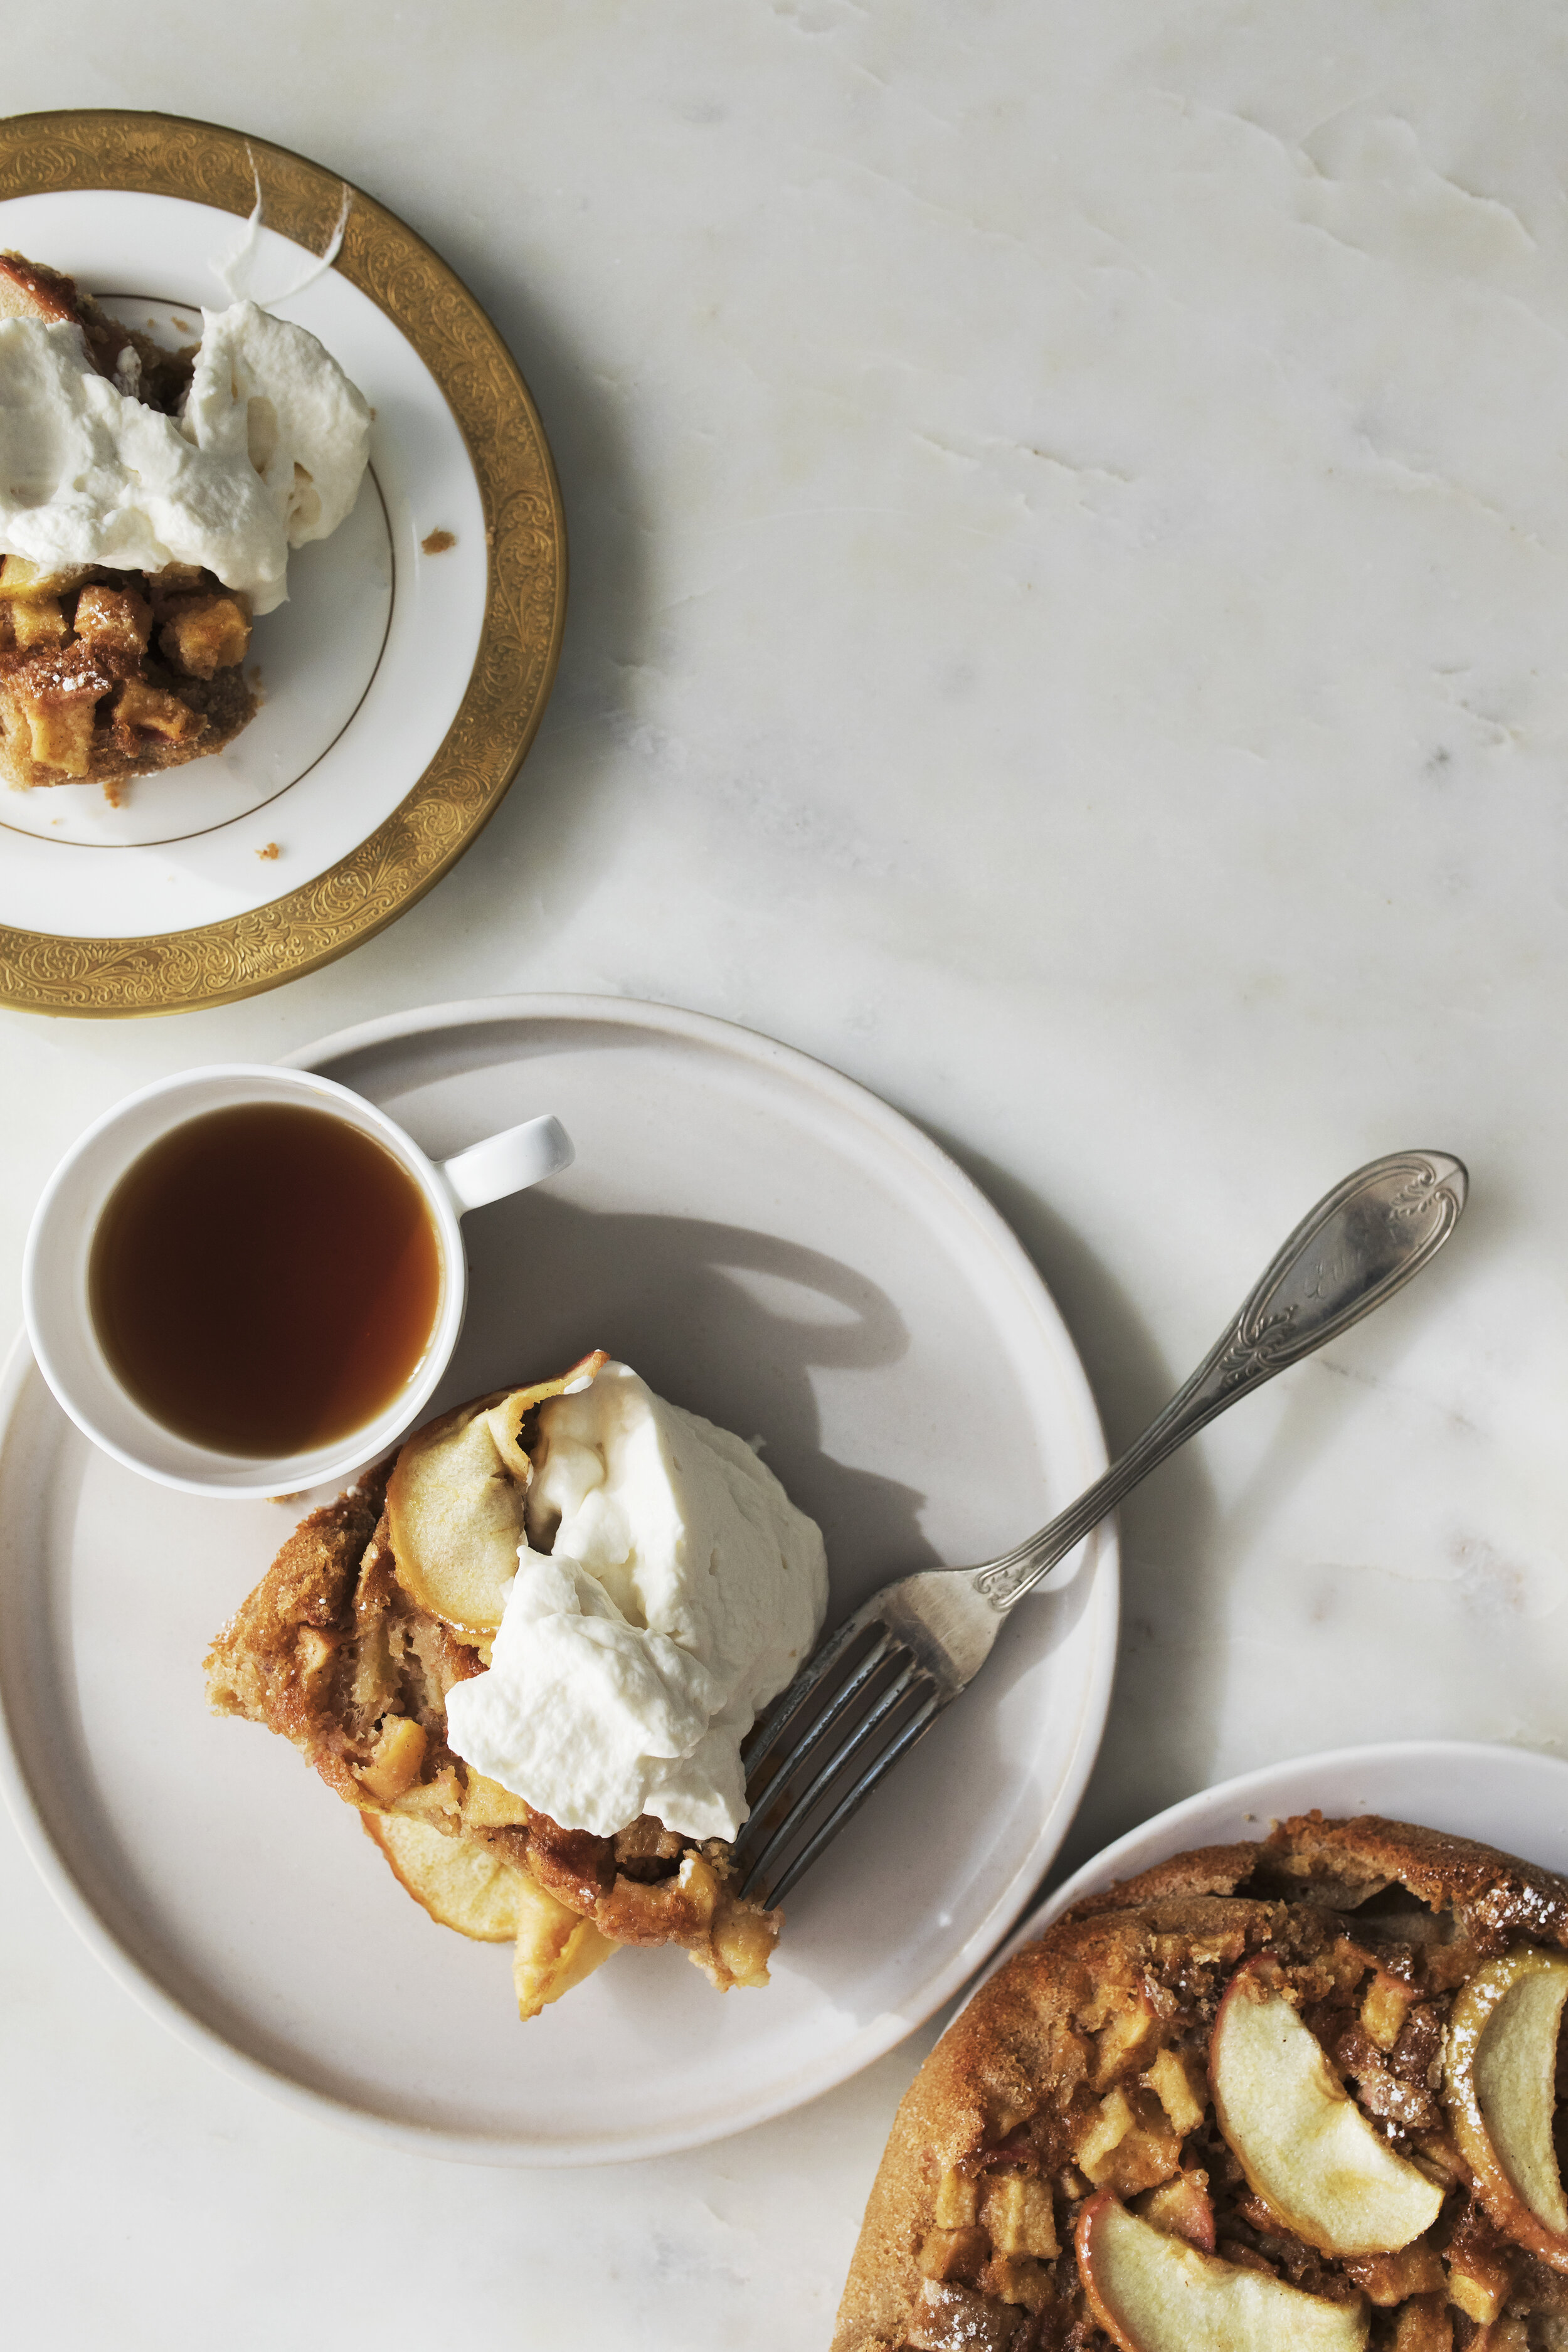
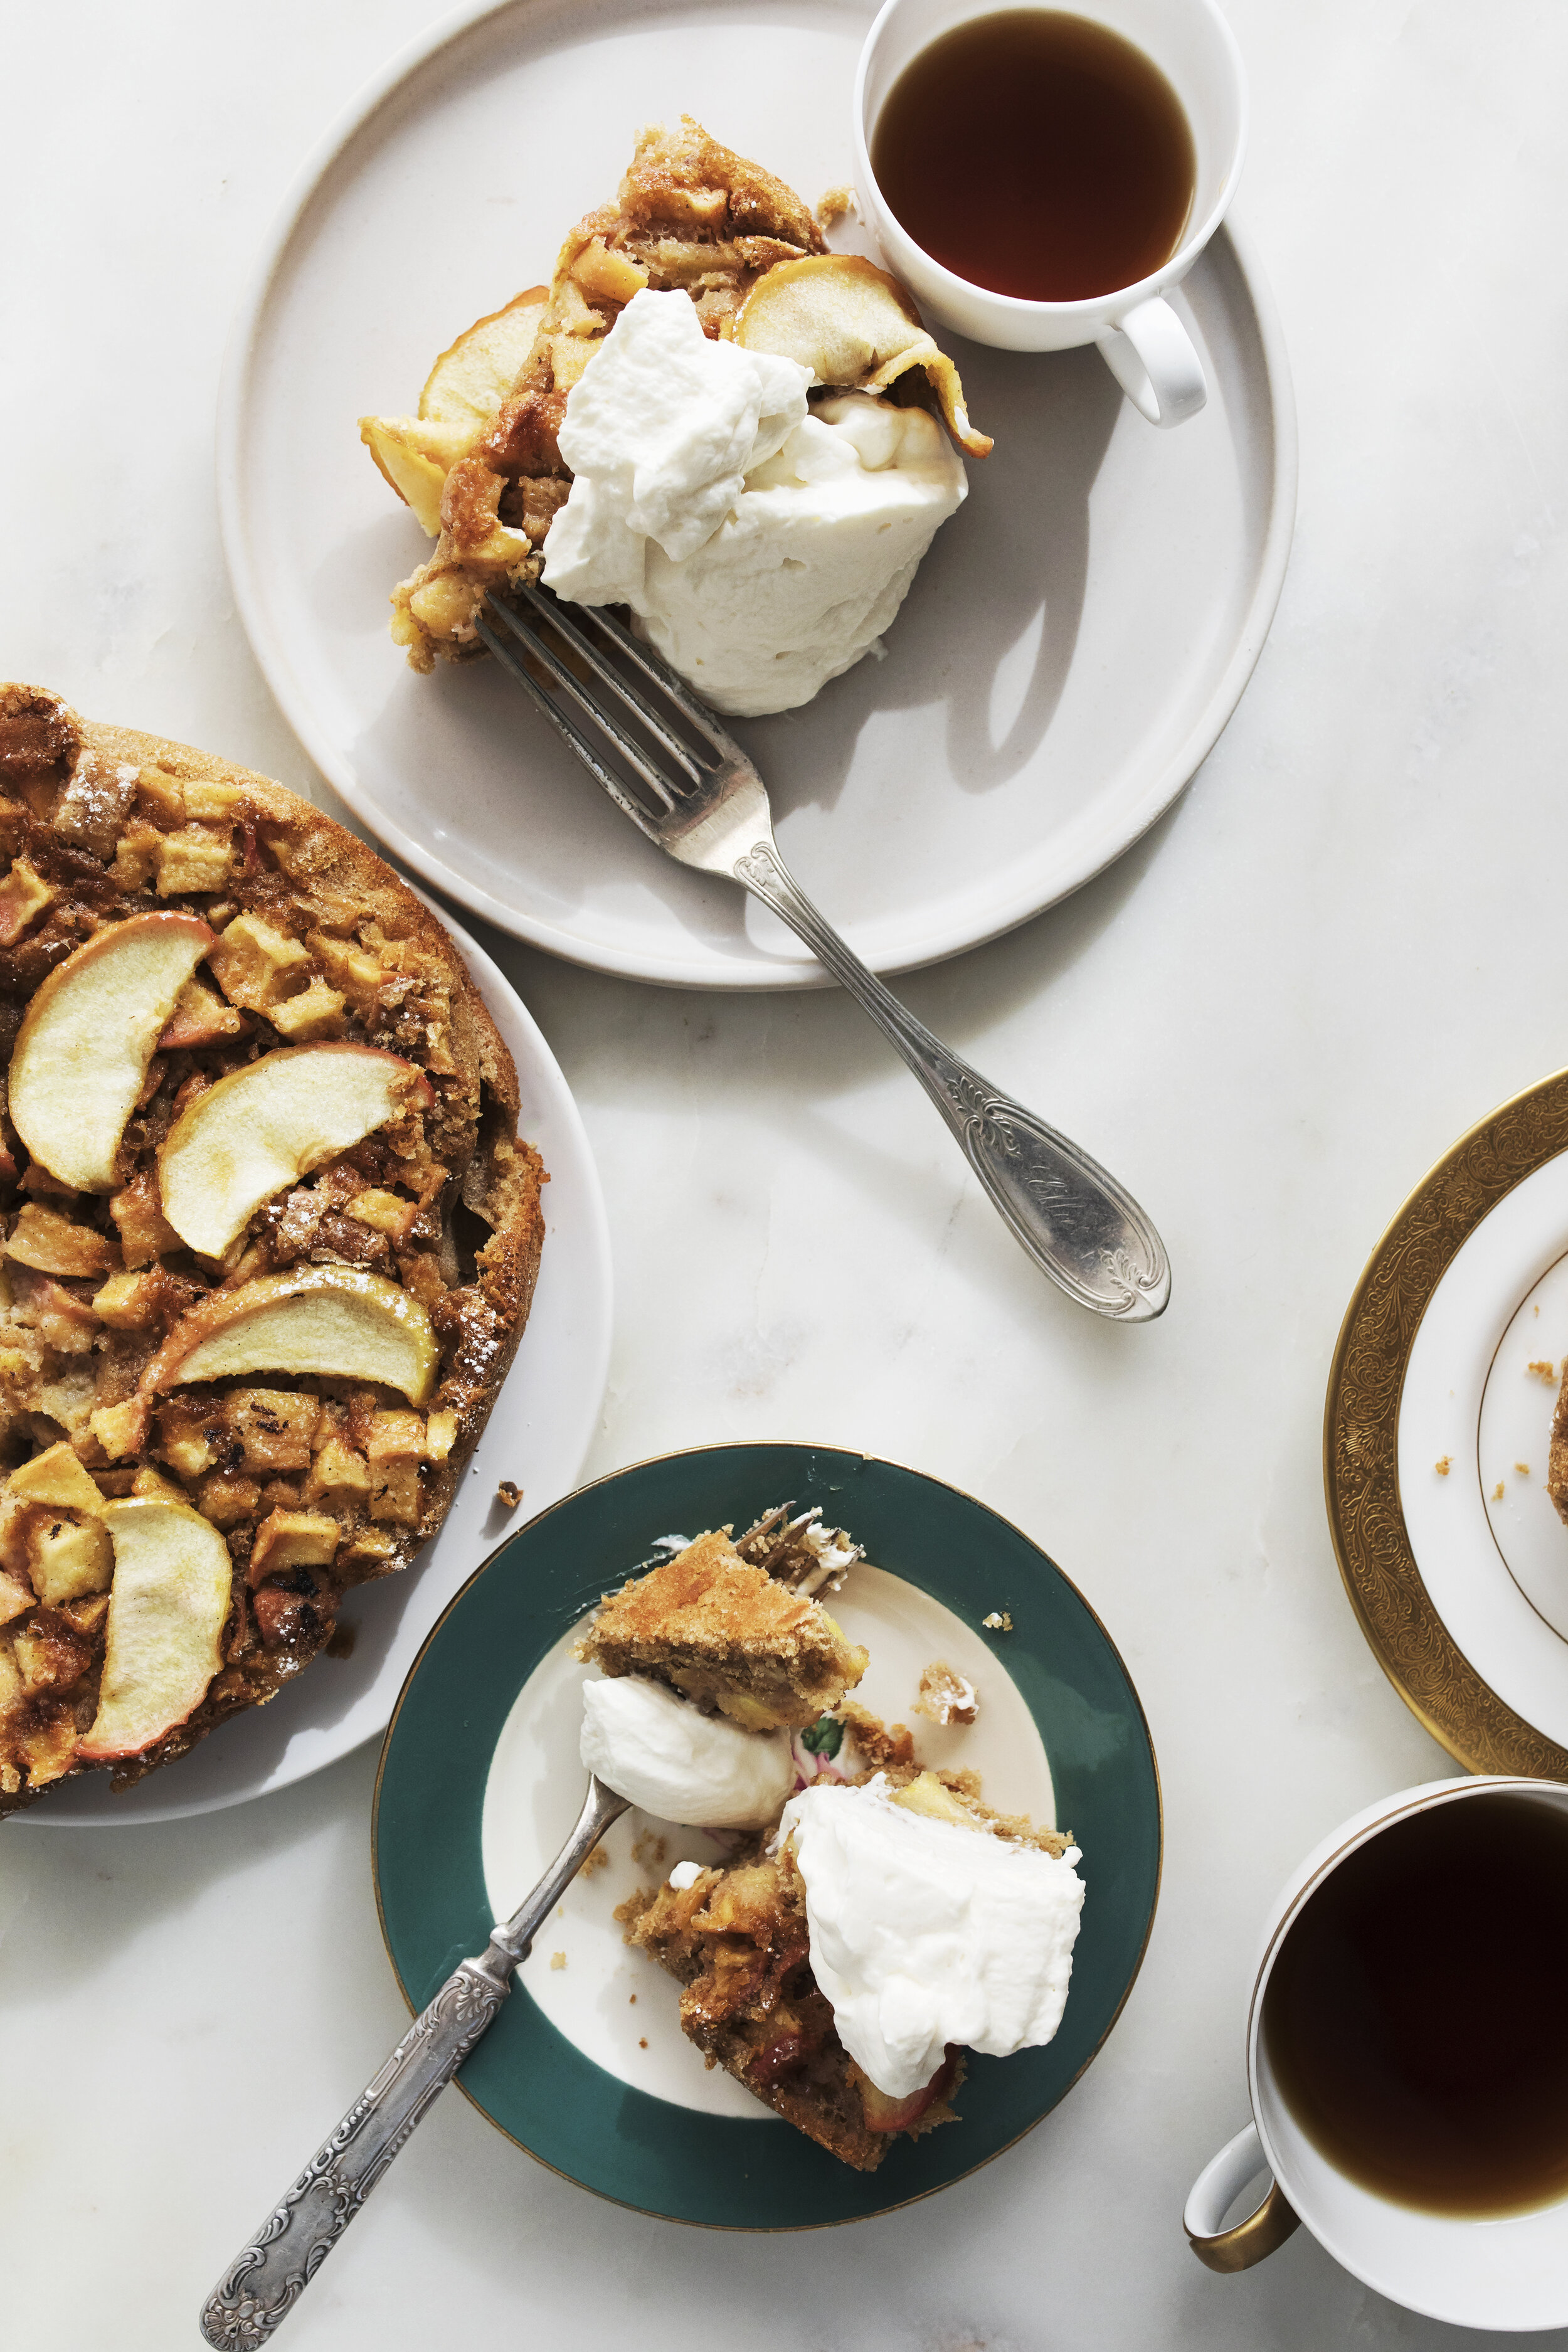
This season has been filled with full-ness, and I think I’ve finally surrendered to it forever being this way, because that is the art of raising kids, having a partner and running a business. Deep down, I think I may go a little crazy if things weren’t always in a state of bustle. In an effort to “ground” myself I made a gluten free apple spice cake, with whipped cream of course... And Scotch, because why not? My fridge was bare last week, because I was taken out by a nasty flu, which unfortunately I feel is still lingering around. I did however have apples, nutmeg, ground ginger, eggs and scotch whiskey. I must confess to you that I felt lazy, and didn’t peel the apples for the cake. Which, I feel it gives the cake a bit more bite to it. And best part, since the cake is baked at 400 degrees, feel free to roast your Sunday Chicken with it. Now lets bake a cake…


lifestyle portrait apple spice cake recipe


Apple Spice cake with whipped cream (Note: this cake is gluten free and dairy free. If for some reason you have an allergy to Scotch Whisky I would switch for another option, like 3 tablespoon of applesauce, or apple cider and Vegan whipped cream tastes just as good as the “real” stuff. )

INGREDIENTS:

  • 3 medium organic honeycrisp apples
  • 4oz ( ½ cup ) grapeseed oil
  • 2 eggs room temperature
  • 1 teaspoon vanilla
  • 1 tspn date syrup
  • ⅓ cup “vegan buttermilk” (to make mix 1 cup of full fat coconut milk, whisked with 1 tbspoon Apple cider vinegar)
  • 3 tablespoons Irish Scotch Whiskey
  • ½ cup plus ¼ cup brown rice flour
  • ¼ cup tapioca starch
  • ¼ cup potato starch plus more for dusting apples
  • ¼ tsp kosher salt
  • 2 tsp grated ginger
  • ¾ tsp fresh ground nutmeg
  • 1 tsp cinnamon
  • ¾ tsp aluminum free baking powder
  • ¾ cup organic cane sugar
  • 9inch metal cake pan
  • Parchment Paper
  • Non-stick spray
  • Stand mixer
  • Confectioners sugar for the top
  • Whipped cream ( vegan or traditional)

DIRECTIONS:

1.PRE-HEAT YOUR oven to 400 degrees F. Crack your eggs and put them in a bowl and set aside. In a 9inch metal cake pan spray with non stick spray, and line with parchment paper. It will need to come up the sides of the pan.(Press it down too). Measure all your dry ingredients, except the sugar into a bowl and whisk. Measure out the rest of your ingredients and get them in front of you. This is called “Mise en place” if you do this before you bake your cake it will go so much easier!

2.Dice and core 2 of your apples. Then thinly slice the 3rd one. Place your diced apples in a bowl, and coat with 1 tablespoon potato starch and 1 tsp brown rice flour. Toss around a bit with your hands.

3.In a stand mixer with whisk attachment, whisk your eggs until light and frothy about 2-3 min. Stop the mixer and add in your sugar, vanilla, scotch and mix for another 1-2 min until incorporated. Then add in half your flour mixture, and half the grapeseed oil, mix for about 1 min, repeat the last step.

4.With a spatula scrape the bottom of the bowl to ensure everything is mixed well, then fold in your diced apples. Pour your cake batter into the lined cake pan, and place your sliced apples on the top in whatever form you'd like.

5.Bake for 46 - 50 min until golden or a toothpick comes out clean. Let cool on a rack for 10-15 min until cutting open. Enjoy with confectioners sugar and whipped cream on top. **

**


SAVERY TOMATO GALETTE RECIPE | GLUTEN + DAIRY FREE | BY NICOLE LEE


Hi Friends,

This summer I’ve been obsessed with experimenting with baking in the kitchen. I’ve also been cooking my way through several cookbooks and having a blast doing it. Not to say there hasn’t been some mishaps but we won’t go into those today. 

Xo

Nicole


galette recipe gluten free tomato

SAVORY TOMATO GALETTE RECIPE | INSPIRED BY RECIPE IN BON APPETIT MAG

HOT TIPS: PIE DOUGH can be made up to 2 hours to 2 days ahead of this recipe. Make Recipe when you have some time, it's great for SUNDAY AFTERNOONS,OR WEEKENDS. If you're pressed for time buy pre-made pie dough. Because we aren’t all bakers and there is nothing wrong with buying PRE-MADE DOUGH.

PIE TART DOUGH INGREDIENTS:

2 cups gluten free brown rice flour
¼ cup potato starch
¼ cup tapioca starch
2 Tbsp coconut sugar
1 tsp kosher salt
1 cup vegan cashew butter (cold cut into cubes)
4 Tbsp unsweetened cold almond milk

PIE DOUGH ADAPTED FROM ARAN GOYOAGA

FILLING INGREDIENTS:

2lbs heirloom tomatoes sliced ¼” thick
3 garlic cloves, thinly sliced
1 bunch of fresh thyme
1 large egg beaten
Good quality extra virgin olive oil
5 oz mixture of finely grated hard cheese combo (Pecorino Romano, manchego, and sharp grass fed cheddar such as dubliner) or any hard cheese that sounds good!
½ lemon zest / 1 squeeze of fresh lemon juice
1 tsp salt
Bunch of fresh basil

OTHER INGREDIENTS: Parchment Paper Non-stick spray 1 large sheet pan

DIRECTIONS FOR PIE TART DOUGH: NOTE: PIE DOUGH MUST BE MADE 1 HOUR AHEAD

  1. Place your cold cashew butter into the freezer for a min while you measure out all of your dry ingredients.

  2. In a large bowl place your dry ingredients. In a seperate cup add a few ice cubes to the unsweetened almond milk to keep it cold.

  3. With your hands gently mix the cashew butter and dry ingredients together until grainy. Add your almond milk and mix together until dough forms. Gently knead together ensuring not to over work. If it feels wet, add 1 tsp of gf flour to the mix, if feels dry add 1 tbsp of more of cold milk.

  4. When the dough forms, pop some plastic wrap over it and refrigerate for min of 1 hour. NO Cheating here!

GALETTE DIRECTIONS:

  1. Preheat oven to 400 degrees f. In a bowl, place your salt and pick off about 1 tsp thyme. With your fingers take your 1 tsp salt and combine with thyme to make a paste. Then add garlic and mix with figures more. Add in your tomatoes and toss together. Let sit for 5 min, while the tomatoes release some liquid.
  2. Drain the tomatoes with strainer, and lay flat onto paper towel.
  3. Grab your dough, unwrap.
  4. Get a large sheet pan and spray with nonstick spray.
  5. Measure out parchment paper to fit your sheet pan, place on COUNTER (not on pan). Lightly dust with flour. Place another sheet of parchment paper over the dough and GENTLY roll out into a round shape. If it falls apart (stay calm) and gently sprinkle water or almond milk over the dough until it combines. It should be easy to roll out, but still be gentle.IT DOESN’T HAVE TO BE PERFECT. WONKY IS OKAY, THAT'S why they call it a galette!!
  6. When it looks even in shape place your finely grated cheese in the middle leaving 1 ½ inch of dough border.
  7. Add your tomatoes and garlic mixture over cheese. Bring the edges of the dough over the filling using your parchment paper to guide it over. NOTE: SINCE this is GLUTEN FREE you have to be EXTRA GENTLE, pretend you are handling a newborn baby!
  8. Crack your egg, and whisk with fork in bowl, blend in 1 tsp flaky salt. With a brush wash it over the edges of the dough (not tomatoes). Then POP in FREEZER for 5-10 min. (Basically depending on how patient you are!) After it’s done, take a bunch of fresh thyme and place in the middle of galette or on the edge of the baking sheet.
  9. Bake on bottom rack for 55-60 minutes until golden. Rotating 1 time.
  10. When finished, enjoy with a drizzle of olive oil, fresh basil and grated lemon zest!

ENJOY and HAPPY baking ANY QUESTIONS feel free to send me a message!


galette recipe

summer tomato recipes

gluten free savory galette recipe

GLUTEN FREE VANILLA BEAN CAKE WITH BLUEBERRY CREAM FROSTING || BY NICOLE LEE


ASHER CAKE small.jpg

The First time I made a cake it was a disaster. Barely working ovens, lead to a burnt cake, that somehow resulted into a frosting with a side of CAKE.  Instead of CAKE with some frosting. At the time, I didn’t have a domestic bone in my body, so of course I used a pre-made Boxed mix and pre-made frosting because why not? After the cake didn’t come out as expected,  I even avoided making all birthday cakes for a LONG time because I was so embarrassed from my first offensive. I was certain I couldn’t bake. Fast forward 10 years later, and my kids are finally begging for cakes on their birthdays, so I accepted their challenge, faced my fear of cake baking and got to it!

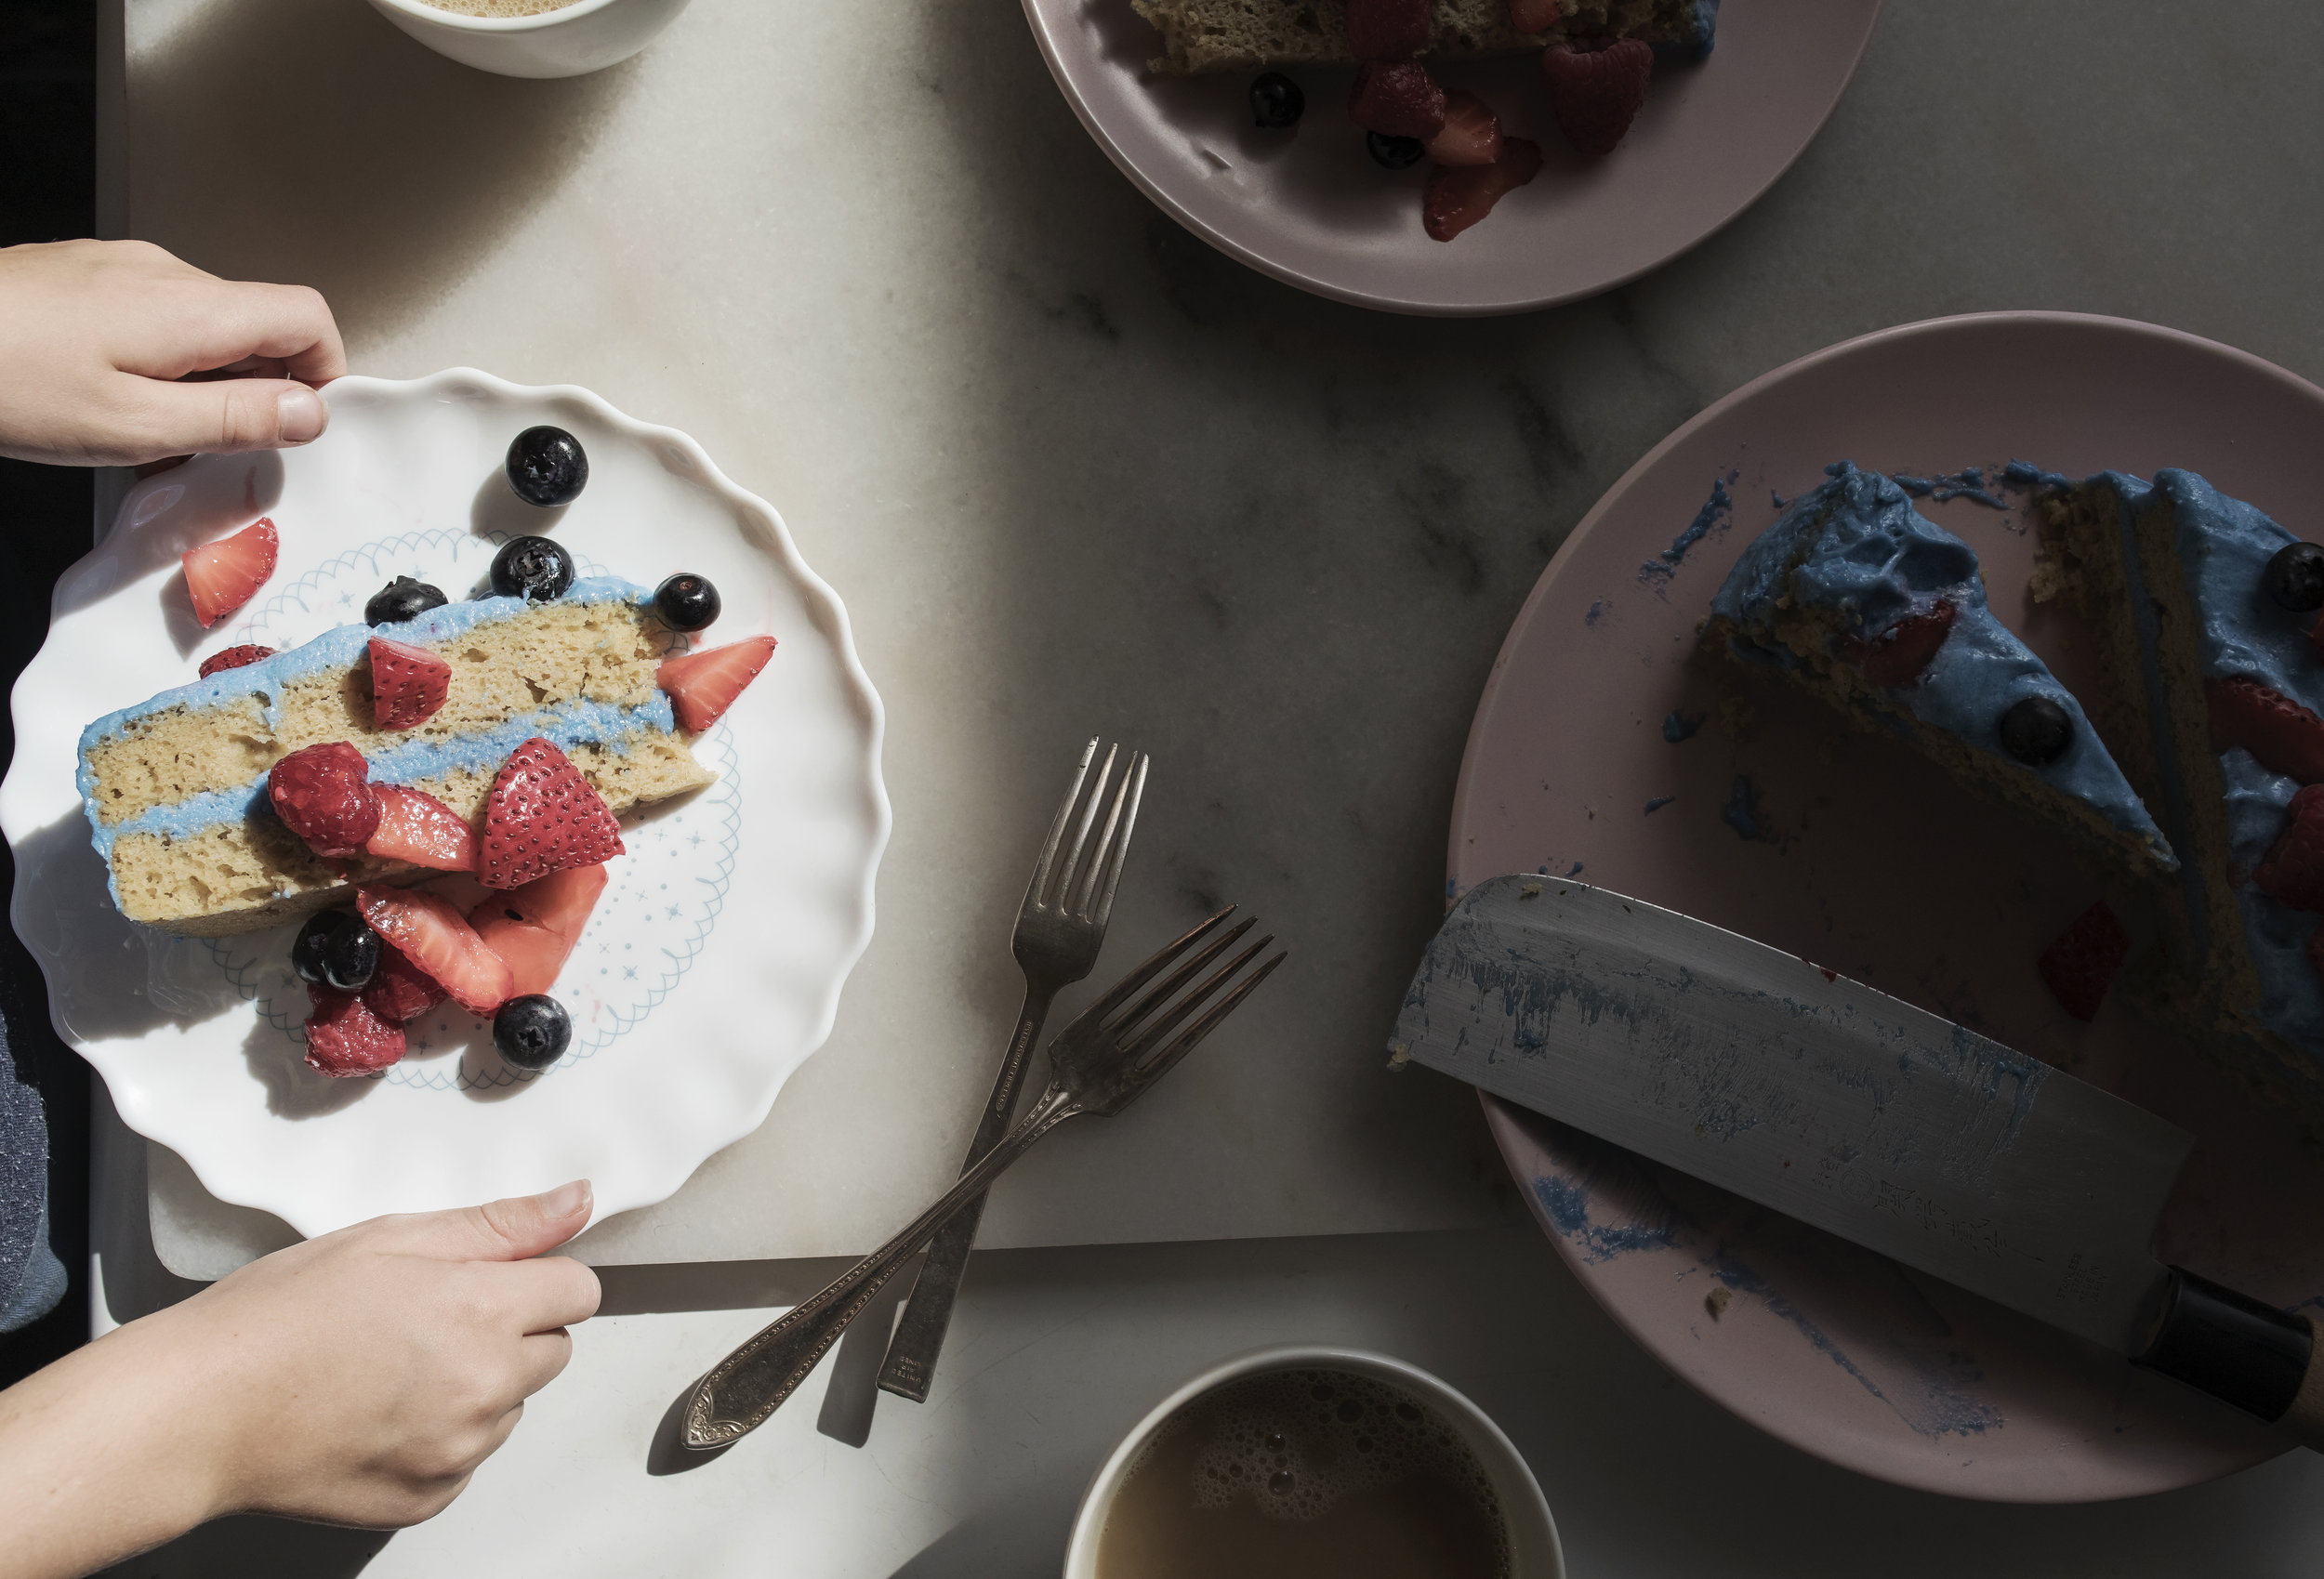
It was Asher’s 8th birthday, he requested a vanilla cake, with blue frosting, and berries on top! So we made cake, with blue frosting and berries on top. And it was heavenly.

Happy Cooking Friends,

x Nicole


ASHER BIRTHDAY 8.jpg

ASHER CAKE 7small.jpg

Gluten free Vanilla bean Cake, with Blueberry Cream frosting

Ingredients:

2 ½ cup bob’s red mill gf flour (1 to 1 blue bag mix)
¾ cups organic sugar
1 cup vegan organic earth balance butter blend
½ cup organic coconut milk
4 large organic eggs
1 tbsp vanilla
2 organic vanilla beans
2 ½ tsp aluminum free baking powder
1 tsp baking soda
¼ tsp sea salt

Directions:

Note: You’ll want all your ingredients room temp.

  1. Measure out all the ingredients and set them in front of you. You’ll need 1 medium to large bowl for the dry ingredients, and your mixing bowl that attaches to your free standing mixer. Sift all the dry ingredients into the medium bowl, set aside.

  2. Cream your vegan butter and sugar on low speed in your freestanding mixer for about 1-4 min, or until it resembles a slight mayo texture. While that is going, crack your eggs into a small bowl. Then stop your mix press down all the sides of your cream and the bottom of the bowl ensuring everything is mixed well. Start the mixer on low and while it's going add in one egg, at a time. Stop mixer, and scrape down the sides of the bowl again.

  3. Slice your vanilla bean pods lengthwise,and scrape out the beans with your knife add them to the mixer. Then start the mix again, add in vanilla, coconut milk. Keep the speed low to ensure you don’t over mix.

  4. While the mixture is going, add your dry ingredients in 3 sections. If need be, stop in between and scrape down the sides again. This just gets everything mixed together without the dough lumping.

  5. Once batter is made, divide it into your prepared cake pans. TIP: spray with nonstick spray, and cut out a circle of parchment paper to fit into the prepared pan.
  6. Bake for 25-35 min until a few moist crumbs cling to a skewer.
  7. To cool, place on a cooling rack until completely cooled.
  8. Ice and decorate your cake.

Blueberry Icing:

Ingredients:

8 oz Vegan Almond Cream Cheese (kite hill is the brand I used)
4 oz organic Coconut milk (cream only, you’ll need to refrigerate for 12 hours beforehand)
1 cup confectioners sugar (sifted)
1-2 tablespoons organic blue food coloring
1 tsp organic vanilla extract

Directions: NOTE: All ingredients must be cold before starting. You will need free standing mixer with whisk attachment. Also, you can freeze your metal bowl beforehand, this really helps the process.

To make, pop all your wet ingredients(except food dye) in your free standing mixer with whisk attachment, on medium speed whisk until light and fluffy about 1 min. Add in your sifted sugar and 1tbsp of food coloring,(if want darker add 1 more tbsp). Whisk again until smooth and creamy. If its not coming together, add more sifted sugar one tbsp at a time, with an addition of 1 tbsp coconut milk.

Frost the cooled cake and enjoy!


ASHER BIRTHDAY CAKE 3.jpg

ASHER CAKE 6small.jpg

ASHERS BIRTHDAY CAKE 1 better.jpg


GLUTEN FREE AVOCADO TOAST RECIPE || NEW TWIST ON AN OLD CLASSIC || BY NICOLE LEE

AVOCADO SANDWHICH 1small.jpg

Hi Friends,

Another week, another slice of avocado toast. I am my own walking cliche to everything Millennial. I consume coffee like water, eat at least one Avocado a day; mashed, whole, on toast or on crackers, dress like a hipster. You get the idea. So why would I stop eating avocado toast, even if some guy say's millennial's are going broke over it

I’m a true believer that the best recipes are the simplest recipes. Toast some bread, mash some avocado, throw spread on it DONE. You have yourself a gourmet lunch or dinner.. Or anytime kind of meal. So if you want to feel fancy, it doesn’t take much, make some toast! I promise you won’t go wrong. Let's make some toast + happy cooking friends!!

-Cheers,

Nicole


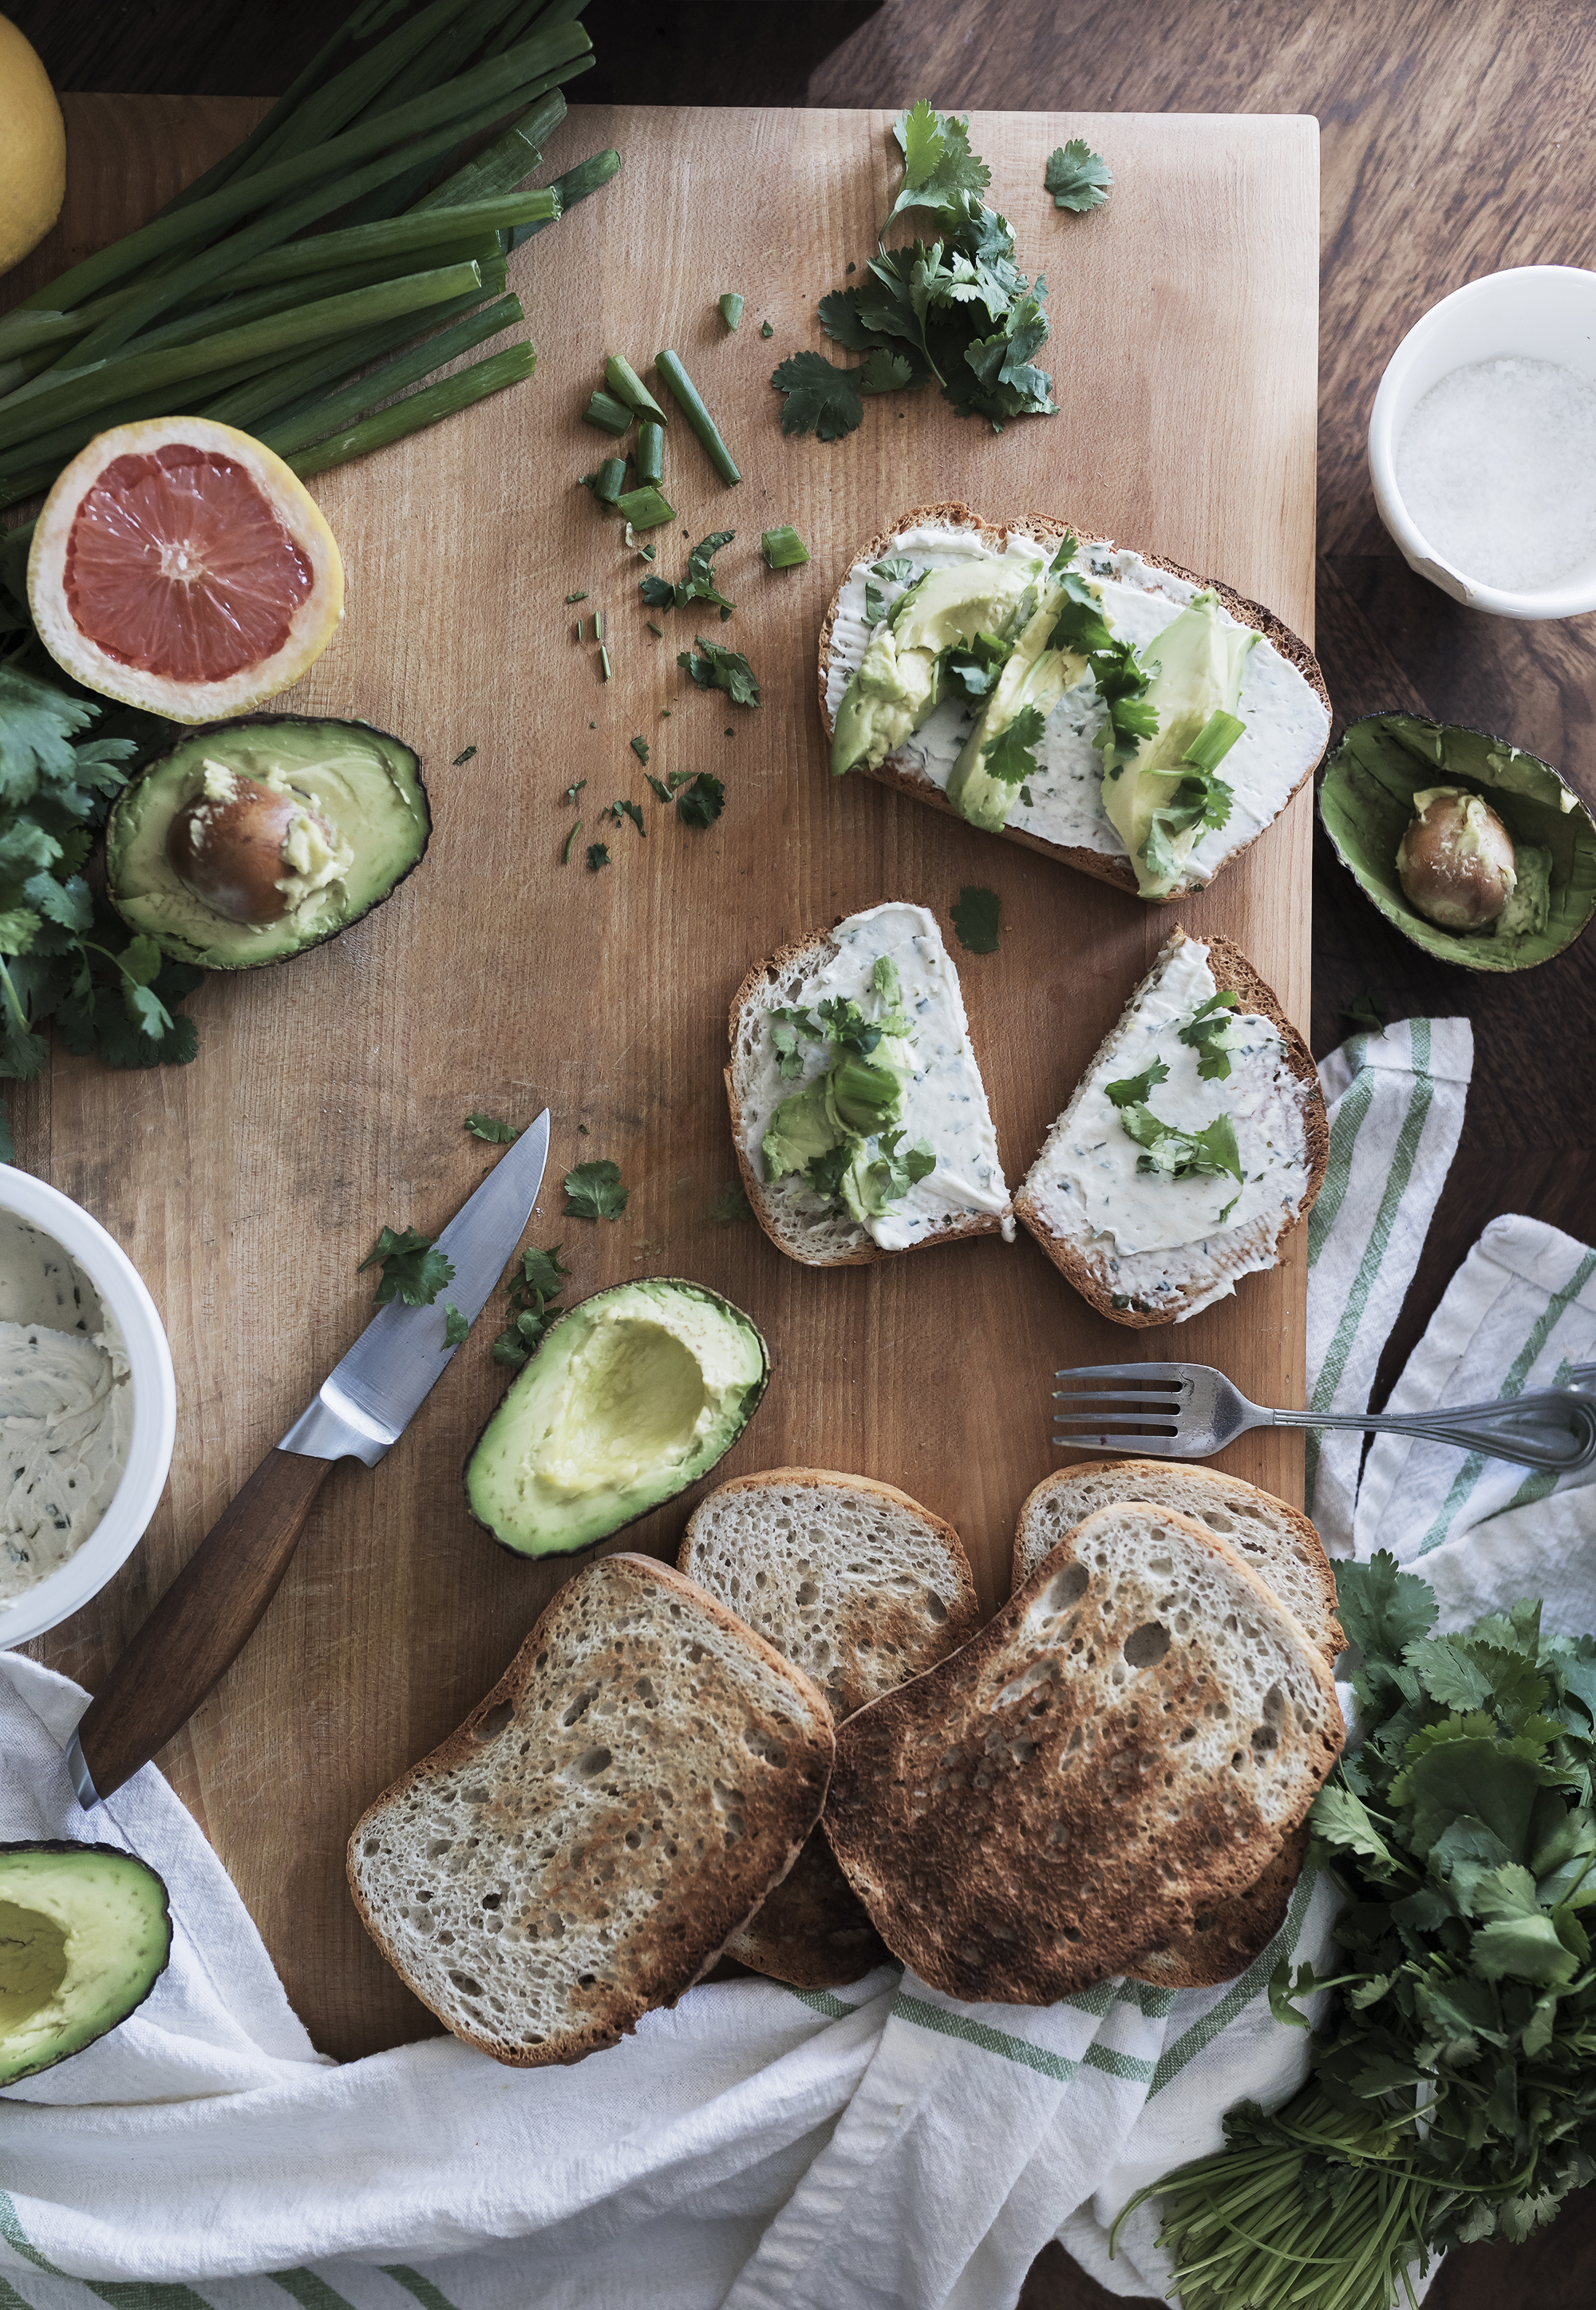
*Avocado Toast with Vegan cream cheese cilantro and lime.


Servings : made to order.. For 1 or can double for more

Ingredients:
2 slices GLUTEN FREE BREAD
2 large Avocados or 3 small ones
1 Kite Hill Vegan cream Cheese (chive flavor is what we used)
1 bunch of fresh cilantro
1 lime
Salt + Pepper
1 tsp Mct oil

Directions:

1.Start by placing all your ingredients on your counter. Get it organized. Slice Your avocado in half, scoop out the avocados with spoon and place in small bowl, mash avocado with a fork + set aside. Next, gently chop your cilantro, slice your lime. Squeeze lime ( about 1-2 tbls) over the avocado, add the cilantro to the same bowl, add salt + pepper to taste. Then add 1-2 tbsp of MCT oil to the avocado mixture. Taste, if it tastes bland, add more salt + pepper, if oily, add one more slice squeezed lime.

NOTE: If don't have MCT OIL - OMIT and DO NOT USE COCONUT OIL it WILL NOT WORK!

2.Toast your bread, while that is going grab a plate. After it finishes, spread the vegan cream cheese on both slices of bread, put your avocado mixture on top and top with cilantro if that’s your jam. Eat open faced and enjoy!


VANILLA DAIRY FREE ICE CREAM RECIPE || TOPPED WITH FIGS AND RAW HONEY || NICOLE LEE FOOD PHOTOGRAPHER


VANILLA FIG ICE CREAM small 2.jpg


Confession,I have a deep love affair with making Ice Cream. Anybody with me?? There is something romantic in the cooking process, therapeutic even. Melting the sugar and vanilla into the coconut milk, watching it do a beautiful dance together, going from two forms into one. When I’m cooking I find myself grounded, in the most natural way. This thing takes over, becoming present in the moment, I’d like to call it Being.

There are times I’d find myself rushing the cooking process. Whatever dish I’d be attempting to cook, didn’t turn out good at ALL. The flavors were off, something was BURNED! What I noticed is BEING is the KEY to becoming a great COOK. If you’re busy doing other things, or your mind is wrapped in endless thoughts during the cooking process, Or you RUSH through it. You bet it will translate into the food. You can taste your anger, and wandering mind, and definitely the burn toast.  I started noticing there was more to cooking than only doing the motions, you have to FEEL it.

Think of cooking like an intimate dance, or making love. Take it slow, feel each ingredient, smell it, and move with the process, MOVE WITH THE FOOD. Turn off all distractions. Focus on cooking ONE thing and nothing else.You don’t want to rush the process, EMBRACE it. Embrace the mess ups to, because we don’t always get it right the first time. When that comes up brush it off, and KEEP GOING.  

Let’s go make some creamy Vanilla Ice cream!

-Nicole xox


DAIRY FREE ICE CREAM RECIPE, Topped with honey and fresh figs.

INGREDIENTS:**

4 cans full Fat organic coconut milk
2 whole pasture eggs PLUS **5 egg yolks **
4 tablespoons MCT Oil 1/2 cup raw sugar or SWERVE ( alternative sugar)
1-tablespoon vanilla paste or Vanilla extract works great
1-2 whole Vanilla Beans

TOOLS: 1 pot (dutch oven), whisk and an ice cream maker)

NOTE: PREP your cans of coconut in the refrigerator upside down overnight! Before you make the next day!

DIRECTIONS:

1.SEE ABOVE NOTE

2.Slice your vanilla beans in half, and with your knife blade scrape out the paste, put in small dish. Set aside. Next, open the cans of coconut milk and separate the fat and liquid. (You can save the liquid for another project, such as coconut water.) Put your pot on the stovetop and set on low heat. Add in the coconut milk, sugar, vanilla paste and beans to the pot. Whisk together until you see chunks of coconut dissolve. Cool liquid to room temperature, and set aside.

TIP: It’s key you keep your liquid warm and DO NOT boil. ( If it boils, take off heat and pop in the freezer for 20 min)

3.In another bowl, whisk together the whole eggs and yolks until light and fluffy. Add into the coconut mixture. Gently whisk again. Then place the bowl in the freezer for about an hour.

4.Once the mixture is cooled put it into the ice cream maker and follow your machines directions. About mid way through of churning add in your chocolate chips, or fresh chopped chocolate pieces berries or whatever you desire. If you keep this vanilla, serve with figs, and raw honey on top. Store in ice cream containers, or a loaf pan lined with parchment paper. The ice cream should make about 2 quarts.


QUICK EASY HOLIDAY PARTY SNACKS || GLUTEN FREE + VEGAN RECIPES || FOOD PHOTOGRAPHER NICOLE LEE


CHEX MUDDY BUDDIE RECIPE

Hello Friends, 

We are in the home stretch of the holiday Season. I don’t know about you folks, but it seems this year has been extra busy. Between all the kids Parties, Family parties, and Christmas, and upcoming New Year's, I may take the rest of January to hibernate. Anyone with me?

Before we decide on that, I’ve got the easiest recipe for you to make. These “muddy buddies” and I go way back. When I started making these I couldn’t even boil and egg, or so much as make a batch of cookies without burning the entire batch. What I'm saying is anyone can make them! This recipe is for the “ultimate home cook” or the people who may not have a clue what they are doing in the kitchen. Recipe is below, Happy Cooking!

-Nicole


GLUTEN FREE + VEGAN CHEX MUDDY BUDDIES RECIPE:

What you will need : 1 family size box Rice Chex Cereal

1 bag of 85% organic dark chocolate chips

¼ cup MCT OIL

1 teaspoon Organic Vanilla extract

½ cup Organic Peanut Butter ( or if allergic omit entirely, add ¼ cup more MCT oil, or ALTERNATIVE NUT BUTTER)

½ cups of Swerve Confectioners Sugar

1 cup Organic Powdered Sugar

1 LARGE saucepan (large enough to mix in 10 cups Chex Cereal)

2 large ziploc gallon bags Or 2 Large Paper grocery bags (for mixing and shaking)

TIP: IF you are looking for the low glycemic version, swap out ALL POWDERED sugar for SWERVE CONFECTIONERS Sugar, it’s one to one ratio. I like to do about half and half.

Directions:

Measure out 10 cups of the rice Chex cereal set aside. In your bag place half of the powdered sugar set aside. Measure out your nut butter, oil, and vanilla. Set aside.

Heat your dutch oven to medium low, pour in your MCT OIL, NUT BUTTER, vanilla and chocolate chips stir with wooden spoon or spatula until all the chips melt, do not stop stirring, it can burn quick. Once Melted TAKE OFF HEAT! Still at the stove pour in your cereal to the melted chocolate , mix until all are coated with chocolate mixture. Then add the mix to your bag filled with the powdered sugar, once in add some more powdered sugar on top of mix, seal and shake shake shake until all coated. If the mixture seems wet, add in 1 tablespoon of powdered sugar, shake again and repeat until it's coated with the powdered sugar. Since we are using all real ingredients, the color may come dark instead of all white, don’t be alarmed. When finished shaking, transfer to parchment or wax paper to cool. Then enjoy!


MUDDY BUDDIES 3small*.jpg

THIS RECIPE WAS ADAPTED FROM CHEX MUDDY BUDDIES

EASY LEFT OVER CHICKEN SOUP RECIPE || FOOD PHOTOGRAPHER NICOLE LEE


CHICKEN SOUP


Hello Friends,

Sometimes the best recipes stem from only what is stocked in the fridge at the moment. You know, when it gets bare and you can’t bring yourself to do another weekly shop. As my kids are growing it seems I am constantly running out of food! So we barely have leftovers, but I do have staple ingredients lying around. Garlic, ginger root, onions, carrots, celery, fresh herbs, always cilantro and basil. In the pantry, canned beans, tomatoes, chicken bone broth and veggie broth stock the shelves. That way when I am in a pinch, I can easily throw something in a pot and walk away, while I  to tend to the chaos of after school activities. Inspired by the classic the many leftovers in the fridge after hosting our first “classic” thanksgiving meal a beautiful hearty soup was born.


Leftover Chicken Soup Recipe

Ingredients:

2 cooked Cornish Hens (or 1 fully roasted chicken)

2 sweet onions

4 celery stalks

2 carrots (I used my roasted carrots from the night before!)

2 cloves garlic

Fresh Ginger (about half the size of your pinky finger)

2 - 16 oz chicken bone broth (free range organic is my preference, I like Pacific Brand or you can make your own stock) White wine (you actually like to drink, I love Sauvignon blanc)

2 cans of cannellini beans (eden brand is great, they pressure cook and Soak them, so they are great on your digestive system)

2 -3 cups of fully cooked mixed potatoes, Japanese sweet, white, red… you get it! (roasted from night before, or boiled then add them to the pot, don’t add raw potatoes to your soup, it will soak up all your broth)

Herbs:

1 bay leaf

fennel leaves

fresh oregano, thyme leaves, sage, rosemary

Salt

Fresh ground pepper

Other things you may need:

Olive Oil, or avocado oil for frying your veg

1 large stock pot, with wide bottom (Dutch oven work great too)

1 wooden spoon

Chef’s knife

Cutting board

Directions:

First chop all your onions, carrots, celery, place in one bowl set aside. Take two garlic cloves with the peel on, place one on your board and with your knife smash down, take off the peel and set aside the garlic. Repeat.

Place your stock pot on the stove, turn on the stove to medium-high heat add in your Avocado oil, when its good and hot add in your onion carrots and celery mixture to the stock pot. Then add in salt and pepper to taste, (small amounts at a time here if you aren’t experienced). Add in your whole garlic. Then Add in ½ cup of wine while the pot is good and hot, then bring the stove down to medium heat. Cook until the onions are clear, then add in both smashed garlic cloves. While that is making magic, roughly chop your herbs and add those to the pot. If things are good and cooked, turn the heat to low.

TIP: Be sure to stir your saute every few min so it will not burn, I like to feel things out when cooking, smell also helps so be sure to use your senses as a guide in the process!

Pull apart the chicken meat and bones, add them to the pot, and set aside the carcass for other use or discard altogether.

Open your cannellini beans, thoroughly rinse and drain beans and put them in the pot. Add in the fully cooked potatoes from last night's roast, ( or pre boiled potatoes). Cut about 1 inch long of fresh ginger root, toss this into the pot whole. Add in your Bay leaf as well.

Give everything a good stir, turn your heat up to high, now it’s time to to add in the bone broth to the stock pot. Let it boil for 5 min on high, when you see it bubbling, give it a good stir and bring your heat down to low and let simmer for min of 45 min - 12 hours depending on when you will be eating. The longer it sits the more time the flavors have to melt into each other. After the 45 min on low heat, you can taste if it needs more herbs, salt or pepper.

Serve with crusty bread and salad to make a glorious dinner!

Cheers

-Nicole

GRAIN FREE "BEAUTY WAFFLE" RECIPE || FOOD+LIFESTYLE PHOTOGRAPHER NICOLE LEE || GLUTEN FREE RECIPE


gluten free waffle recipe

Hi friends,  

How we doing out there? It’s been pretty go! go! go! this summer. We are so close to moving back into our home. Officially we move back in this Friday July 14th. We are feeling slightly bittersweet about it all. The “storms” have calmed down, and the “series of unfortunate events” have been put to rest. Mold gone, plumbing fixed throughout the house, tree that was causing leaky roof, gone ( my apologies mother nature) roof fixed…let me think.. Walls fixed.. Now the house is safe. Amen. Ha. Ryan and I have been cleaning like mad, painting, so the house will be move in ready. There are a few odds + ends I’ll still be sharing on Insta stories ( so stay tuned!) Nothing but clear skies ahead for us with our home. Excited to get back into the kitchen ( well my own kitchen and test some new recipes!)

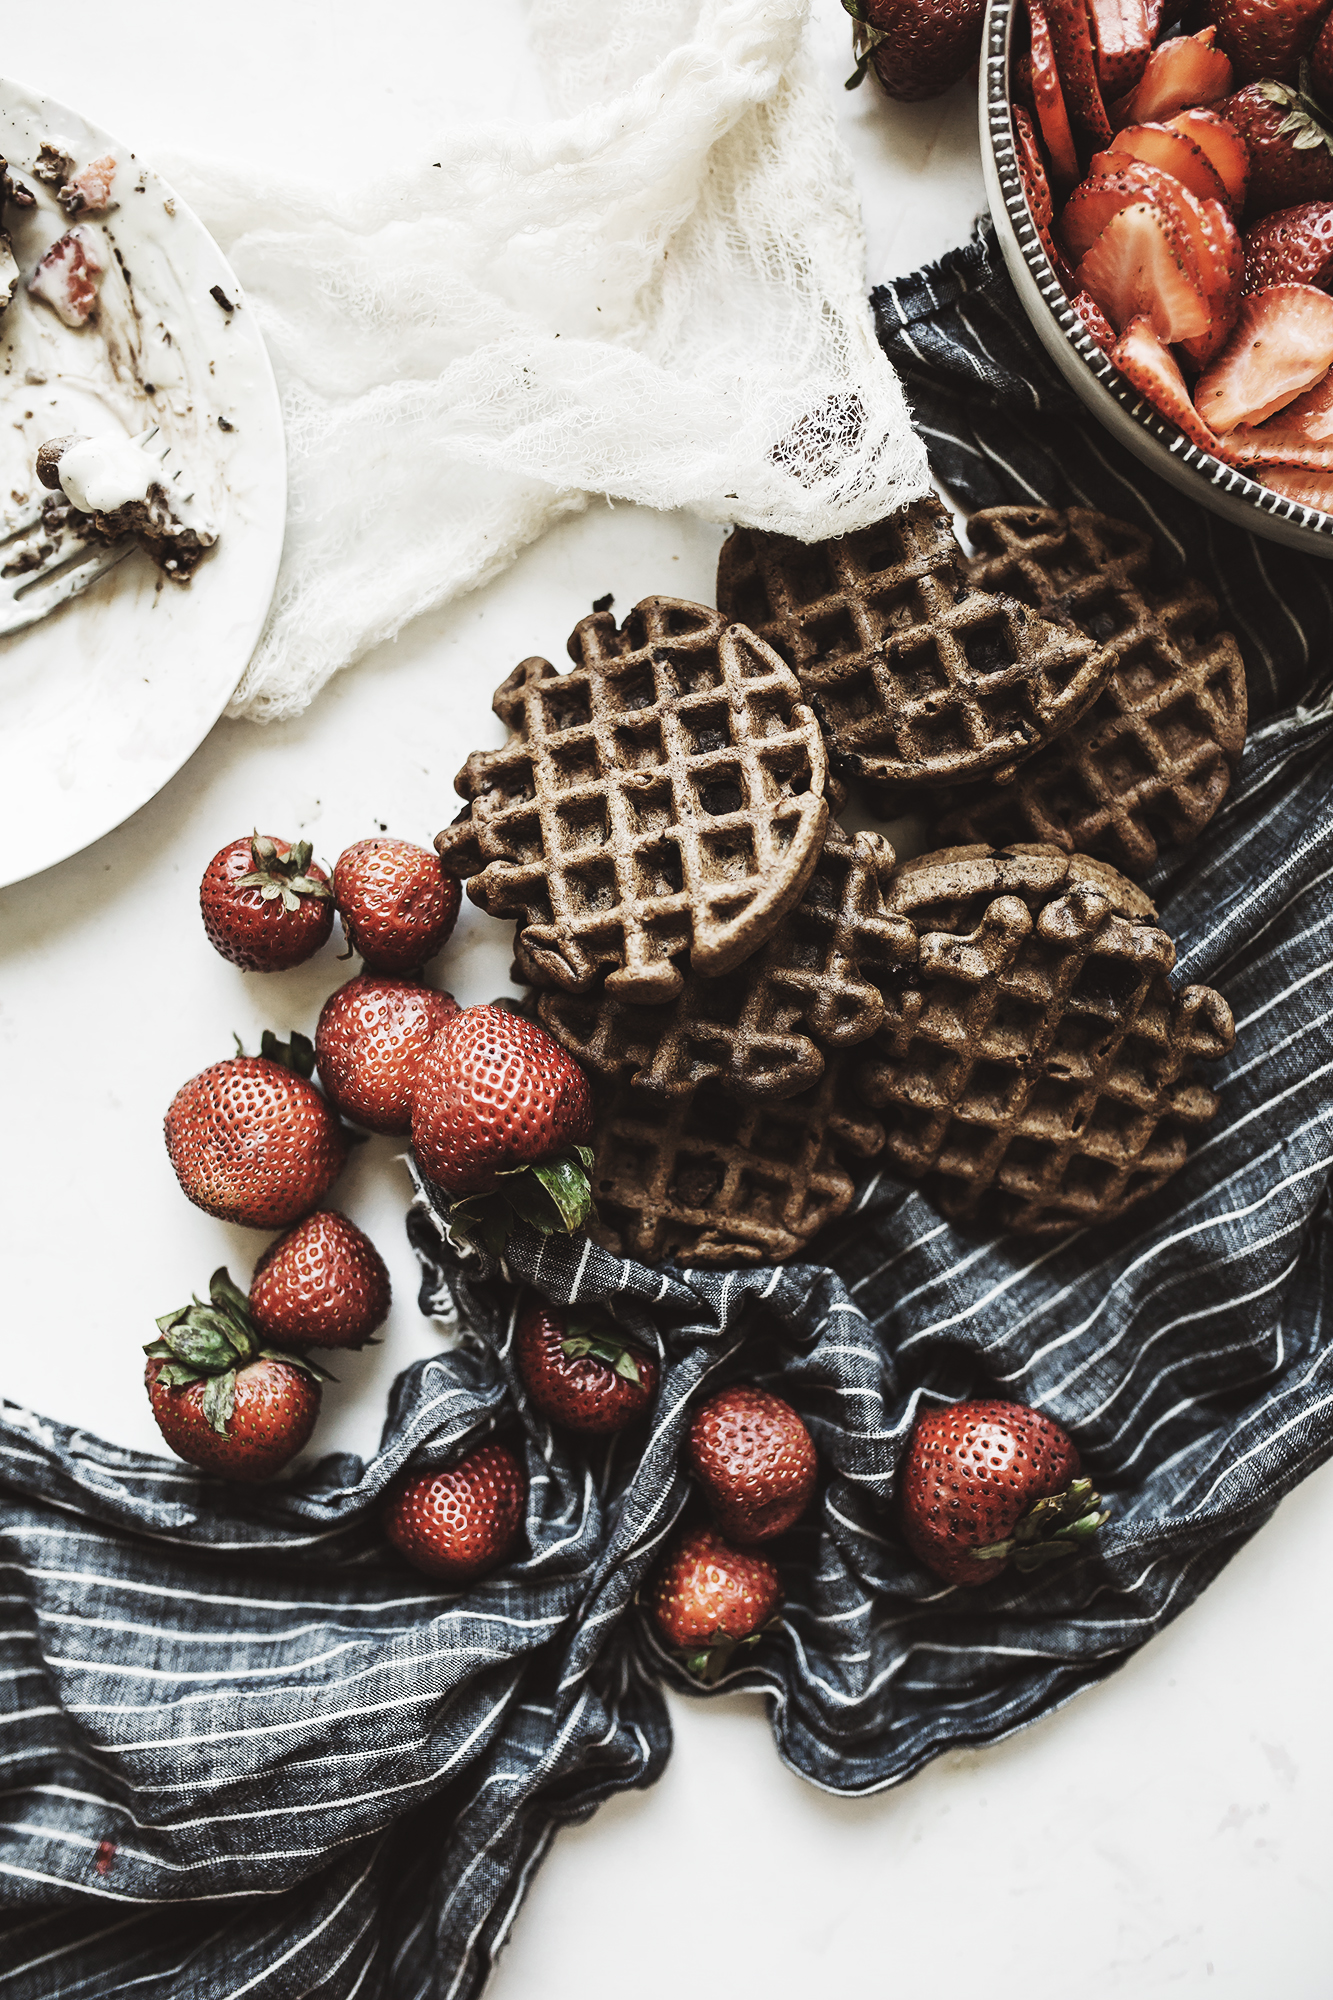
To celebrate our move in, I've been cooking up some waffles. I have been recipe testing like mad these past few weeks with this grain free chocolate beauty waffle concoction. It sure has been giving me a run for my money! “Beauty waffle”? These waffles are filled with all sorts of good stuff, we’ve got, raw cocoa(rich in magnesium), dark chocolate, xylitol sweetener ( no sugar spike + crash), egg yolks (amazing for skin!), Maca ( libido boosting), and flaxseed meal (aids digestion). All mixed together you have heaven, oh and don’t forget the whipped topping! If you are into things tasting good, and knowing the ingredients going into the food you make are full of added bonus give these waffles a try.

-Happy cooking!

Nicole 


waffle ingredients

gf chocolate waffle recipe

Recipe :
Grain Free Chocolate Chip beauty waffles

Ingredients:

Wet ingredients:
3 pasture raised egg yolks plus+ 1 full egg
2 tablespoons filtered water as needed or almond milk
1 tspn vanilla extract or unsweetened vanilla powder

Dry Ingredients:
½ cup cassava flour
¼ cup unbleached almond meal
1 tablespoon High quality Extra Virgin Olive Oil
1 tablespoon MCT oil ( I love bulletproof brand)
1 teaspoon organic cinnamon
½ tspn baking soda
1 tspn baking powder (aluminum free)
1 tablespoon organic raw cocoa (if desired)
2 tablespoons organic ground flaxseed meal ( trader joe’s brand is awesome)
1 tablespoon raw Maca powder ( moon juice brand is my favorite)
1 bag of stevia sweetened chocolate chips or 1 dark chocolate bar (roughly chopped)
1 tablespoon of swerve ( sugar alternative)
1 tablespoon of xylitol

Tools needed: large mixing bowl, measuring cups, wooden spoon, small or large waffle iron, plate or cooling rack.

Directions:
TIP: It’s always helpful to measure your ingredients ahead ( I don’t always do this, but it helps to at least have them all out)

In a small bowl Separate the egg yolks from eggs. Add in the one whole egg. Set aside. Grab your large mixing bowl and add in all the wet ingredients. Lightly whisk the mixture for about 30 seconds. Add in your dry ingredients (except the chocolate chips), starting with the sugars, then add in all the rest doesn’t matter the order. Mix it all up with your wooden spoon. If it looks dry, add in 1 tspn at a time of almond milk ( or water). Add in your chips. ( to your desire, I like a lot!)
Plug in your waffle iron, use the directions on your machine( believe me they are all different)
Start making waffles! Poor a bit of waffle mix into the maker, when the little light goes off you know they are done, but sometimes they may need an extra min. This is where your own judgment comes in. You can also poke them in the middle, and if they bounce back they are done. Note: you can make a few “tester” one and set a timer. This is always helpful.
Place on plate or cooling rack with a piece of paper towel or parchment paper over the top to keep warm.
Chop fresh berries for topping
Enjoy! Add your favorite whipped cream, maple syrup, or nut butter with bacon.

“Whipped topping”:
(Makes 11 oz )

Ingredients :
3 pasture raised egg yolks
2 cans full fat organic coconut cream (refrigerated overnight)
2 tablespoons xylitol
1 teaspoon of organic vanilla extract or unsweetened vanilla powder
1 organic whole vanilla bean
1 -tablespoons of moon juice loose probiotics ( another form of loose probiotics should work)
Vitamix high powered blender

Directions:
1.Place the blender top in the freezer for about 15-20 min. Or until cold enough there is a layer of fog around the blender top.
2.In a bowl open and separate coconut milk fat from the water. (This should be natural as you have put it in the refrigerator). Disregard the water and use for another project!
3. Slice open your vanilla bean, in half with a sharp knife, scrape out the beans and place with your coconut fat.
4. When your blender top is good and cold, take all the ingredients and place in the blender. On the cold setting blend your heart out ( about 15-35 seconds). Check the consistency and if it’s thick ( not too thick) transfer to airtight container and back in the fridge while you make your waffles. (You can also use this cream to have for a late night treat with berries or other goodies. )


Gluten free chocolate waffle recipe

grain free waffle recipe

SAY HELLO! 


Source: www.heydear.co/blog

CHOCOLATE GRANOLA RECIPE || GLUTEN FREE+DAIRY FREE || FOOD PHOTOGRAPHER NICOLE LEE


Hello Friends, 

Chocolate seems to be at the top of my food list, it is only fitting that I would try to add it to almost everything. One of my fondest memories of chocolate was when we used to live in the PNW; we would walk and get a coffee from our favorite shop. I’d order a hot double short latte and on the top they would serve it with a piece of dark chocolate. The chocolate would warm from sitting on the cup. You would have to eat it quite quickly, the melted chocolate followed by sipping your espresso left the most heavenly taste it your mouth.

Lately, I am yearning to recreate moments of food heaven each day. It looks different now. Instead of walking to the coffee shop, I walk into the kitchen. Back then I cooked, but was still getting my bearings down. Lots of burning, lots of undercooked chicken, and lots of baking, I could do that. The baking was easy. Maybe its because the control of the ingredients lead as a guide of safety and comfort. “ Actual recipe development, seemed scary as you had to move with the food, no rules, just feelings. Food makes you feel. It’s instinctual. You are forced to do a dance, taste, smell, and engage with it. Or else you get a burned hot mess; this took me years to sort out. I just kept cooking, and trying. Lots of repetition, as I was learning I would cook the same dish every night until I nailed it! Ryan would ask “ what’s for dinner, I would say – roast chicken and veg! He replied without grumble, SPLENDID! Along with my encouraging husband, the other helper I had was “the naked chef” (AKA JAMIE OLIVER) he taught me how to: boil eggs, make curry, make soup, homemade pizza, what herbs were, and even nail a good granola. Once I sorted out how simple cooking could be, it all came together. Recipes became effortless. 

So, I want to share my take on good ole granola, it’s easy and the best part it takes 15 min to prep!


CHOCOLATE GLUTEN FREE GRANOLA RECIPE// (Makes about 1.5 gallon bag)

You will need: 2 baking sheets, unbleached parchment paper, mixing bowl, spatula, small saucepan

*INGREDIENTS: *

  • 1 cup nut butter (almond, cashew, peanut or no nutz)
  • 6 cups gluten free rolled oats
  • 6 tablespoons coconut oil
  • 1 tablespoon vanilla bean paste
  • 5 ounces high quality dark chocolate (chopped)
  • 3 tablespoons brown sugar
  • 5 tablespoons high quality coco powder
  • 1/2 cup raw honey
  • 3 tablespoons cinnamon
  • 1 tablespoon ground ginger
  • 1 tablespoon nutmeg
  • 1 cup chopped almonds and cashews
  • 1/3-cup chia seeds
  • 1/3 unsweetened coconut flakes
  • 1 teaspoon sea salt (or kosher salt)

Directions:

Pre- Heat your oven to 300 degrees. Line your baking sheets with parchment paper. Set aside.

Measure out ingredients, and in a bowl place: gluten free rolled oats, cinnamon, ground ginger, chia seeds, coconut flakes, brown sugar, nutmeg, chopped nuts, and salt mix a little with a spatula. Set aside. Chop your chocolate, set aside.

Take your small saucepan and put on medium –low heat. Add your coconut oil, nut butter, raw honey, and 5 tablespoons of coco powder. Mix constantly, until melted and blended together. Take off heat, add in the vanilla paste and mix in. Pour mixture over the rolled oats mixture and thoroughly combine until the oats are completely coated. Add chopped chocolate, mix.

Finally spread evenly over the parchment paper lined baking sheets. Place both trays in the oven, Bake for 15 min. Let cool completely for about an hour. Store in gallon bags, or mason jars. Store in the refrigerator for up to two weeks!

To serve, you can enjoy with nut(or raw) milk, fresh berries like raspberries, strawberries, or blackberries. This granola, also tastes great over ice cream or just by it’s self!


CHEERS, 

NICOLE 


CHECK OUT MORE ON INSTAGRAM :