


IN HOME INTIMATE COUPLE PHOTOS // AASH + RACHEL // SOUTHWEST PHOTOGRAPHER NICOLE LEE / HEY DEAR / ARIZONA/ TRAVELING
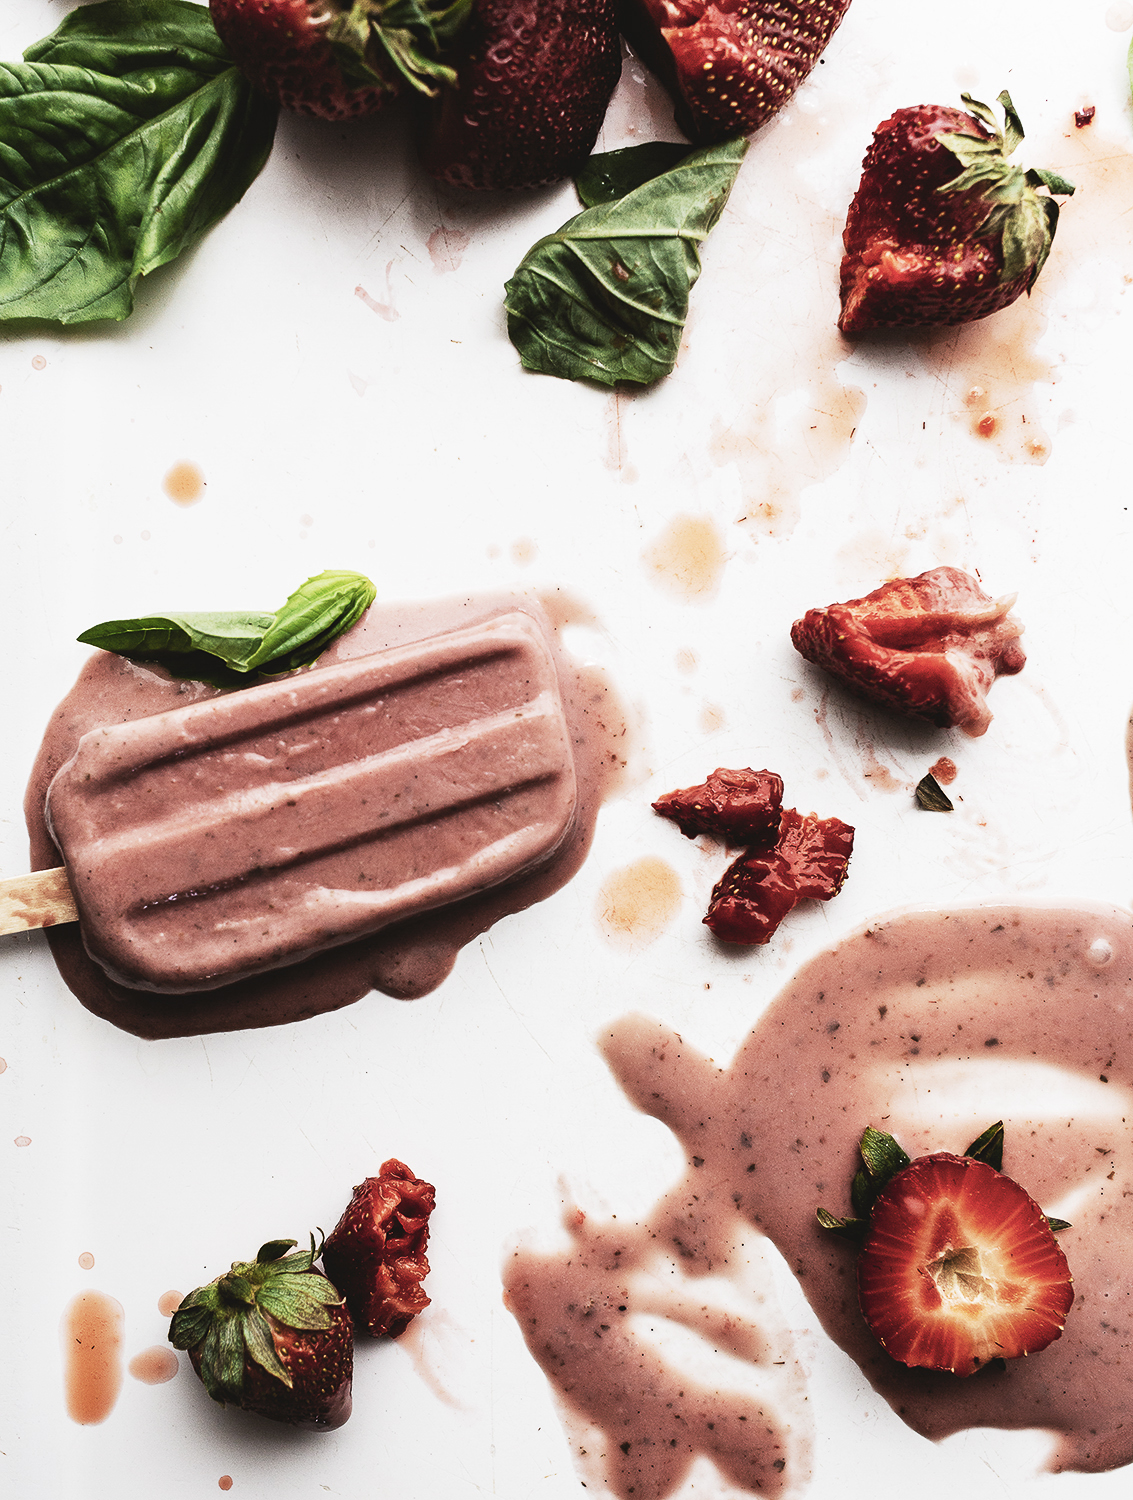
Strawberry-Basil and Coconut Popsicle Recipe// Arizona food Photographer Nicole Lee

Hi! Lets start there. I wanted to take a moment and reintroduce myself. I’m Nicole. I am a photographer, home cook, Mother, jack Jill of all trades kind of girl. Last year, I started pursuing photography full time, I had no idea “what” "where" or "how" I was going to get there. Becoming a Photographer that is. Looking back I was quite the hot mess, sometimes I still feel that way ha. But Over the last 6 months I have found some clarity in it all.
When you first start you have a hundred people chiming in your ear, which I am thankful for. They say words like branding, Marketing, Direction, Specialize, Who are you? What are you, how are you going to be successful? What do you charge? Can you do a headstand, then 100 jumping jacks, and snap a shot of me doing one to?
Then you have doe eyed me, blank faced and speechless…queue the crickets please…
I had no idea how to answer any of those questions. I just thought, well I have a camera, I like to take photographs, I like food, and I like people. It is that simple. (But it wasn’t) So many other creatives make it look so simple, truth is I wasted too much time focusing on how to ‘make it' I missed all the key steps to getting there. I just got in the way of myself! I’m sure you have been there.
Then Last April, I ended up taking the most amazing trip out to Seattle and attended the Survival Guide Workshop, by John Keatly. It saved me. I am not kidding around here folks.
He taught us how to market, do business, charge people properly, become a real sustaining brand, and he taught me how to take a risk, to start putting my feet on those stepping-stones. We also had killer food, and pop quizzes. It’s not your average workshop. Plus, I walked away connecting to some supportive friends, some game changers who being the new girl, and they didn’t stomp all over me, they embraced the underdog.
For the last year, I have been able to put myself out there, gain some confidence, say I’m the girl for you, (or not). I’m getting clear on who I am which; in fact you do need to know if you are a creative. What am I willing to say no and yes to, as well as be humble enough to do the odd jobs while I get my feet off the ground.
So where am I going with all this? Well I am saying, If you are struggling creative, don’t give up, figure out what you need to get better at and find someone, anyone, or you tube how to get from here to there. Second, I’m just so freaking excited that all the little steps are coming together.
Now go make some popsicles!!
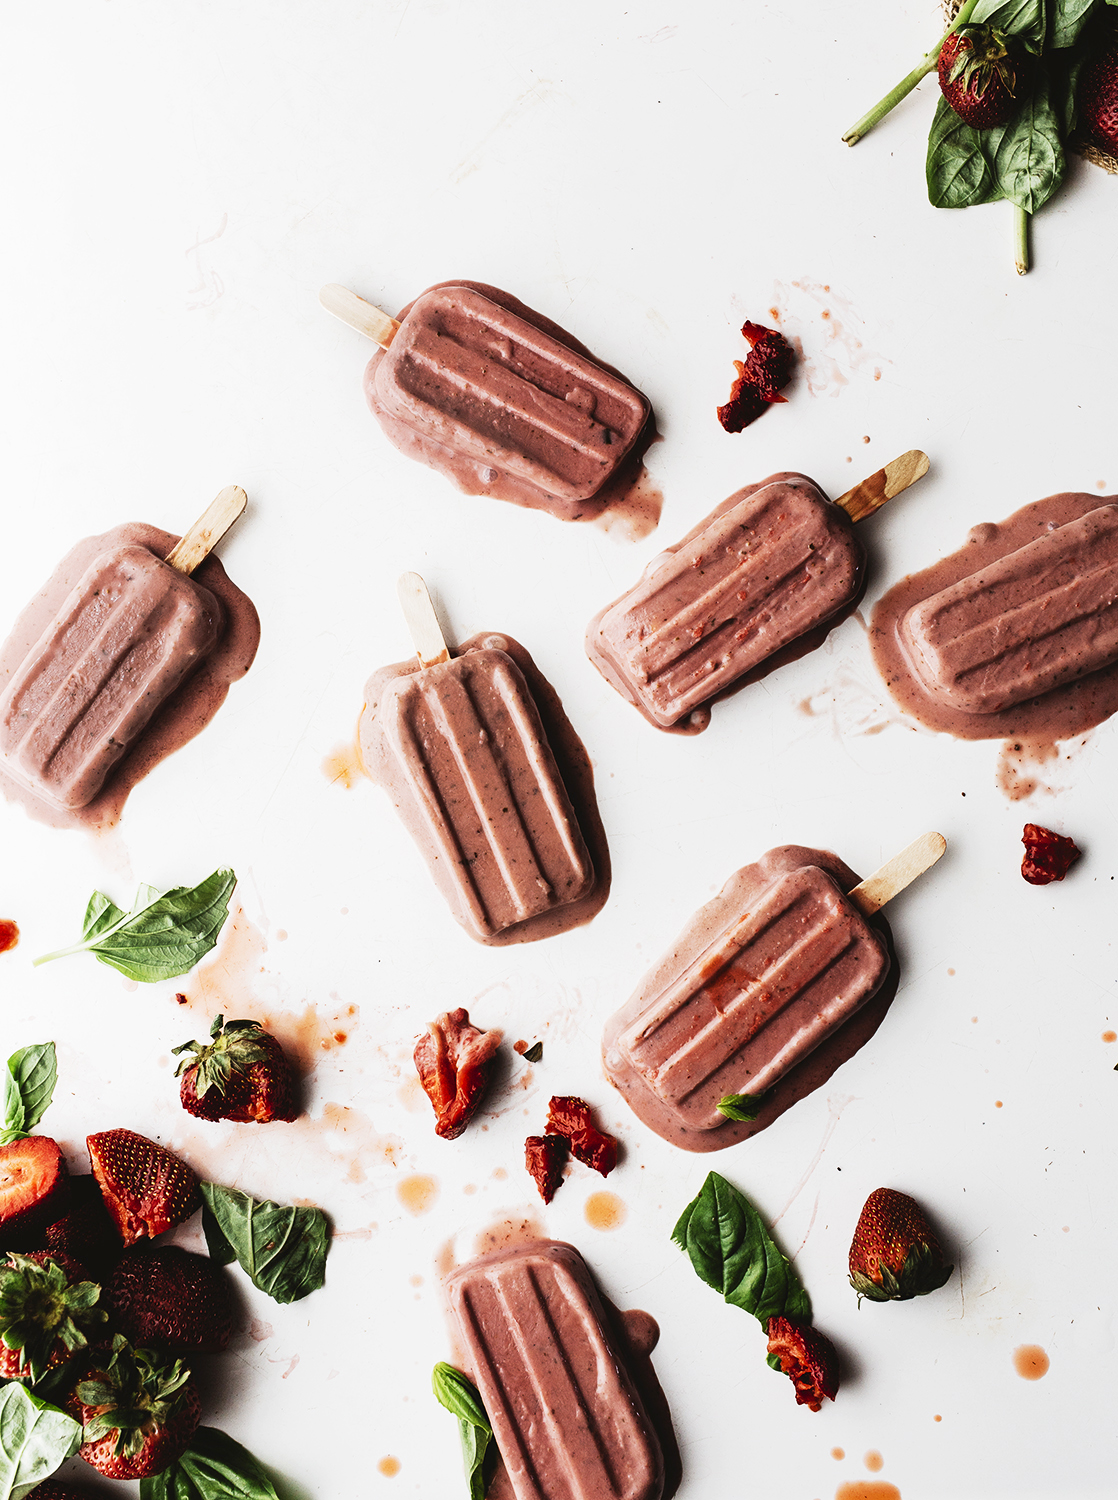
Strawberry Coconut Popsicle Recipe
Makes 12 Popsicle molds
Ingredients:
4 cans full fat coconut milk (chilled in refrigerator)
2 lbs strawberries (fresh or frozen)
3 eggs
1-tablespoon vanilla paste
1 bunch fresh basil
2- 3 cups raw sugar
1 tsp. fresh squeezed lemon juice
2 trays of Popsicle Molds
Directions:
Clean and Cut the ends of the strawberries, set aside. Measure out the sugar, the vanilla. Open the cans of coconut milk and separate the fat. Measure the fat out to 2 cups. Set aside the coconut water from the cans. Prep the basil, cut off stems and gently chop up.
Put a large pot or Dutch oven over medium heat on the stove, place a small tsp. of olive oil, and cook the strawberries, sugar, and lemon juice together. You will want to stir frequently, until all the water comes out of the strawberries. (About 5-10 min) Add in the basil and vanilla paste. Cook for another 5 min.
You know it will be finished when the strawberries aren’t as tart, with a strainer take out the strawberry mixture from the pot, place in a blender and blend until smooth.
Set aside the left over liquid from the mixture.
Put the coconut milk into the pot, add in the strawberries, cook until everything is smooth and no lumps are shown.
Take the strawberry coconut mixture off the heat, stir in the 3 eggs, taste to see if needs more sugar, or strawberry, or even more coconut. You want a smooth creamy strawberry flavor to come through.
Once finished, add your mixture to your molds. Freeze for 6-12 hours depending on your freezer, and enjoy!!
easy granola and vegan whipped cream recipe

Lets chat about business. I want to be real for a min as well; it’s not as easy as everyone says it is. Its one big game, even if you are prepared for the test. Business is a bitch.
Sometimes I find myself having a clear direction and path, along with creative ideas energy, then I get in the way of myself.
I get insecure, I want approval, and I have a hard time jumping into my ideas because of the things that happened in the past. (Which I am working on not doing.) Do you know what I mean? By getting in the way of yourself?

For the last 2 weeks I have been on what I like to call a creative high. Upward spirals, downward spirals, and so many “great” ideas my head may burst into a thousand tiny pieces. I want to get them all done, right now, at this moment, I cant seem to get the pen to paper fast enough, I’m brilliant. And then not….
So I say farewell to insecurity, and would like to say I’m diving off the board, into the deep end. Sink or swim, Join me on this ride?
Vegan Whipped Cream
Ingredients:
2 Cans full fat organic coconut (chilled in refrigerator the night before)
About ½ cup of organic confectioners sugar
1 teaspoon vanilla paste
An electric mixer, or kitchen aid with a whisk attachment and metal bowl
Directions:
Fill your metal bowl with ice, dump out after about a minute. Open your coconut milk, the fat and liquid should be separated, at this point dump the liquid in a jar and save for later. (you could make coconut water or use for a sauce) Take the coconut fat and place in the bowl, then add in the vanilla paste, and the powdered sugar. Turn your machine on low for about 1 min then speed it up for about 2-3 min. You want to get a lot of air in there to get it nice and fluffy.
Once you see the consistence change into airy and light , you have your vegan whipped cream. (Taste it to see if it needs more sugar. )
Gluten free Granola:
Ingredients :
¾ cup avocado oil
6 cups old fashioned gluten free rolled oats
1/3 cup honey or coconut sugar
1 tablespoon light brown sugar
1 teaspoon vanilla paste
1 tablespoon cinnamon
1 cup chopped roasted almonds
1 pinch of salt
Directions:
Preheat the oven to 325 degrees. Line a large baking dish or cookie sheet with parchment paper.
In a mixing bowl, whisk together; oil, honey, brown sugar, vanilla paste and salt. Once this has mixed add in the oats, nuts, and cinnamon, stir all together until combined.
Then place evenly spread the mixture onto your lined baking sheet. Bake for 25-35 min or until golden brown. When finished, cool for about an hour, then break apart into chunks. This can be stored up to 2 weeks (if it lasts that long!)
Cheers Friends - Nicole
GLUTEN FREE OLIVE OIL CAKE - RECIPE

Sometimes I wish I could start a blog post with romantic words of my childhood, about how my grandmother was the one who taught me to bake. Or I was in the kitchen most of my childhood, or we grew up on a farm and I frolicked with the horses. Then I know I wouldn’t be me and that living on a farm would just be boring. I look back and wonder how did we (my sister and I make it out alive?) Just barley hanging on, but we did.
Instead I had what you would call an unconventional childhood. Ups downs, Parents spending too much time arguing, not on a farm but in the neighborhoods in the worst parts of town. We moved a lot, I mean a lot. By the time I was 16 I had a least moved into 16 different houses. Its not like we were in foster care or something, my father didn’t know the concept of what pushing through meant. I think he did it because he thought that would fix things, what he didn’t realize is that his problems followed him wherever he went.
Then there were the things that stuck, they told me you should do sports, so I did, I “failed” I had anxiety. (Did you know children actually could develop this at the ripe age of 6 or 7?) My father said you aren’t a natural athlete, tear me down sometimes, but I kept going, and failed with integrity, I knew I gave it my all. With no guidance my father would just say, “go out there and go do it, on your own”. Old fashioned? I see the value you in what he said, but as a parent now, there is a fine line for telling your child to figure out life and help them learn something like baseball. Which are both valuable in my opinion.
I mush have been about 9, or 10. It’s all blurring together. I decided I wanted to succeed; I focused on what I could succeed in. I organized a food drive at school, I went above and beyond at my studies, and I even was a band geek and practiced my clarinet so much my lips were numb. I was lucky enough to have attended some pretty awesome schools in NY, we had all sorts of programs, I found art, I fell in love with it; life was looking up. My goal was to catch up, catch up to the rest of my peers so I could fit in. You know what I am talking about?
Have you ever Read the book Matilda? When I read it in 3rd grade it changed my world. I had someone to relate to, this girl she gets me. Our worlds were the same. Her parents where off in “la la land”, while she did it all; taught her self things, took care of the house, so on. That’s kind of like me. I just learned how to take care of myself, while they checked out.
Once I found out I really enjoyed baking things really changed. See baking is for the controlling person. You have to be meticulous on measurements, ingredients, and the oven temperature. Really pay attention to every detail, follow the recipe, if not, it fails. I think I liked it because of exactly those reasons. I would be lying if I said otherwise. See since my world was out of control, I used cooking/ baking to control something in front of me. Sure, there were times I burnt things, and when it didn’t come out right the first time I would be upset. But I didn’t give up. See, I am a determined person, someone who dreams big, but in a practical way. Why would I throw in the towel so quick? That would be too easy..
Now, I have a few things I am still in the process of learning; Gluten free baking is like a science experiment, you have a million failures, then the day comes you crack the code. That it’s a choice to “check in”, instead of “check out” when it comes to parenting. Parenting in its self is a beautiful dance that it doesn’t have to be as complicated as we make it out to be. Lastly, that you can have your cake and eat it too.

GLUTEN FREE OLIVE OIL CAKE
RECIPE:
Ingredients:
Vegan Butter, for the baking dish
6 large eggs
5 cups raw sugar
3 cups extra virgin olive oil
5 cups gluten free, 1 to 1 flour mix
plus extra for the dish
Parchment paper
2 teaspoons baking powder
½ teaspoon baking soda
½ teaspoon salt
Juice of ½ lemon
Grated zest of one lemon
1 can of full fat coconut milk chilled
2 medium apples
Directions:
Preheat the oven to 350 degrees F.
Butter and flour the pan with parchment paper.
In a large bowl or electric kitchin-aid mixer whisk, together the eggs and sugar. Stir in the olive oil, coconut milk and lemon zest.
In another bowl, sift together the flour, baking powder, baking soda, and salt. Slowly add the wet ingredients to the dry, stirring until just blended. DO NOT OVER MIX. Pour the batter into the prepared cake pan.
Place the lemon juice in a large bowl. Peel the apples, and slice very thin. (If you have a mandolin that would work to) Drop the apples into the lemon juice to prevent browning, and arrange the apple slices on top of the came batter.
Bake the cake for 1 hour and 15 min, until golden, or until a toothpick is in the center and comes out clean. (the baking time may very. If it needs more time put a tent with foil around the cake and continue baking) Cool in the pan before un-molding.
(This recipe was modified from Sunday Suppers, if you don’t have food allergies you can find the classic recipe in the cookbook!)
Cheers friends, happy baking.
-Nicole


Gluten Free Chocolate Peanut Butter Ice Cream Sandwiches


How to make an ice cream sandwich Part 2
Recipe:
Gluten / Dairy Free Chocolate Peanut Butter cookies
Ingredients:
2 Vegan Baking butter sticks
2 Cups brown sugar
2 Room temp. Eggs
1 ¾ cups Gluten Free Flour
2/3-cup Raw Cocoa Powder
2 teaspoons Baking Soda
5 Ounces Finely Chopped Good quality Dark Chocolate bars
1 cup Peanut Butter
1 teaspoon of vanilla
Directions:
In a large bowl, or kitchen aid mixer, cream the butter, brown sugar, vanilla and eggs. You will know when it is done because the mixture will be fluffy and airy.
Next add in baking soda, gluten free flour, and cocoa powder until combine. Add in your peanut butter and chopped chocolate.
Cover the dough with airtight seal, such as plastic wrap or a container. Let sit in fridge for 1 hour or up to the next day.
Preheat the oven to 350 degrees F. Line a cookie sheet with Parchment paper. Place about one tablespoon of dough onto the baking sheet.
Bake for 10-12 min, turning your cookie sheet halfway through bake time.
To make the Ice Cream Sandwich:
½ pint or pint of vanilla bean ice cream(make your own, or choose your favorite store bought)
6-12 gluten free chocolate peanut butter cookies
Spoons
Ice cream scoop
Take your cooled cookies facing down, spread ice cream layer on each side. Then smash together. Cover with plastic wrap and store in freezer. Repeat until all the cookies are gone!


Hipster Affogato Recipe : Coffee with Ice Cream, Nicole Lee

Some may say my obsession with Coffee is only because I am a millennial. Or I’m a hipster. All we do is sit in coffee shops and waste away our days. Now I think people have our generation all wrong, we appreciate things, where they came from, how they are made, how they taste so on. We want to slow down and take in life and not let it pass us by.
I would also politely disagree that my obsession with coffee began when I was a young girl. My Italian Heritage didn’t spare me that, growing up around the kitchen table coffee was served morning noon and night. Fresh espresso, served straight up, with desserts to follow. Usually my mother would give my sister and I a cup filled with milk and a splash of coffee in it. I was probably 7. I thought it was the coolest thing ever. As I got older my passion for coffee grew stronger, I feel deeply in love with coffee, the way the beans were roasted, the process of making a French press, how some blends tasted different than others. I learned how Folgers coffee is in fact different than fresh roasted beans! If you cant tell I am sorry for your palate. Naturally I spent most of my teens, into adulthood working at coffee shops. (I am pure dork for sure).
As of late I have been on the hunt for a new local coffee spot here in Arizona, Starbucks has me thoroughly disappointed because although I understand what Howard Shultz is doing for his business I feel that’s it is becoming more like McDonalds. He is killing me.
Recently I found, Cartel Coffee Lab, which is of course filled with hipsters and even I feel out of place when I first stepped in. It wasn’t until I got some guts and asked the girl taking my order how to make my shots of espresso not taste so acid? She told me how to order my drink, gave me some knowledge, (which was great, my drink was perfect. I was hooked! Now, I spend my days contemplating driving a half hour each way to get my fix? Worth, it? Yes. I promise. Anyway I am really off on a tangent, you have probably skipped over to the photos by now. (I don’t blame you; I’m joking if you can’t tell.)
When I am not out enjoying a coffee, I have been making a lot of coffee at home. French press of course, (note to self: I need to invest in a pour over). Occasionally I will add in some of my vanilla bean ice cream to change things up, it’s so good.
Some refer to this as an Affogato (“Drowned”) the Italian term.
You take a scoop of vanilla ice cream or gelato and place it in the cup, and pour a shot of hot espresso over it (espresso not expresso!). If you don’t have espresso you can just use a French press. I thought I would share a simple recipe and some images I took to inspire you to make your own Affogto at home! It will change your world.
To make a simple Affogato:
Ingredients:
-French Press coffee maker; pour over coffee maker, or Stovetop Espresso maker works great. If you are privileged enough and have a fancy set up that works well too.
-Fresh ground coffee beans, Espresso blend, or your favorite brew. (The stronger the better in my opinion)
- Vanilla ice Cream (dairy free, or regular works either or)
- Boiled water
-Espresso cups (these are smaller than regular coffee cups because of the portions) you wont be making a huge cup of coffee here, think portion control at its finest)
Directions:
-French Press: You would take 2 tablespoons of ground coffee beans and place in the bottom of your press, once the water is boiled pour on top of the grounds fill with water to the fill line. Set the lid on top without pressing it down. Set timer for 4 min, once it goes off, push down your press and its done.
-Stovetop Espresso Maker – this is a two-part contraption depending on your model. Take it apart; fill the bottom half with water. Then there should be a little basket fill that with ground espresso beans, leave a little room because you will be screwing it back together. Then place on the stovetop and put the maker on high heat, once it starts boiling and whistling the coffee is done.
(Also see your user manual it will give you proper instructions)
Then get your ice cream fill the espresso cup with a scoop of ice cream, pour over the hot espresso and serve immediately!
Enjoy!
-Cheers, - N

Cooking Basics : Chicken Soup Recipe
Soups are by far the easiest and my most favorite thing to throw together. For entertaining, getting through the busy week or because it’s cold outside. I thought it would be good to start with the basics of cooking, with the foundation of a soup, simply because if you start every soup this way its very easy to build on. You can come up with any type of dish if you nail those basic principles.
Lets begin:
In French cuisine there are soups, sauces, stocks. These are usually the bases for other dishes to build on. Which would consist of a tomato sauces to put over pasta, any soup or stew dish, or even a sauce to place over meat. The base is a Mirepoix (pronounced “meer-pwah”) it is a mix of chopped carrots celery and onions. Traditionally it’s about 50% onions, 25 % carrots and 25 % celery. But honestly if you like more of one, for instance more carrots less onion, or an even amount of all feel free to break French rules and do it the way you like best!
Mirepoix is important because with this foundation your cooking magic can begin, the taste of these three alone are simply heavenly and can turn a bland anything into bursting taste! Also once you know how to start dishes you can then break the rule, that’s right friends. Nail the basics, and then break the rules. I would say that is true with a lot of things, being open to exploring the possibilities. Do you know what I am saying?
Let me also mention ingredients, I have stressed this once and I will stress this again. Fresh ingredients so key in cooking. They aren’t expensive, in fact if you shop at the right places such as your local farmers market, Trader Joe’s and yes whole foods you would be surprised at what you could find for little to nothing. The reason I stress fresh or “the best” ingredients is not because they look pretty, but they taste the best, they have the best nutrients, which is key, and well its going to awake your taste buds! So lets just agree on this one? Lets move on…

Starting your Soup:
Ingredients/ Cooking Supplies:
-Dutch Oven or large Stockpot
-Wooden spoons for stirring and tasting
-Strainer, Culinary Knife’s, Peeler, Cutting boards
-Large mixing bowls, prep bowls
-1 lb. Yukon Gold or Red Potatoes
-2 16 oz. Chicken bone broth, or Kosher Chicken Stock - or homemade
- 2-4 carrots
- 2-4 celery stalks
-1-2 onions
- 2-3 cloves of garlic
- A whole chicken, either precooked from the grocery rotisserie, or made at home.
- A bunch of fresh herbs and spices: thyme, oregano, and old bay seasoning salt, salt pepper
- Loaf of fresh country bread (or gluten free for those with sensitivity)
- Quality grade olive oil, or avocado oil (for high heat)
Directions:
(Note: Prepping ingredients first will cut your cooking time in half. So we will be prepping all the food first setting it aside, and then getting on with the cooking.)
1. You can either roast your chicken at home or you could buy a precooked roast from the store. Leftovers of roast chicken make for great soups as well. This works if you are in a pinch for time!
2. Make your Mirepoix mix of carrots, celery and onions. Do your best here, its alright if it’s a rough chop, but just eye ball your cuts with the sizes being pretty even. Set aside in a bowl. Then finely chop your garlic cloves and herbs set aside. Quarter your potatoes, set in a large bowl of warm water, and let them soak for a good 15 – 20 min. When the chicken is finished roasting, break it down with knife, then pull apart the meat with fork or hands. (Set aside as well, you can keep the bones, and legs together).
3. Once you are finished prepping your ingredients, set your Dutch oven on the stovetop and put the burner on medium to medium high. After about a min, add in the olive oil place a few onion’s in the pan to see if it sizzles, if so the pan is hot enough. Through in the MirePoix mix, let cook for 5-10 min. Letting the vegetables cook until the onions are translucent. Add salt and pepper to taste, I would say about a pinch of each. Add in your garlic, sauté for another 3 min, and add in herbs and more salt and pepper if needed.
4. While that cooks strain your potatoes, and add those into the mix (you could always boil your potatoes before hand as well then add them to the pot.) Let that cook for another 5 min, add in more salt and pepper if needed.
5. Toss in the Chicken Stock and bring your heat up to high, you want this to boil for a good few min until you see a “rolling boil at the top of your soup”, then let that hang out for about 5 min. Then add in your cut up chicken, and bones. Reduce your heat to low and place a lid on the top, stirring your soup every 10 min, or to insure it doesn’t burn at the bottom. Cook for about 40 min to 1 hour. Then skim the top, and pull out the bones before serving.
Then serve with beer, white wine, crusty bread and enjoy!


Works sited :
The Culinary Institute of America. The Professional Chef 9th Edition. USA: WILEY, 2011.Print.
Dutch oven : LE Cresuset
Handmade Wooden Spoons, for the kitchen - Nicole Lee Phoenix Food Photographer
This winter I was commissioned to take on photographing and styling a small business who specializes in handmade Wood spoons, cutting boards and all sorts of other goodies! They are simply awesome. They are still in the process of setting up their shop but they go by a little name called Bo Woods!
Below are my favorites from the project. Happy Thursday Friends!
Cheers! -N


Fancy Prosecco Cointreau Ice Cubes, Recipe
When I think of Champaign, Prosecco or Rose` I can't help but want to channel my inner Lady GoLightly. Aka Audrey Hepburn from Breakfast at Tiffany’s. Call it cliché’ call it typical, I don’t mind. Back in the day I used to watch that movie so many times. If I can be really honest, probably every other day! Fantasizing about how amazing her life would be to just have for a day. Live in New York City, wear fabulous clothes, be an actress. You know what I mean right?
The thing is when I grew up I finally figured out what she did in the “Powder Room” with those men each evening. I’ll let your imagination run away on that one. Some how the charm of her glamorous lifestyle, of chic clothing, fancy parties and her tiny apartment seemed to take my breath away. (Although, Currently speaking it doesn’t look like it was all that fabulous after all.)
This shoot wasn’t fully inspired by Audrey, but after staring at my screen editing I couldn’t help but think of the movie. Of her, Of the Scenes of fancy parties with great music, and of Course Paul Darling. (Insert British accent from his mistress) How can we forget him?
I am sure she would have been smart enough to make fancy ice cubs for her drinks as well, or maybe she couldn’t afford an extra bottle of Prosecco to make them? Either way, I have a wonderfully easy way to spice up your Prosecco, or to keep your glass chilled. And while your making them, maybe channel your inner Audrey, you know she is in there!


Prosecco Ice Cubes, with Fresh Blueberries and Cointreau, Recipe
Ingredients and Materials:
-2 rubber ice cube trays, (I find these are the easiest to use, the ice cubes pop out really easy)
-1 bottle of Prosecco (Lamarco is a great one!)
- 1 bottle of Cointreau, orange liquor
-1 bunch of fresh BlackBerries, or any that is in season
- A tea towel to wrap the Bottle of Prosecco with when opening
Directions:
First make sure to chill your Prosecco in the fridge for at least an hour, to speed up the process you can throw it in the freezer. Just don’t forget it, I have totally done that before and ended up with ice of course.
Take the tea towel and wrap it around the chilled Prosecco, pull the top off straight up away from your face. Go slow! Unless you are a pro and use a saber. Grab your ice trays; fill them with the Prosecco leaving room for the Cointreau and berries. Then add in a splash (about ½ tablespoon) of Cointreau in each ice cub spot, and fill to top. If desired add in berries to each cube. Freeze for a good 6-12 hours. (Depending on your Freezer. This also works if you choose to leave the berries out.
When serving the Prosecco, add in one or two ice cubes to your glass and enjoy!


Cheers Friends!
-Nicole