Cooking Basics : Chicken Soup Recipe


Soups are by far the easiest and my most favorite thing to throw together. For entertaining, getting through the busy week or because it’s cold outside. I thought it would be good to start with the basics of cooking, with the foundation of a soup, simply because if you start every soup this way its very easy to build on. You can come up with any type of dish if you nail those basic principles. 

Lets begin:

 In French cuisine there are soups, sauces, stocks. These are usually the bases for other dishes to build on. Which would consist of a tomato sauces to put over pasta, any soup or stew dish, or even a sauce to place over meat. The base is a Mirepoix (pronounced “meer-pwah”) it is a mix of chopped carrots celery and onions. Traditionally it’s about 50% onions, 25 % carrots and 25 % celery. But honestly if you like more of one, for instance more carrots less onion, or an even amount of all feel free to break French rules and do it the way you like best!

Mirepoix is important because with this foundation your cooking magic can begin, the taste of these three alone are simply heavenly and can turn a bland anything into bursting taste! Also once you know how to start dishes you can then break the rule, that’s right friends. Nail the basics, and then break the rules. I would say that is true with a lot of things, being open to exploring the possibilities. Do you know what I am saying?

Let me also mention ingredients, I have stressed this once and I will stress this again. Fresh ingredients so key in cooking. They aren’t expensive, in fact if you shop at the right places such as your local farmers market, Trader Joe’s and yes whole foods you would be surprised at what you could find for little to nothing. The reason I stress fresh or “the best” ingredients is not because they look pretty, but they taste the best, they have the best nutrients, which is key, and well its going to awake your taste buds! So lets just agree on this one? Lets move on…


Starting your Soup:

 Ingredients/ Cooking Supplies:

-Dutch Oven or large Stockpot

-Wooden spoons for stirring and tasting

-Strainer, Culinary Knife’s, Peeler, Cutting boards

-Large mixing bowls, prep bowls

-1 lb. Yukon Gold or Red Potatoes

-2 16 oz. Chicken bone broth, or Kosher Chicken Stock   - or homemade

- 2-4 carrots

- 2-4 celery stalks

-1-2 onions

- 2-3 cloves of garlic

- A whole chicken, either precooked from the grocery rotisserie, or made at home.

- A bunch of fresh herbs and spices: thyme, oregano, and old bay seasoning salt, salt pepper

- Loaf of fresh country bread (or gluten free for those with sensitivity)

- Quality grade olive oil, or avocado oil (for high heat)

Directions: 

(Note: Prepping ingredients first will cut your cooking time in half. So we will be prepping all the food first setting it aside, and then getting on with the cooking.)

1. You can either roast your chicken at home or you could buy a precooked roast from the store. Leftovers of roast chicken make for great soups as well. This works if you are in a pinch for time! 

 2. Make your Mirepoix mix of carrots, celery and onions. Do your best here, its alright if it’s a rough chop, but just eye ball your cuts with the sizes being pretty even. Set aside in a bowl. Then finely chop your garlic cloves and herbs set aside. Quarter your potatoes, set in a large bowl of warm water, and let them soak for a good 15 – 20 min. When the chicken is finished roasting, break it down with knife, then pull apart the meat with fork or hands. (Set aside as well, you can keep the bones, and legs together).

3. Once you are finished prepping your ingredients, set your Dutch oven on the stovetop and put the burner on medium to medium high. After about a min, add in the olive oil place a few onion’s in the pan to see if it sizzles, if so the pan is hot enough. Through in the MirePoix mix, let cook for 5-10 min. Letting the vegetables cook until the onions are translucent. Add salt and pepper to taste, I would say about a pinch of each. Add in your garlic, sauté for another 3 min, and add in herbs and more salt and pepper if needed.

4. While that cooks strain your potatoes, and add those into the mix (you could always boil your potatoes before hand as well then add them to the pot.) Let that cook for another 5 min, add in more salt and pepper if needed.

5. Toss in the Chicken Stock and bring your heat up to high, you want this to boil for a good few min until you see a “rolling boil at the top of your soup”, then let that hang out for about 5 min. Then add in your cut up chicken, and bones. Reduce your heat to low and place a lid on the top, stirring your soup every 10 min, or to insure it doesn’t burn at the bottom. Cook for about 40 min to 1 hour. Then skim the top, and pull out the bones before serving.

Then serve with beer, white wine, crusty bread and enjoy! 


Works sited : 

The Culinary Institute of America. The Professional Chef 9th Edition. USA: WILEY, 2011.Print.

Dutch oven : LE  Cresuset 


Handmade Wooden Spoons, for the kitchen - Nicole Lee Phoenix Food Photographer


This winter I was commissioned to take on photographing and styling a small business who specializes in handmade Wood spoons, cutting boards and all sorts of other goodies! They are simply awesome. They are still in the process of setting up their shop but they go by a little name called Bo Woods! 

Below are my favorites from the project. Happy Thursday Friends! 

Cheers!  -N


handmade wood spoons


Fancy Prosecco Cointreau Ice Cubes, Recipe


When I think of Champaign, Prosecco or Rose` I can't help but want to channel my inner Lady GoLightly. Aka Audrey Hepburn from Breakfast at Tiffany’s. Call it cliché’ call it typical, I don’t mind. Back in the day I used to watch that movie so many times. If I can be really honest, probably every other day! Fantasizing about how amazing her life would be to just have for a day. Live in New York City, wear fabulous clothes, be an actress.  You know what I mean right?

The thing is when I grew up I finally figured out what she did in the “Powder Room” with those men each evening. I’ll let your imagination run away on that one. Some how the charm of her glamorous lifestyle, of chic clothing, fancy parties and her tiny apartment seemed to take my breath away. (Although, Currently speaking it doesn’t look like it was all that fabulous after all.)

This shoot wasn’t fully inspired by Audrey, but after staring at my screen editing I couldn’t help but think of the movie. Of her, Of the Scenes of fancy parties with great music, and of Course Paul Darling. (Insert British accent from his mistress) How can we forget him?

I am sure she would have been smart enough to make fancy ice cubs for her drinks as well, or maybe she couldn’t afford an extra bottle of Prosecco to make them? Either way, I have a wonderfully easy way to spice up your Prosecco, or to keep your glass chilled. And while your making them, maybe channel your inner Audrey, you know she is in there! 


Prosecco Ice Cubes, with Fresh Blueberries and Cointreau, Recipe

Ingredients and Materials:

-2 rubber ice cube trays, (I find these are the easiest to use, the ice cubes pop out really easy)

-1 bottle of Prosecco (Lamarco is a great one!)

- 1 bottle of Cointreau, orange liquor

-1 bunch of fresh BlackBerries, or any that is in season

- A tea towel to wrap the Bottle of Prosecco with when opening

Directions:

First make sure to chill your Prosecco in the fridge for at least an hour, to speed up the process you can throw it in the freezer. Just don’t forget it, I have totally done that before and ended up with ice of course.

Take the tea towel and wrap it around the chilled Prosecco, pull the top off straight up away from your face. Go slow! Unless you are a pro and use a saber. Grab your ice trays; fill them with the Prosecco leaving room for the Cointreau and berries. Then add in a splash (about ½ tablespoon) of Cointreau in each ice cub spot, and fill to top. If desired add in berries to each cube.  Freeze for a good 6-12 hours. (Depending on your Freezer. This also works if you choose to leave the berries out.

When serving the Prosecco, add in one or two ice cubes to your glass and enjoy!


Cheers Friends! 

-Nicole 


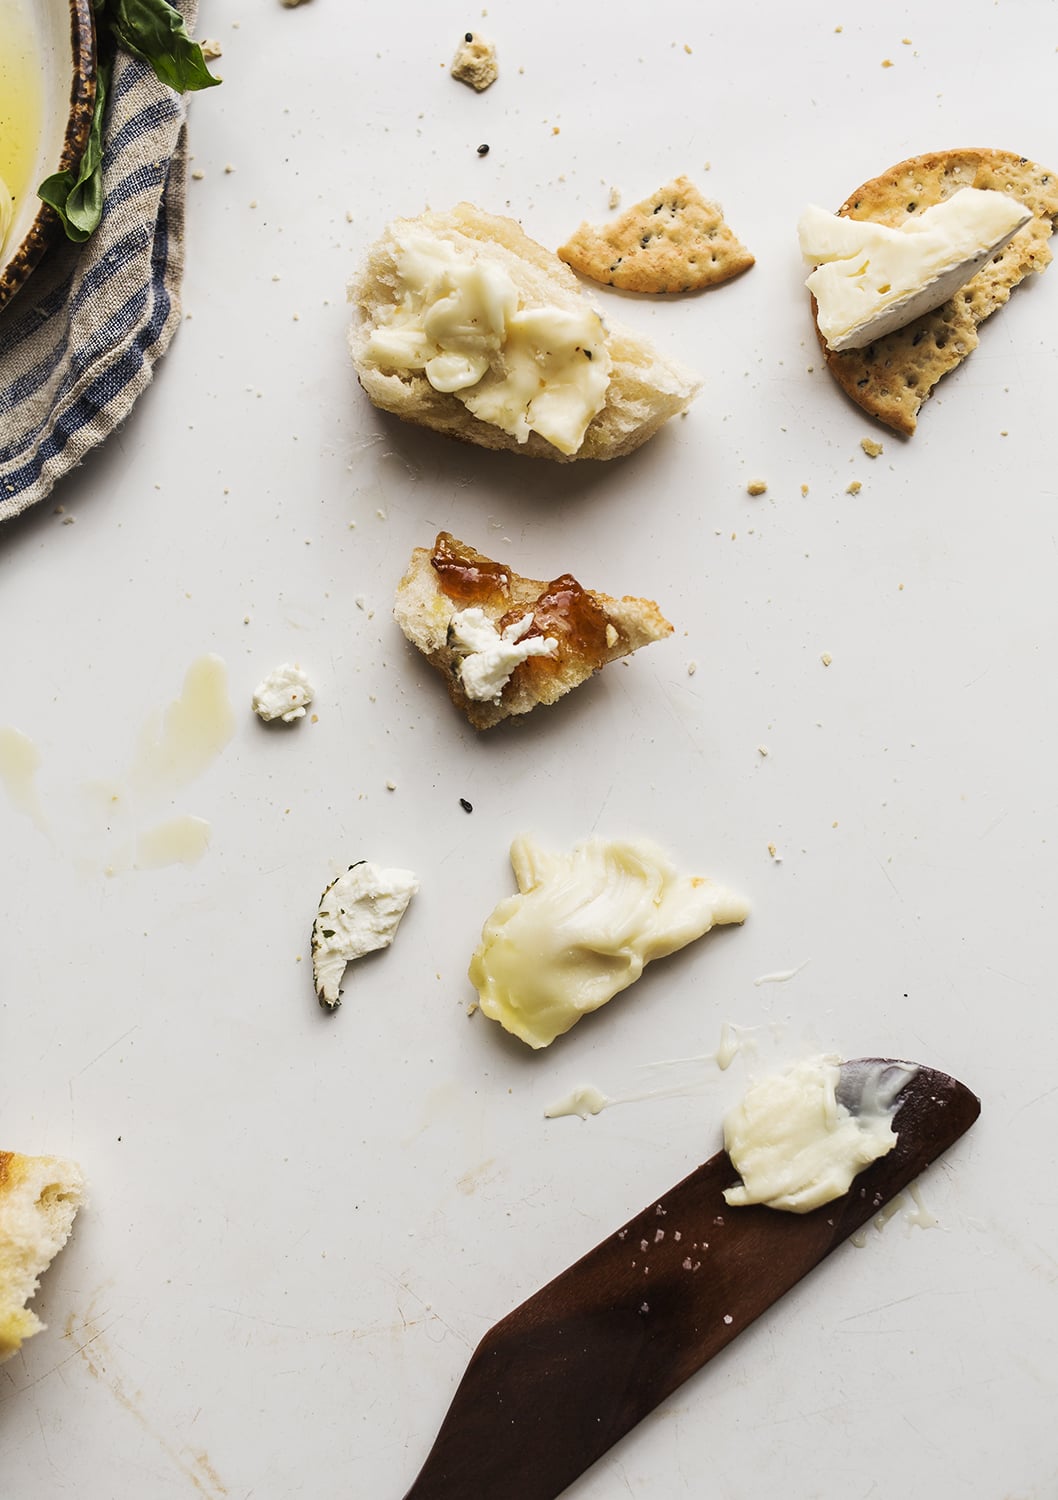
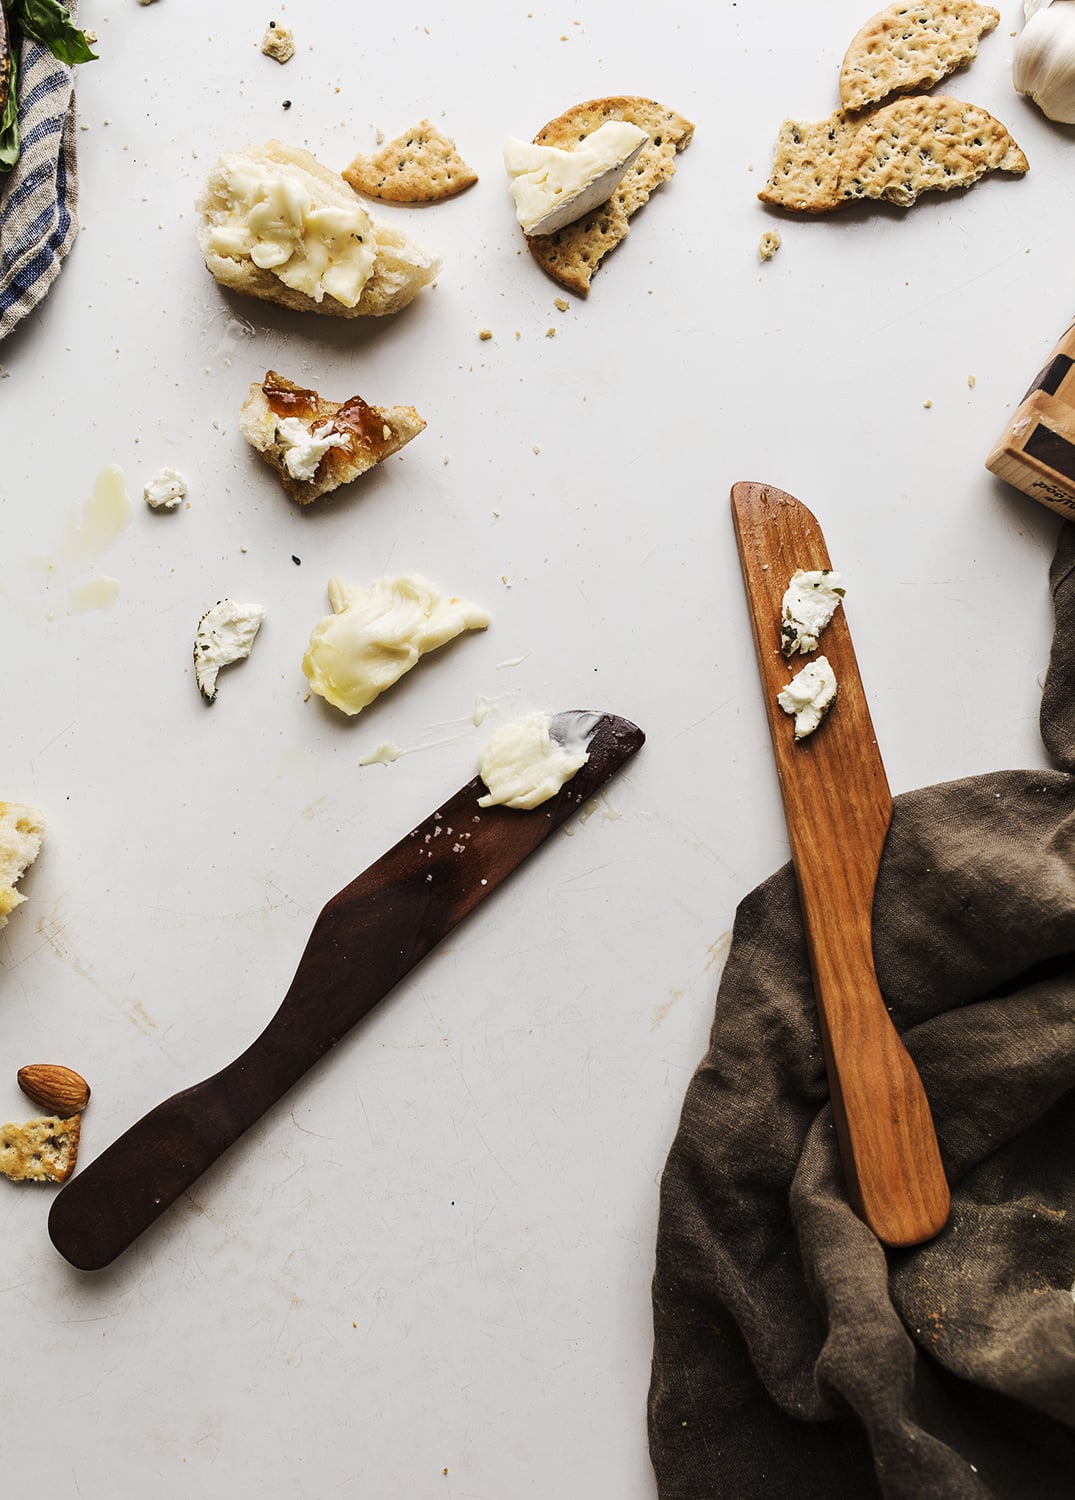
Recipe: Building a Cheese board 101


Lets chat about cheese. Interestingly enough I am allergic to dairy, a devastating discovery I was in denial about for the first 26 years of my life. Until I found an allergist, what he explained to me was astounding. You crave what you are allergic to. What? Really? No way! I love Cheese, Butter and all things dairy. I love the creaminess, I love the way it makes a dish savory, or adding a pat of grass-fed butter to olive oil in the sauté pan and watching it do a magical dance to the vegetables I am cooking.

Now cheese does not equally feel the same about me, as it gives me chronic migraines, ear infections, sinus infections, brain fog and well the list goes on. Since my discovery of my dairy allergy I have given up dairy completely. Much to my surprise life has been smooth sailing without it. These days I find myself entertaining with Cheese instead of eating it, channeling my inner love of it towards others instead. Making cheese plates is a great communal food, conversation food most of all its an easy thing to throw together for any occasion. When it comes to putting together a cheese plate there are basics to follow, but you don’t have to be rigid about putting something amazing together!  


Cheese board Building 101: building your board

So we don’t over complicate things I will simply stick with the basics here. This will be a simple single cheese board with 3 cheeses, for about 2-4 people. If you have more guests and are having a dinner for a party of 6- 8 people I would just simply do the same for one more board of 3 cheeses, or one more with 5 cheeses. It really depends on if you will be serving other food later in the evening. Sticking to 3 to 5 cheeses keeps it simple and doesn’t overwhelm anyone.

Materials and Ingredients:

-Wood, Slate or Marble cheese boards. 

(Note: Sticking to these surfaces makes the food look lively and appealing.)

3 – 5 Different Cheeses, a Goat, a Sheep and a Cow

(note: these could consist of: sheep Brie, grass-fed cow cheddar, and soft goat chevre. Or if you are unable to find a mix of GOAT –SHEEP- COW, stick with a regional theme. You could get All Irish cheeses, French cheeses, or an assortment of local cheeses. Remember their aren’t any “rules” and whatever you choose will be great!

-Layering items: Fig Jams, Raw Honey, or even fresh preserves. Salted nuts, Olives, or Other antipasti like cured meats or wild Alaskan smoked salmon items work well. Fresh berries, or seasonal fruit is a nice touch.

 (Note: The key here is use what you have in the fridge first, then hit the store.)

1 loaf of Bread, or Crackers or both:

(note: Sourdough, French Baggett’s or Country loaf bread. Hearty Crackers such as Mary’s superseed (which are gluten free). Water crackers or artisan crackers are a nice touch.

Mix of Red/ White Wines and Beer:

(Note: handy staples; French Pinot Noir, New Zealand Sauvignon Blanc, and either Prosecco or a bubbly Rose’. These are all easy sipping wines that aren’t too heavy or light. There is no need to fuss over the perfect pairing wine, just grab your favorites. Or even encourage your friends to bring their favorite to share! Beer: Local brew, or Stella Artois is always a hit.)

Extras: Cheese knifes, table cards with cheese labels on them, Pellegrino (sparkling water), basil or mint herbs to garnish.

Directions; Building a cheese board

Take your cheeses and place them on the plate. Assort them a few inches apart from each other. Then add in your honey or jam. Place your berries, nuts, garnish around the cheeses, mostly to one side of the plate, most people place these items to one side, because people are cutting their cheese in the other direction. Then place cards of the names of the cheeses around them, you can add your olives or meats to the same board or in bowls next to it. I usually try to make the board so full that its almost running off the board, or you could do the opposite and do it really simple and minimal. Either way I try to add a garnish to give it some color!


cheese boards how to

Final Notes:

When picking out your cheese, head to places like Trader Joes. If you are on a budget, you can get your whole spread their for under 100; including wine, bread, crackers, cheese and so fourth. If you aren’t on a tight budget head to a local cheese market or even whole foods, they tend to have a larger section to choose from. Lastly, don’t be afraid to ask questions! There are lots of friendly people there to help you along your way. Good Luck Friends, happy entertaining!

-Nicole 


sources : 

(This is not a sponsored post )

Mary's Gone Crackers : http://www.marysgonecrackers.com

trader joes : http://www.traderjoes.com

whole foods : http://www.wholefoodsmarket.com


Cooking with Kids: Banana, Nut butter, Honey on Rice Cake Recipe


honey comb

Food should be simple, should taste good and be easy to make. Especially in our busy day to day lives.  –

Snack time has always been an important factor in my life. To be honest I was the person who had snack time before kids and now I just use them as an excuse to take a break and eat something yummy. Snack time has become precious, it’s a great time to take a break and reconnect with my kids. Usually I pick up my kids about 3pm, come home sit together and talk about our day and of course stuff our faces!  On occasion if I am not swamped with work I make the kids a snack before I leave, but as of lately my oldest is into making his recipe, so we will make it together when we get home.

In this one instance on the way home Jacob my oldest said “ Mom I have a great idea”, “Yes Jacob” I replied. “Jacob continued, lets make rice cakes with peanut butter, bananas and honey!’

Lets do it I answered! Lets do just that.

Jacob’s Rice Cakes-

Ingredients:

1 bag of flat or regular rice cakes.

About 2 tablespoons of honey

1 jar of nut butter of your choice

1 bunch of bananas

Directions:

Peel and slice your bananas set aside. Spread your nut butter over the rice cake, add slices of bananas and drizzle the amount of honey over the top. Serve and enjoy!
As Jacob would say: Easy peezy, Lemon Squeeze! Enjoy Friends!

- Nicole 


gluten free snacks


sources :

rice cakes : http://www.lundberg.com/products/snacks/ 

Nut butter :  nutzo , https://www.nuttzo.com


Source: www.heydear.co

Stella Bakes, Nicole Rambles, - Personal Post


girl portrait

As I stumble over myself trying to come up with the perfect words for this blog post I cant help but become more frozen. The pressure of curating images, and meaningful words seems to have gotten the best of me.

Heavy thoughts cloud my mind, all of life’s goodness and troubles compounding my heart. Seemingly all at once, I tend to fight the waking moments, finding myself in a battle once again over staying underneath the covers hidden when it gets hard. This time the battle hasn’t one; I have the many tools to not covert back to old habits that once destroyed me. Even if it’s the constant reminders of the three brave souls that came from me, the children are always all right; it’s the parents you have to watch out for.

You probably have no idea what I’m talking about; I guess that’s okay. Maybe you get it. Maybe not. Anxiety and depression is a bitch. They are just symptoms of habits you teach yourself to try to stay afloat in the scary world. The thing is since they are just symptoms I can tell them to go away now, and they aren’t needed anymore. Clearly it’s a battle, but more importantly, a battle I can come out on top of. The problem with a lifetime of experiencing trauma is sometimes it does come up. So I chose to meet it, share it instead of tucking it away in a tiny package and pretend it didn’t happen this week. Its not like I fell off the wagon, I guess what I’m trying to say is its just where I was at, that my friends is the truth. I won’t get into the details because it’s not about the details. It isn’t the time or place and I’m not paying you to listen to those boring stories of my traumatic childhood. My goal was to give you a lovely story, a handful of images and a recipe. That is the purpose of this blog right? See, what I mean is things aren’t always, as they seem. Sometimes we even choose to see what we want, that could make our real lives much easier to handle. Or the social media easier to handle. What do you think?

Now where I am today, not yesterday. Today, I feel clear, I am remembering all the new things I taught myself and realized that my shield can go back into the closet until I need to use it again. The world isn’t a scary place and the 4-year-old girl instead me, well she will be okay to. Ramble over.

No recipes to share, but below are some images of my 3-year-old Stella Baking her little heart out.

X

–Nicole 


ingredients


Gluten Free Oatmeal Chocolate Chip Cookies - Recipe


Every year right before Christmas my father in law Arne makes his famous chocolate chip cookies. Yes, this fisherman who is 6ft 4, who spends most of his days sipping coffee and working on his boat BAKES!  He is quite the baker too.

Maybe it’s his Norwegian blood. Which if you didn’t know Norwegians they are known for their baking and all the glorious baked goods. So each year like clockwork he sets up the tree, puts lights on the house, puts Christmas music on and as the snow falls over their Seattle home just like in a movie, the baking begins.

He is so orderly and neat about his process, dancing around the kitchen singing tunes and being Jolly. I would say he is the definition of jolly and all its glory. Its just what you need to keep you out of the bah humbug motif and remembering that well all the cheesy Christmas cheer can be fun after all.

Arne inspired me with his traditions to well start our own, stop being scrooge and find the ability to well, be JOLLY!

I got up some guts and asked him for the recipe, he shockingly said yes! Then I successfully baked those cookies, without burning the house down. Of course they just weren’t exactly the same as his but it’s the effort that counts right?

Fast forward to present day. I no longer eat dairy. I no longer eat gluten. But I do still eat cookies, and chocolate, because I would be crazy not too!

The problem well I still wanted to bake those cookies. Instead of being a scrooge and not make them, I chose to come up with my own cookie recipe for the holidays. Now, Doing gluten modifications in baking are a whole science, it’s not an easy task. Still determined to make a flavorful cookie, I took on the challenge. I baked and baked and tested and failed and finally succeeded with an amazing cookie that well tastes just as good as the real thing.

Which that my friends makes quite a jolly moment!

I would love to hear what some of your favorite things to do at this time of year are, what your family, friends do! Leave a comment below!


Happy Baking Friends! 


Gluten Free Oatmeal Chocolate Chip Cookies

Ingredients:

1-cup vegan butter – Earth balance soy free baking sticks

1-cup sugar – Raw Sugar, preferably organic

1-cup light brown organic sugar

1 teaspoon Vanilla

2 eggs –

1 ¾ cups Gluten Free Flour – Bob’s red millone/one mix is great!

1-teaspoon baking powder

1-teaspoon kosher salt

2 cups Gluten Free Thick rolled oats (bob’s redmill again is the best!)

1 bag of vegan chocolate chips/ or favorite brand

An electric mixer, measuring cups, ice cream scoop, parchment paper, and cookie trays.

Directions:

In an electric mixer Cream the butter, sugars, and vanilla, add in one egg at a time.

In a separate bowl mix the dry ingredients, minus the rolled oats and chocolate chips!  While the electric mixer is still going slowly add in the flour mixture and until dough forms. Then take off the bowl of the mixer grab a spatula, dump in the rolled oats and the chocolate chips. Hand mix until evenly through the dough.

Now this part is key. You need to let the dough chill for at least one hour. If you have patience let it sit overnight. Instead of the dough being soupy it will bake perfectly. The thing is after much baking mishaps I have learned this is truly the best way to get those awesome cookies. That’s why those store bought dough’s actually taste good! Because they are cold!

Once the dough is chilled.  Then preheat the oven to 355 degrees.

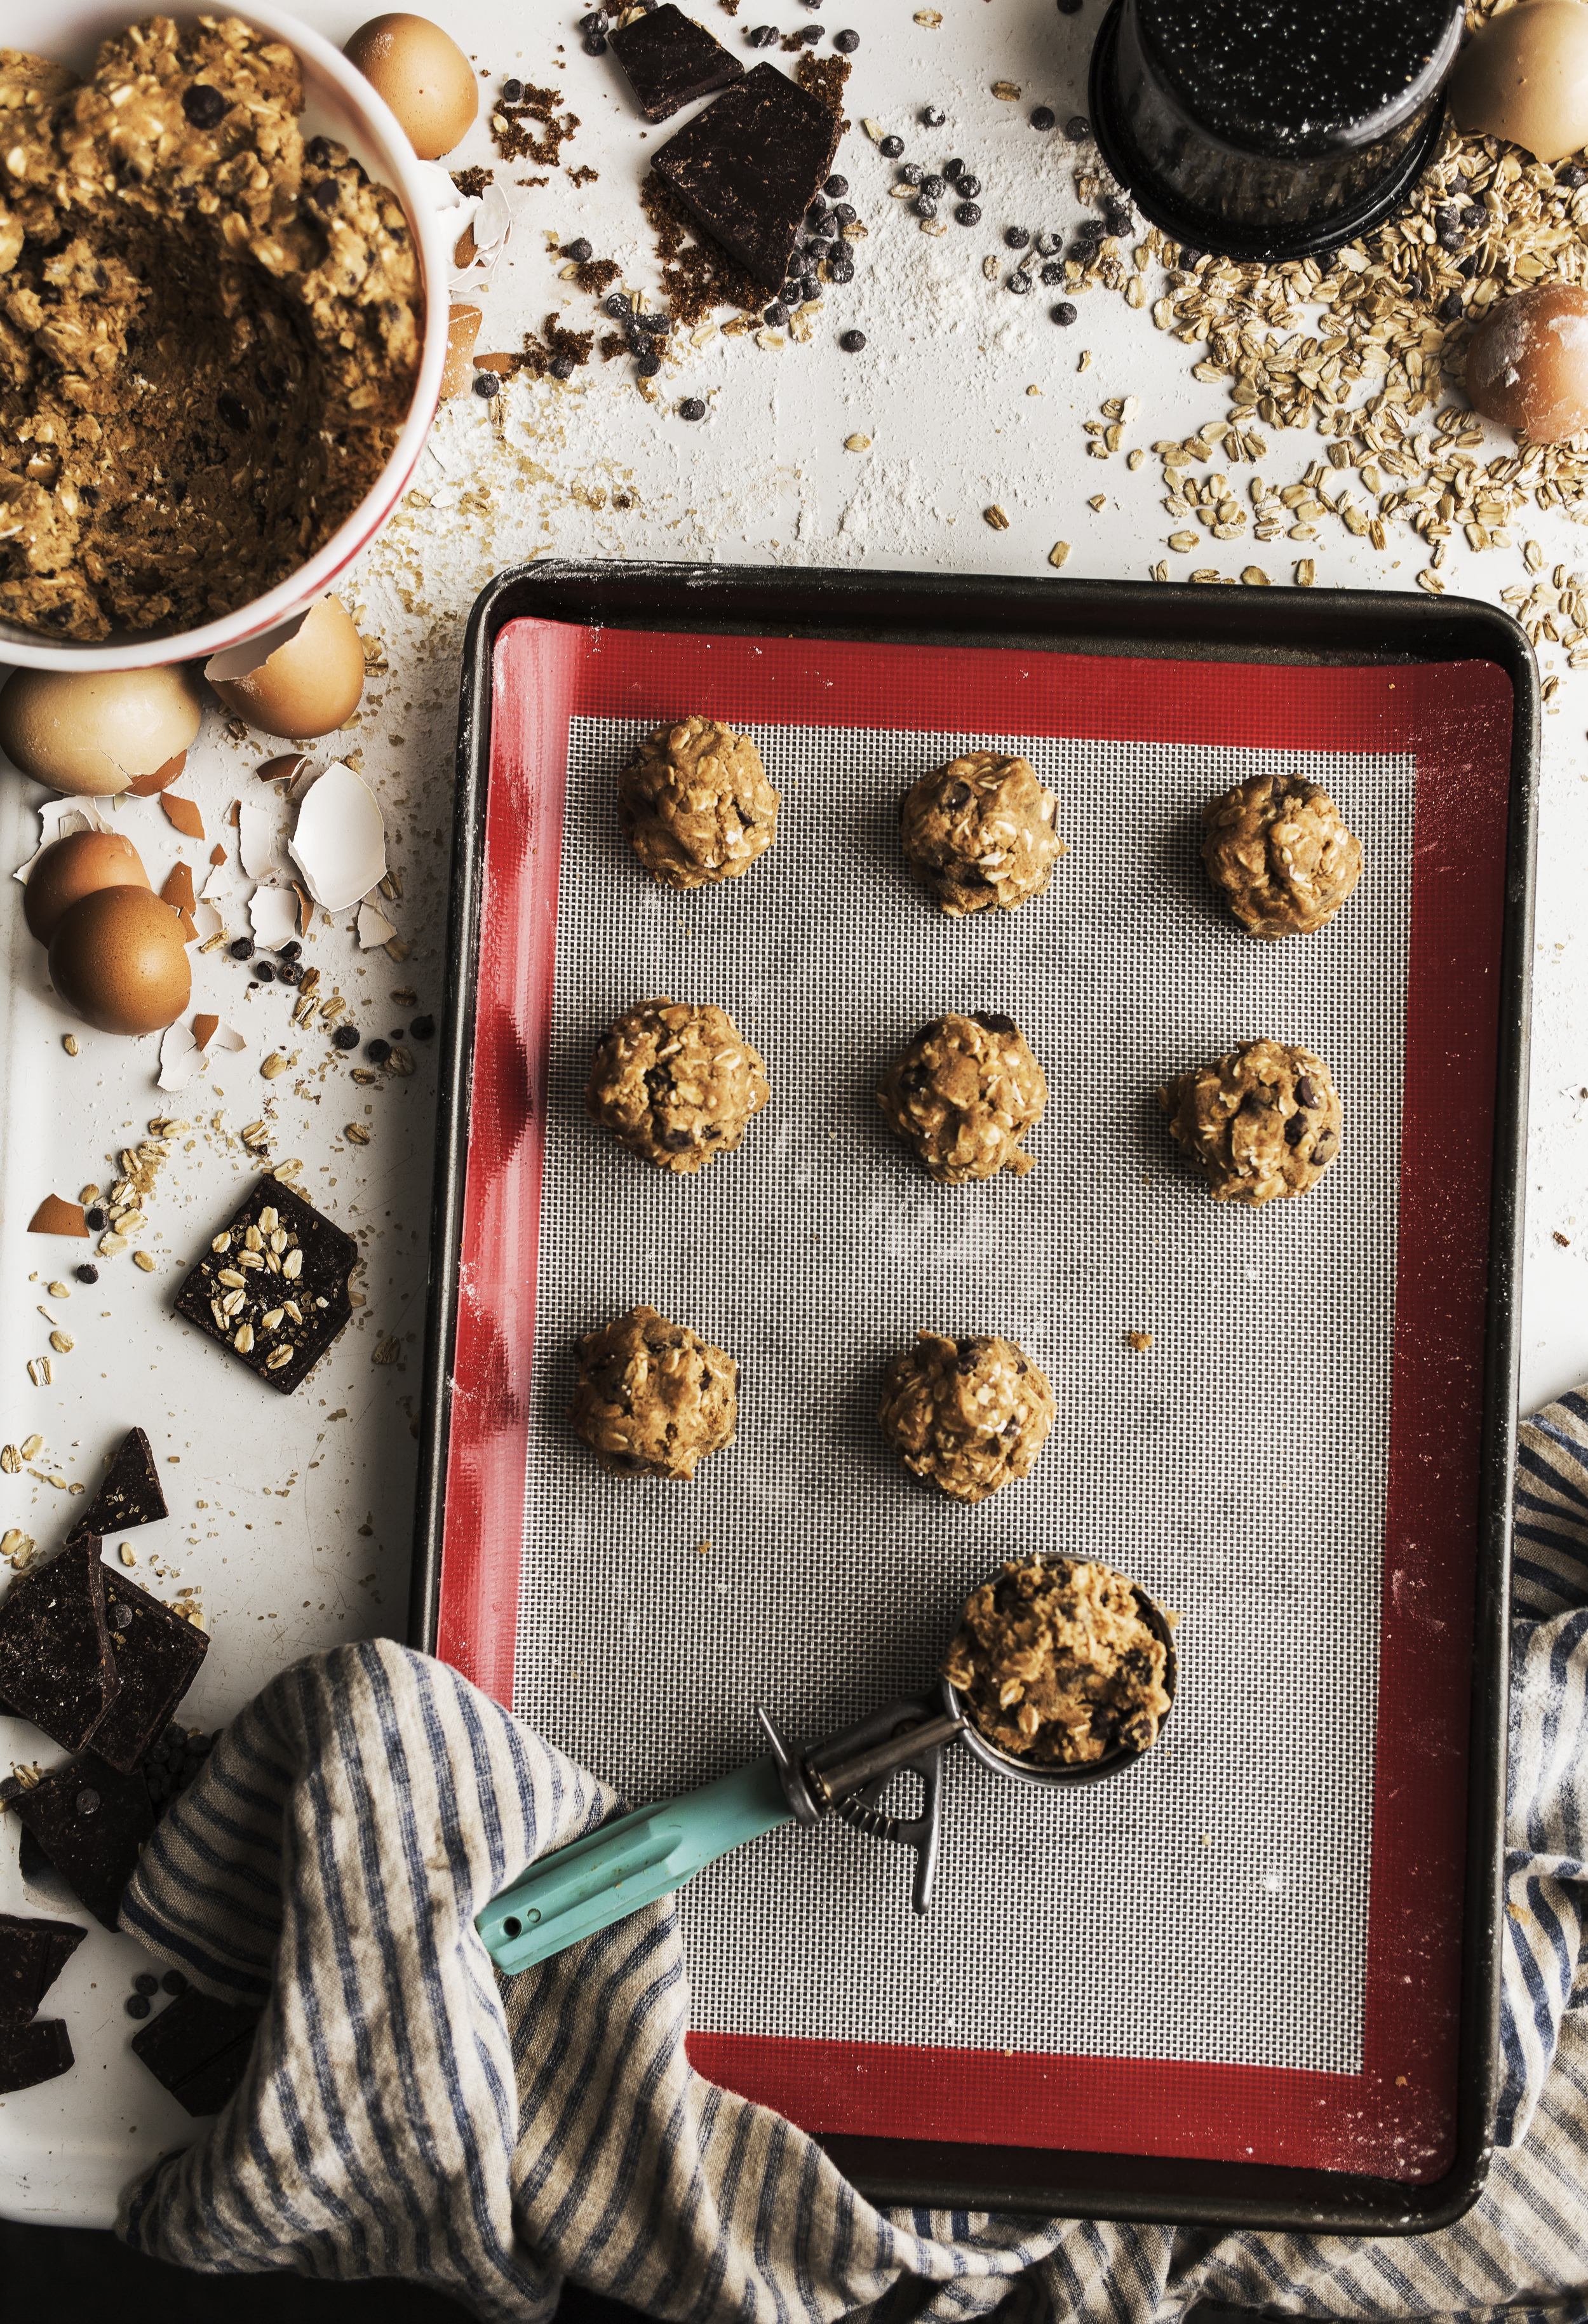
Line your cookie sheet with parchment paper, then scoop with a small ice cream scoop your dough and place on the tray. You will make rows of three about 1 inch apart from each other on the tray.

Bake for 9-12 min. Until golden brown on the edges. Once done remove the cookies from the cookie tray and place on a cooling rack until cooled.


Then serve with milk and enjoy!


Jacob's Applesauce Recipe


Who doesn’t love applesauce? You can eat it plain, spread it over vanilla ice cream, and add it to yogurt. Add it to baked recipes. The list is endless. My 6 year old came home from school so excited to share he had learned how to make applesauce in his first grade class. He then of course wanted to teach me how to make it right away, so we did.

I would say cooking with my children is something we always have done. Its something I wanted to include them in, and make them feel apart of things. When they were crawling they would be banging on pots and pans in the kitchen while I danced around and cooked. As they got older we started giving them real jobs, stirring a sauce or making the scrambled eggs. Sometimes Jacob (my 6 year old) comes up with his own recipes, for example, peanut butter with honey on rice cakes, or the not so popular, mustard peanut butter sandwiches.

So this applesauce recipe seemed like the perfect thing to add to our recipe book, and do something well just fun together!

Cheers Friends, Happy Cooking!


-Nicole


Jacob’s Applesauce

Ingredients:

4lbs apples cored and sliced (about 10 apples)

A mixture of red, yellow and green

½ cup sugar

½ teaspoon cinnamon

1 tablespoon lemon Juice

1-cup water

1-tablespoon vanilla paste (preference only)

Directions:

In large Dutch oven, bring the cup of water to a simmer, add in the apples, sugar, cinnamon, lemon juice and vanilla. Give it a good mix with a large wooden spoon. Let this simmer until the apples are good and mushy, about 12-20 min. If needs more water add in about a half cup at a time.

Once the apples are good and cooked, remove from heat and blend in a blender or food processer and pulse until combined. The consistency you are looking for is slightly smooth, slightly chunky.

Then transfer mixture to bowls and let completely cool (about 1-2 hours)

When cooled you can store in a container / Mason jar for up to two weeks.

(If it lasts that long!) 


Ultimate Banana Bread Recipe; America’s test Kitchen 100 recipe cookbook

Have you heard of Cooks illustrated or America’s test kitchen? First if not you should! And I am a huge fan, so when they contacted me and sent me their new cookbook I thought how cool! I screamed with excitement, maybe multiple times over ha. The thing is I just love their approach, concepts and core values. They say “repetition and good practice are keys to success in the kitchen” as well as “A good cook will learn from his her mistakes and make a better dish next time”. Hello that is huge! I mean if you can take on those mantras it will change the way you approach cooking, or photography, or really any skill you may be learning. It helps us keep pressing through and even laugh at ourselves.

The other thing about their new cookbook 100 recipes is that it is a compilation of essential basic and staple recipes. In my opinion it’s those simple recipes that are the key to cooking, and becoming a cook. Once you learn these skills you can truly become and expert and then break the rules, and come up with your own recipes. They are the foundation and building blocks to the kitchen. Now the only thing I would say for someone who has food allergies such as myself, many of the recipes are adaptable. But you will have to put some work in to get it just right if you have never done that type of thing before.

Usually during the fall I make pumpkin bread, this year I wanted to switch it up and chose the banana bread recipe from America’s test kitchen 100 recipes cookbook. I am going to be a stickler, with baking itself you really need to follow word for word the recipe. Down to each minute detail to get it right. Unfortunately, I had to change the butter out for olive oil, as well as the flour for gluten free flour. But when I switched out those to things and followed their recipe through and through it really worked! I would say their method was spot on and would totally recommend anyone just learning to give it a go. The banana bread was moist and yummy and lasted 24 hours in my house because everyone loved it so much.

Now for the recipe, this is from the 100 recipes cookbook; I did not come up with this on my own, as well as in the margins I will give you substitutions.

Also A big thank you to America’s Test kitchen for sending me their lovely book and giving cooks around the country the confidence to venture into the culinary world! 


Ultimate Banana bread

Makes 1 loaf

Note: Be sure to use very ripe, heavily speckled (or even black) bananas for this recipe. The texture is best when the loaf is eaten fresh, but once cooled completely, it can be covered tightly with plastic wrap and stored for up to three days.

Ingredients:

1 ¼ cups (8 ¾ ounces) all-purpose flour (or one to one gluten free mix)

1-teaspoon baking soda

½ teaspoon salt

6 very ripe bananas (2 ¼ pounds), peeled

8 tablespoons unsalted butter, melted and cooled (or olive oil if allergic)

2 large eggs

¾ cup packed (5 ¼ ounces) light brown sugar

2 teaspoons granulated sugar

½ cup walnuts, chocolate chips chopped (optional)


Directions:

1.Adjust oven rack to middle position and heat oven to 350 degrees. Spray 8 ½ by 4-½ inch loaf pan with vegetable oil spray. Whisk flour, baking soda, and salt together in a large bowl.

2.Place 5 bananas in separate bowl, cover and microwave until bananas are soft and have released liquid, about 5 minutes. Transfer bananas to fine- mesh strainer over medium bowl and allow to drain, stirring occasionally, for 15 min (you should have ½ to ¾ cup liquid).

3. Transfer to medium saucepan and cook over medium – high heat until reduced to ¼ cup, about 5 minutes. Return drained bananas to bowl. Remove pan from heat, stir reduced liquid into bananas, and mash with potato masher until mostly smooth. Whisk in melted butter, eggs, brown sugar and vanilla.

4. Pour banana mixture into dry ingredients and stir until just combined, with some strokes of flour remaining. Gently fold walnuts, if using. Scrape batter into prepared pan. Shingle banana slices on top of the loaf in 2 rows, leaving 1 ½ inch –wide space down center to ensure even rise, Sprinkle granulated sugar evenly over loaf.

5. Bake until toothpick inserted in the center of loaf comes out clean, 55 minutes to 1-¼ hours, rotating pan halfway through baking. Let loaf cool in pan for 10 minutes, then turn out onto wire rack and let cool for 1 hour before serving


Sources and notes: 

This is or was not a sponsored post. All recipes were written and developed by Americas test kitchen, they are not property of Nicole Lee or Hey Dear. All rights Reserved. 

America's Test Kitchen : https://www.americastestkitchen.com

100 recipes cookbook : http://americastestkitchen.buysub.com/homepage/100-recipes-the-absolute-best-way-to-make-the-true-essentials.html